
Preface
Authentication within a homelab is always a strange issue, in that just about every service provides authentication, but it can be a terrible experience managing this as whenever a user needs to be added to something, it requires running through every service and creating a new user in each of them. The amount of time this can take when running a lot of services is significant, not to mention that it pushes users and administrators towards bad practices for password management due to the number of separate passwords required.
Fortunately, there’s a solution to this problem with Single Sign On (SSO) that allow a user to be managed centrally, while being given access to a large number of separate services. There are several systems that provide SSO including SAML, LDAP and OAuth. Support for these systems varies between containers, but LDAP and OAuth are pretty common. The idea of this guide is to explain how I added this functionality to my homelab.
Additionally, by using a centralized authentication platform, I can massively simplify user management and enrolment by having one central portal that I can add and remove users to for access to all of my homelab applications, rather than the default of every application managing it’s own users.
Considerations
In order to pick which solution I wanted, the following criteria are what I was considering when trying to pick out the solution that would work for me:
- Configuration via Docker
- Integration with as many applications as possible
- Well supported by the community
- Simple setup
Choices
There’s a large amount of choice in this space, but I did look at the following options:
All 3 of these are great options, but I ended up going with Authentik as it has a lot more built-in auth providers and the documentation is very good, with detailed guides for how to integrate many applications that make it so much easier when configuring SSO. This is because there’s so many different ways to provide the same functionality, so having multiple awkward integration examples gave me confidence I could cobble the SSO together based on a document from Authentik and the documentation from the application being integrated (that shows the configuration with another provider). Though having looked around a bit, I have seen the opposite opinion expressed about the Authentik documentation.
The downsides to using Authentik, is that it is more resource intensive than the other options and can be pretty complicated to get running. For example, Authentik requires 4 containers to run versus KeyCloaks’ 2 and a single container for Authelia. However, I do have the resources to spare so I decided to go with this over the alternatives.
Setup
File structure
The structure of files for this container is pretty much the same as my networking article, just with the container names changed out
text
Decisions in compose file
This compose file is a bit more complicated than usual due to how the Authentik Docker compose recommends creating the compose, so this is just pointing out some of the differences:
- The use of
&authentik-environmentis making use of YAML anchors to avoid repeating myself when setting up the same environment variables in 2 containers. - Related to the
&directive, isx-which is an Extension that cause Docker compose to ignore that line. - I’m not using a direct volume to bind 2 of Authentik containers as it’s bound multiple times, which would mean multiple volumes to create. So in this case, I’m just binding directly to a folder in the
datadirectory. I will show the opposite functionality in a future Compose file. - typically, I use the
latesttag for pulling a container, but there can be quite a few breaking changes between versions, so I’m using a specific version tag instead.
Compose file
The default compose file can be found here, but I’ve made a fair number of modifications in my setup:
yaml
Environment variables
these go into the .env file in the authentication folder.
bash
Running the compose
Running this is simple,, just sudo docker compose up -d in the authentication directory and the containers should be pulled down and started. Provided there’s no issues with starting the containers, visiting the URL for Authentik (authentik.pve.testhomelab.com for me) will provide a message saying authentik is starting up.
I can check what’s happening by using sudo docker logs authentik_server. Provided nothing’s wrong, it can take a couple minutes for the initial database migrations to apply. Once this happens, I’m greeted with the following screen:
Initial Authentik configuration
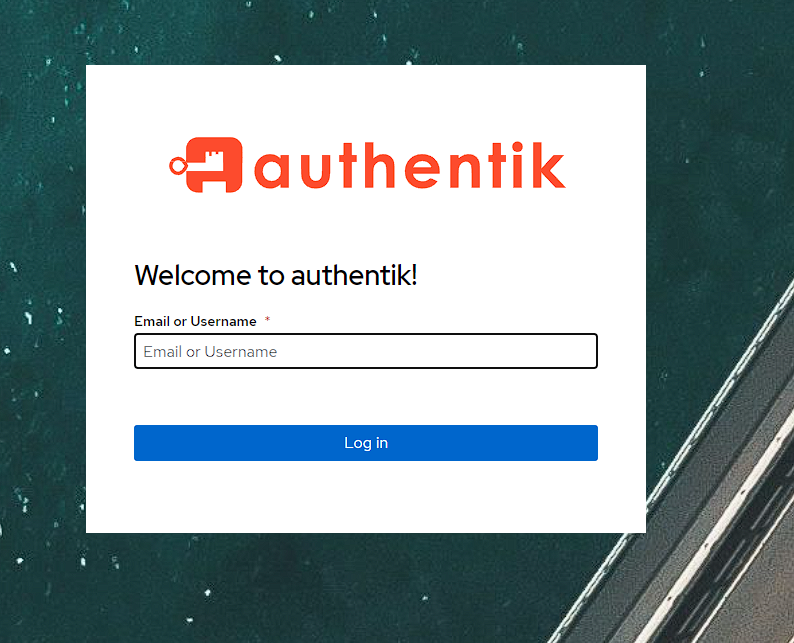
While the above login screen is shown, it’s not actually possible to use it yet as Authentik needs to have an admin user configured. To do this I go to the URL https://<base url>/if/flow/initial-setup/ and I can see a setup screen:
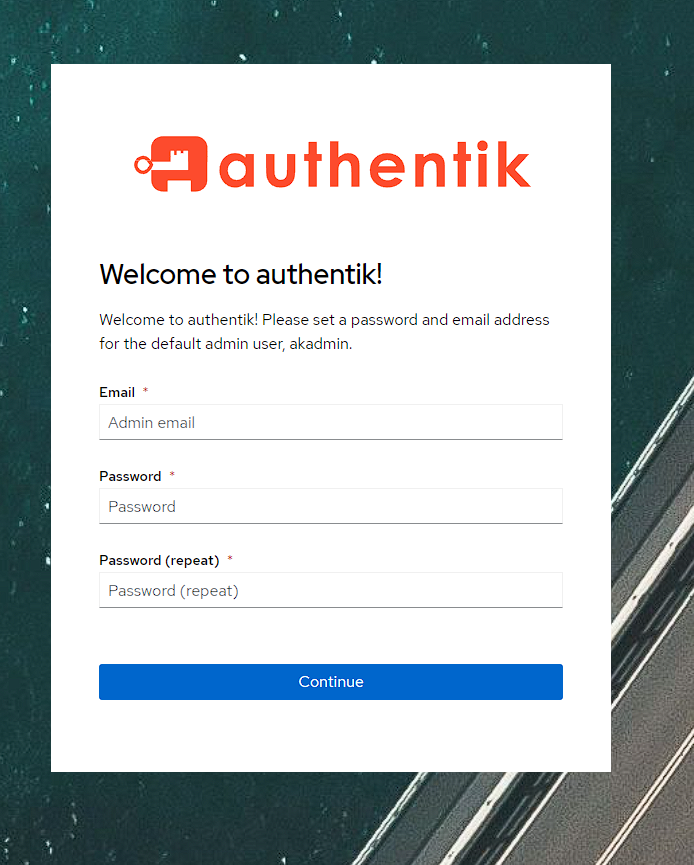
Once I fill these details out, I’m logged into Authentik under the akadmin user:
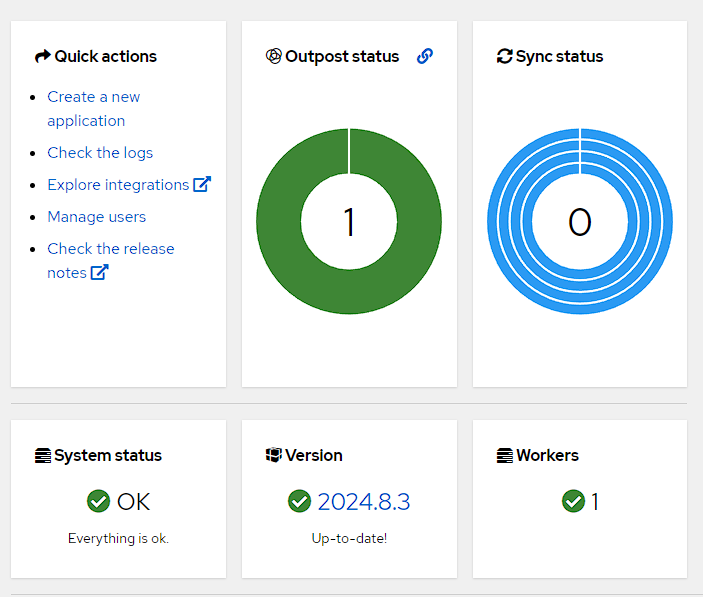
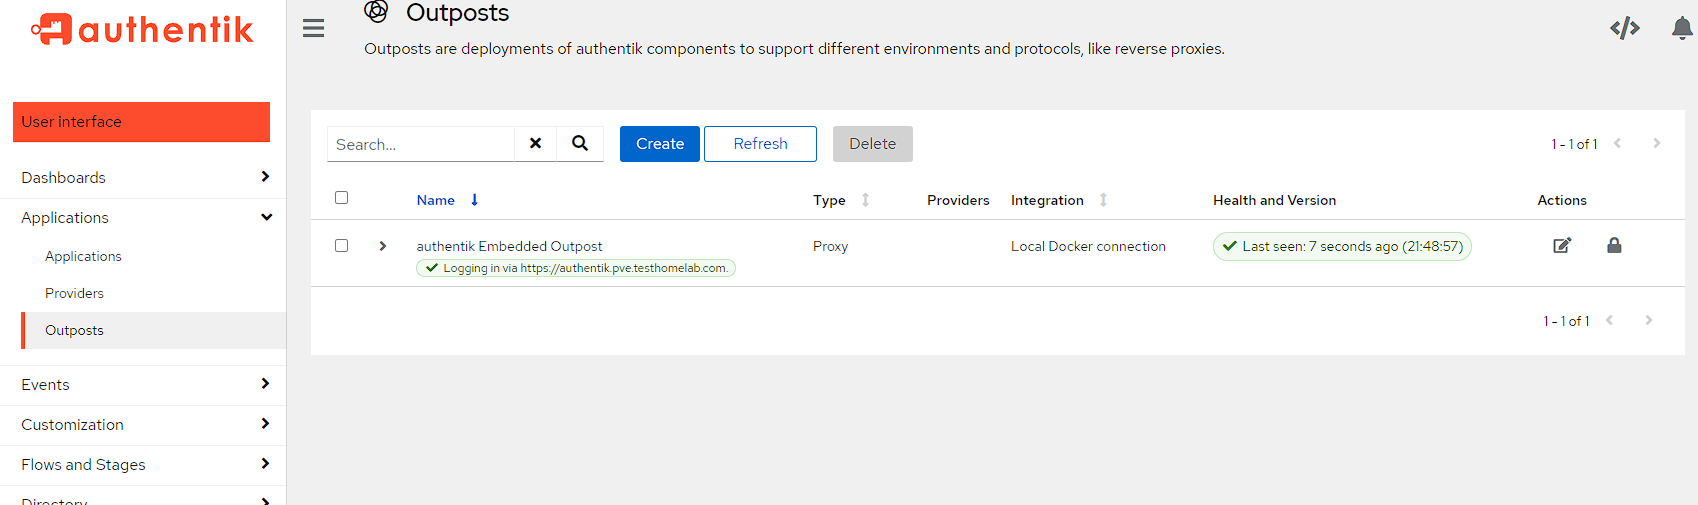
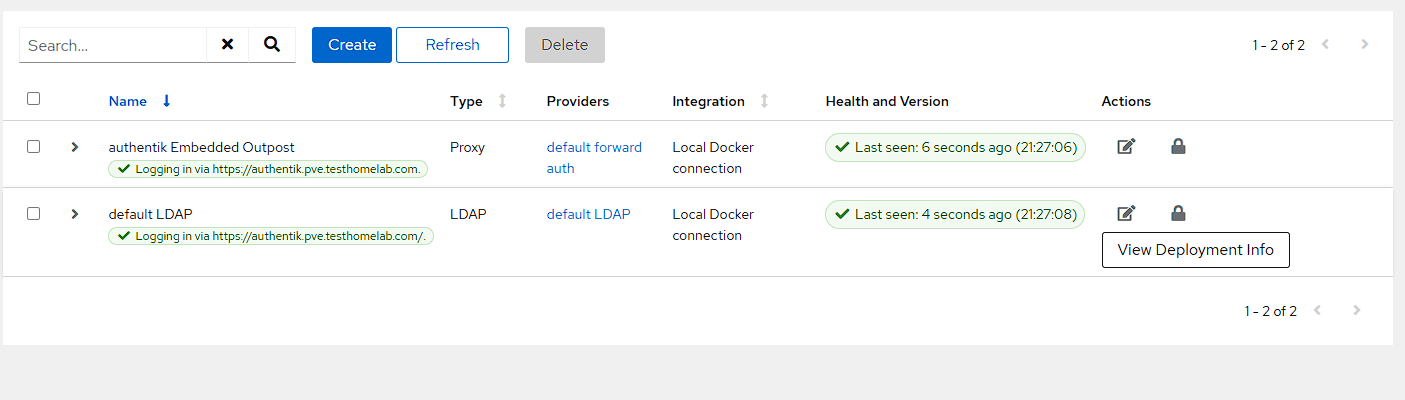
To verify everything’s up and running I head into the admin console by pressing the Admin Interface button at the top right, and I can see I’ve got an outpost and worker setup already and everything’s up to date:
User setup
While there’s an initial user and group setup that can be used to access everything, it’s a good idea to get in the habit of creating users and groups that can be used to access various applications as the default akadmin user has superuser privileges that I’m not going to want anybody else to have. As such, I’m going create a group and a user specifically for SSO.
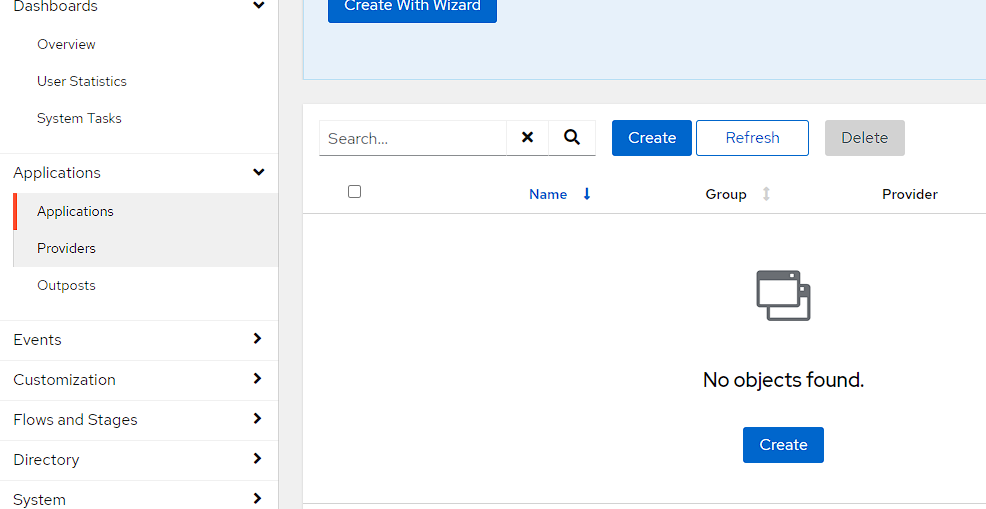
To start with, I head into the Admin Interface and then go to Directory -> Users and click the Create button:
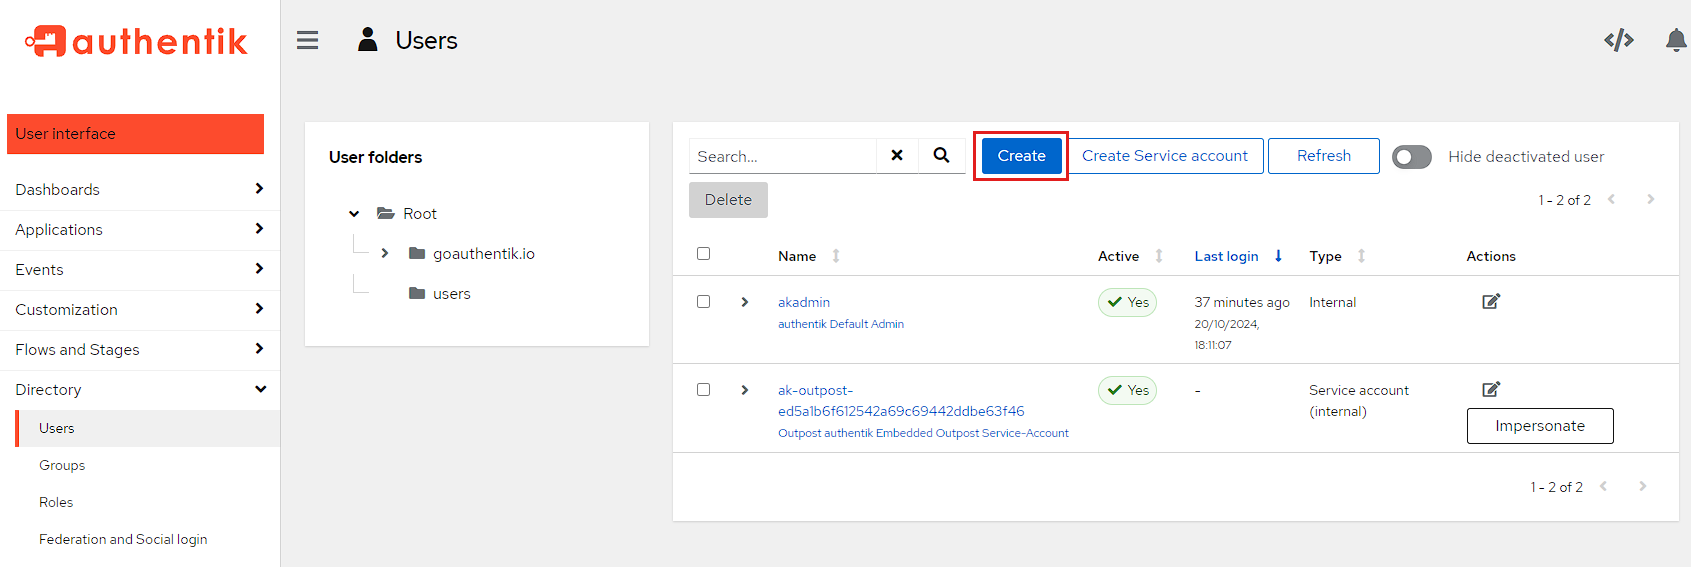
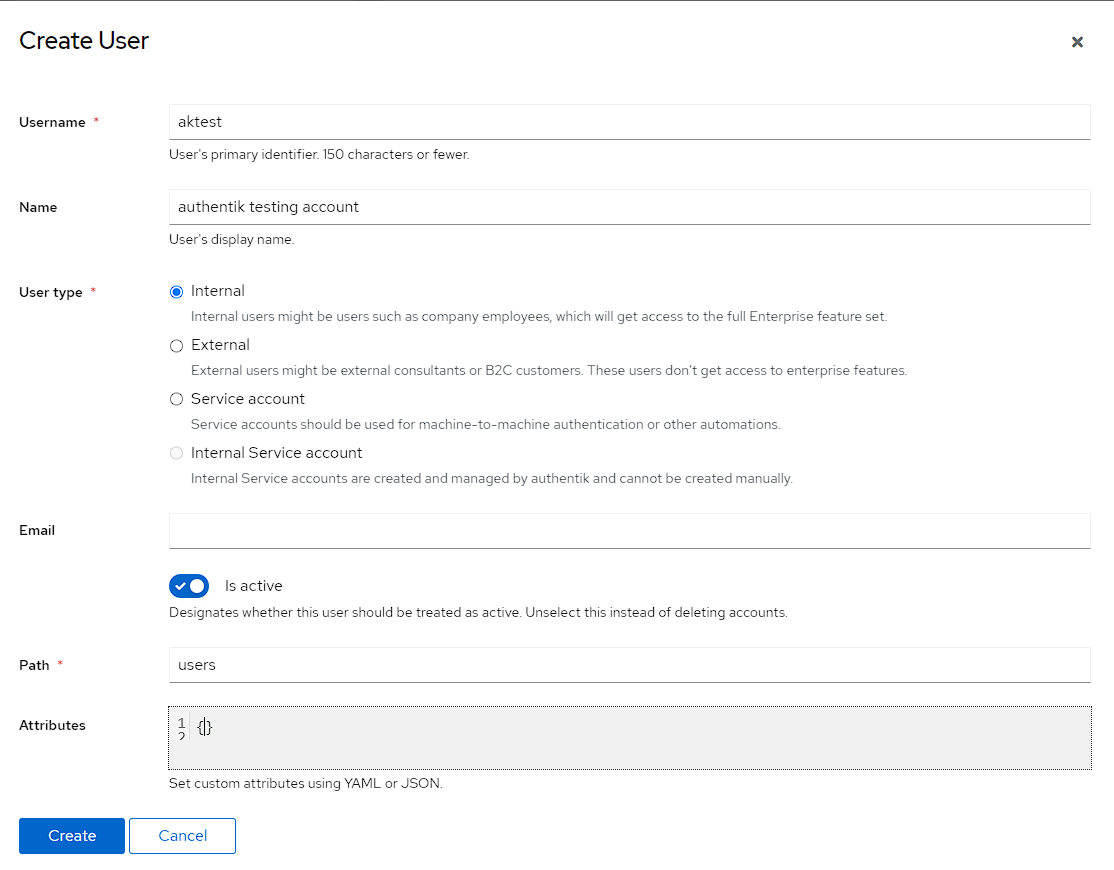
I then create an aktest user for testing. I’ve set this user as Internal, but it doesn’t really matter as I don’t have access to the enterprise features anyway.
I then also create another user called aknoaccess which will be designed to test a created user that doesn’t have permissions anywhere
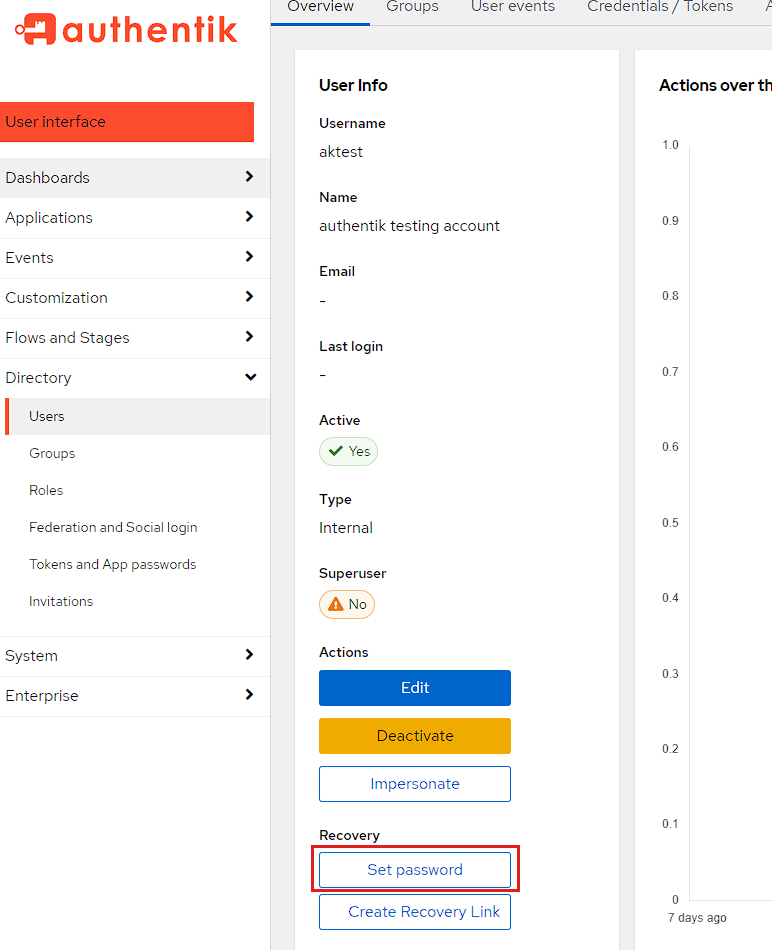
Once the user is created, I need to set a password for the user, and I can do this by selecting the name aktest and scrolling down to the Recovery section and then pressing Set password:
I can then go into Directory -> Groups and click the Create button:
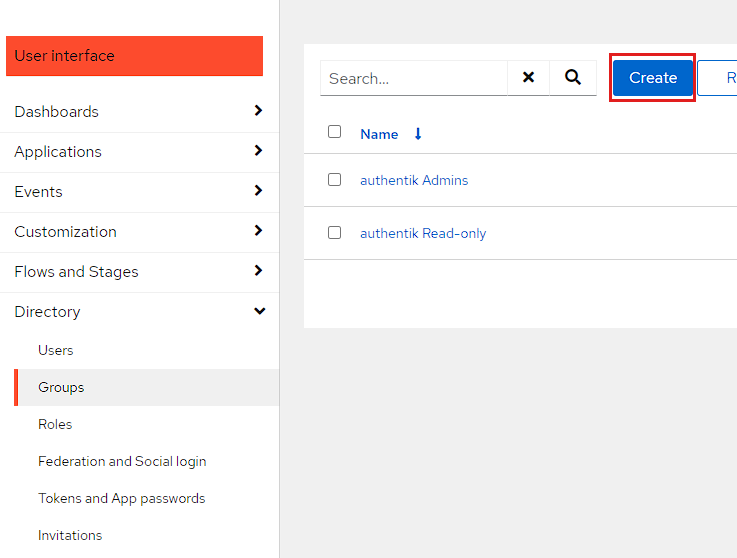
I then create group by just setting the name to users. I don’t want this group to be able to login to Authentik, so I’m purposefully not setting either a Parent or any Roles.
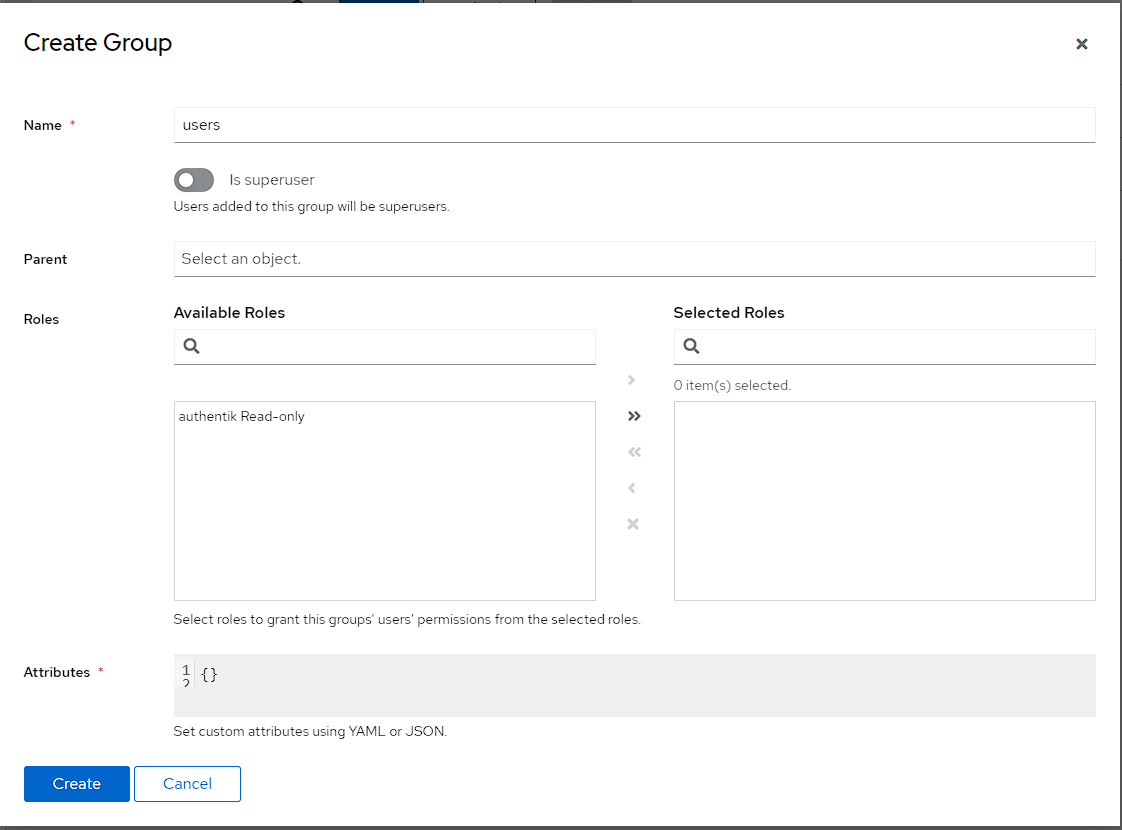
After the creation is done, I then click directly on the name of the group, move to the Users tab, select Add an existing user and choose aktest:

Creating authentication methods
There are 3 different methods I want to use for authentication, all of which require slightly different setup, but I just want to explain what they are before running through the setup.
- OIDC/OAUTH
- Explaining exactly what OIDC and OAUTH are (and the difference) is out of the scope of this article, but there is an explanation here This is the default SSO solution used by homelab as it provides the most frictionless way to access services. This is because I only need to login to one application, and the auth will be reused for other applications on sign in, meaning no need to re-enter my password. I’ll be referring to this flow as OAUTH going forward.
- LDAP
- As mentioned, Authentik has a built-in LDAP provider I can use, though it’s secondary to using OAUTH as I need to re-enter my password every time I change applications.
- Forward proxy auth
- This is essentially putting the OAUTH login flow in front of an application that only supports anonymous use.
OAUTH setup
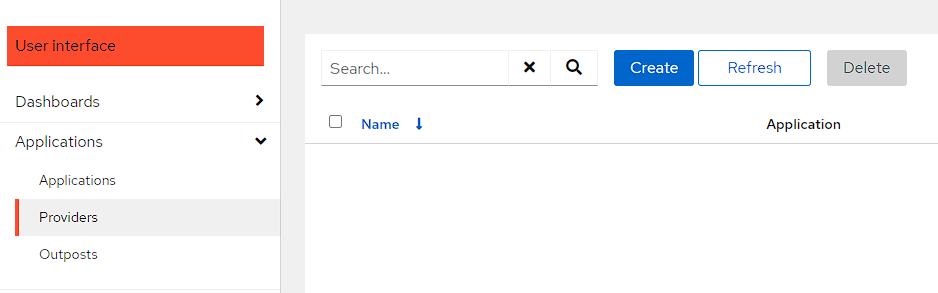
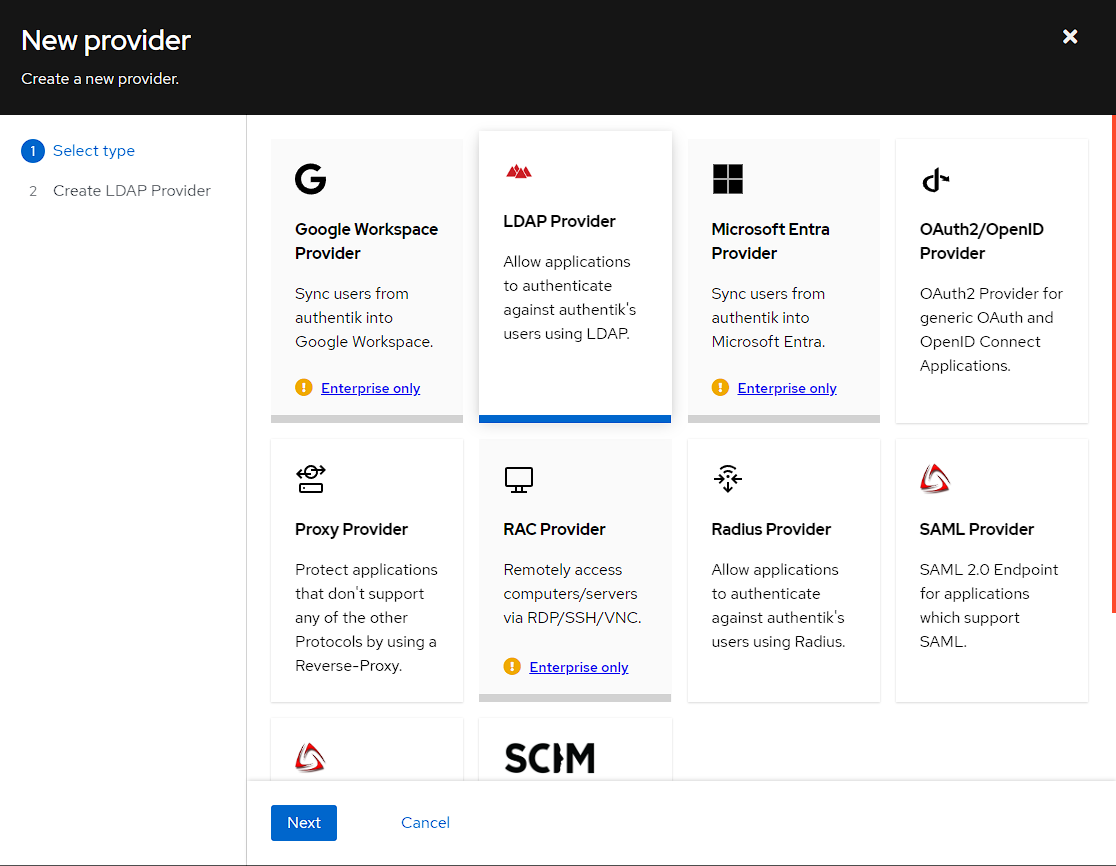
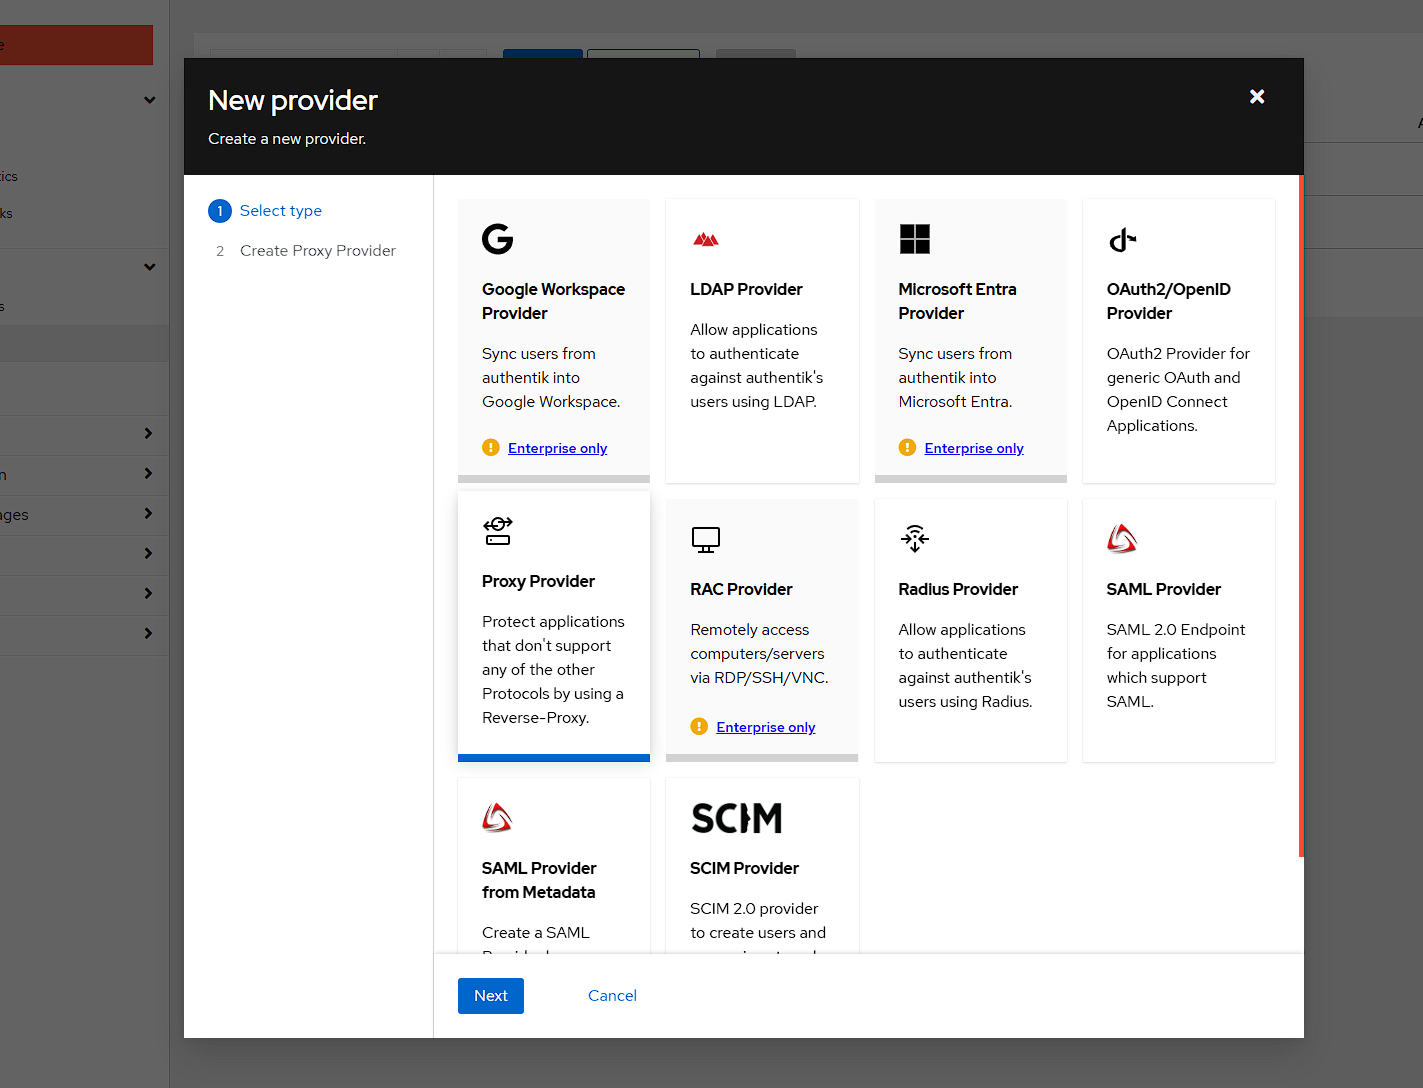
To configure OAUTH, I go to Applications -> Providers and click Create:
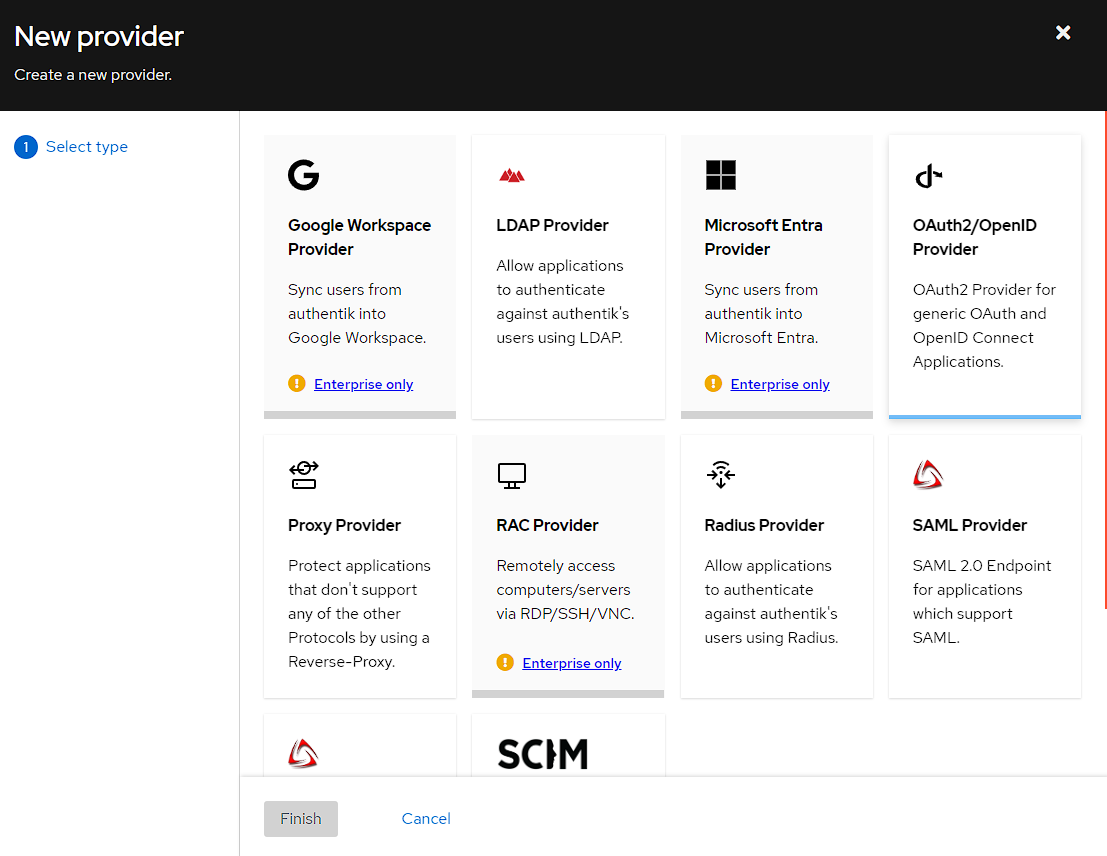
I then get a list of providers I can choose and I’m going to pick the OAuth2/OpenId Provider and clicking Next:
The next step is configuring the OAuth provider. There’s a few settings which I have to set in order to get this to work.
- Setting the name to something easy to remember (
default OAuthfor me)- Authentik seems to recommend a separate provider per hosted service, and while this is more configurable, within my homelab I’ve found the additional configuration burden outweighs the benefit, so I’m creating a single provider for all services. This does have the downside, that I can occasionally be redirected to the wrong URL on login.
- Choosing
default-authentication-flowfor the Authentication flow- The other option is
sourceand while it’s a little difficult to find information about this, I believe it’s used when another identity provider is required, like using Google to login.
- The other option is
- Using
default-provider-authorization-implicit-consentfor the Authorization flow- The other option is the
explicitflow which adds an extra confirmation when logging across applications, rather than just logging in
- The other option is the
- Optionally, I also change the
Access Token validityunderAdvanced protocol settingsto 60 minutes- increases the amount of time before I need to log in again - 5 minutes is the default and can feel a bit short
NOTE: At this point, I can also set redirect URI’s here, and I can use the value * to allow anything, but this is a little insecure (if the application is hijacked and redirects to a malicious URL) so it might be best to set a list of allowed redirect URI’s.
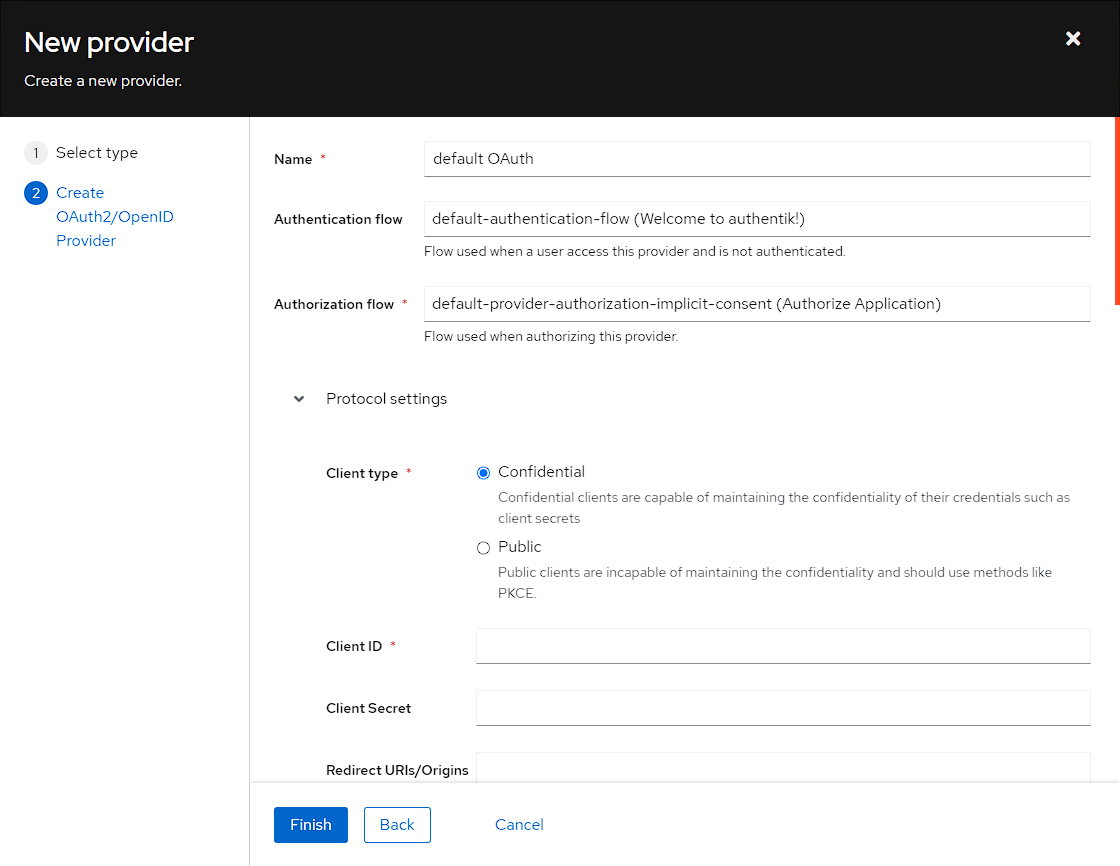
NOTE: take a copy of the Client ID and the Client Secret as these will be needed in future steps, but they’re accessible later on if you forget to copy them.
After clicking Finish the provider will be created with a warning around Provider not assigned to any application.:

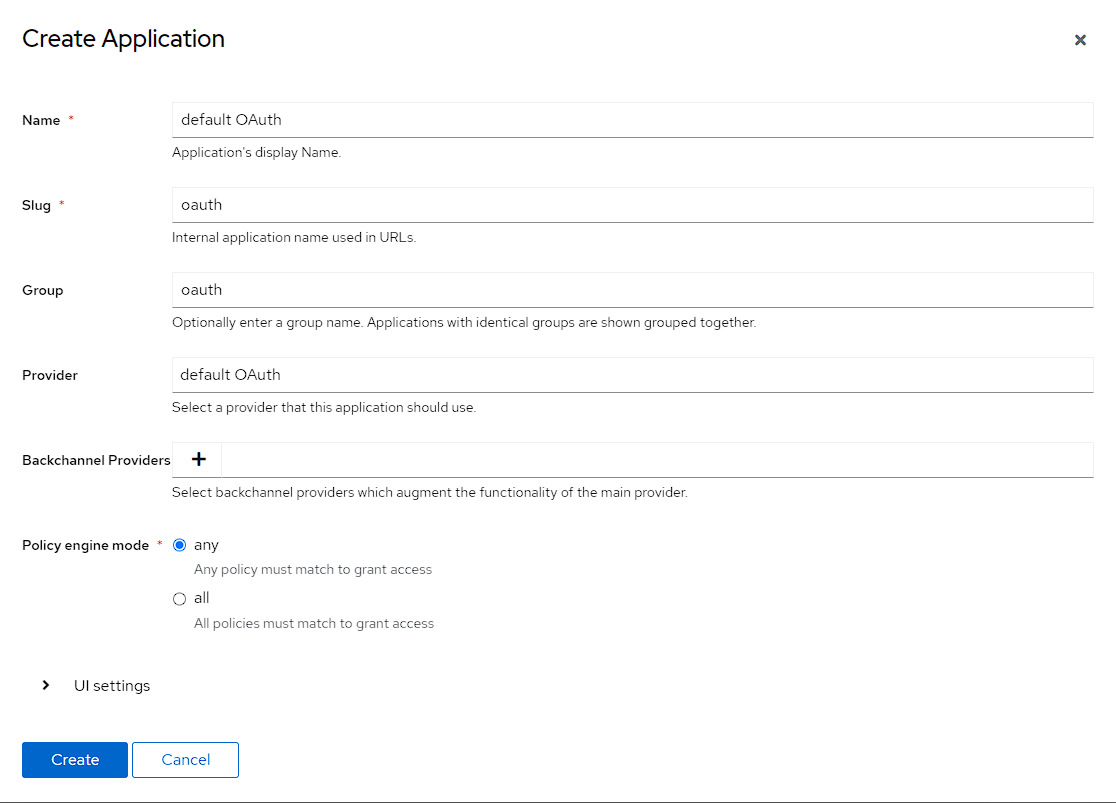
To fix this warning, I need to go to Applications -> Applications and click Create:
I then need to fill out the fields for the OAuth application, which I do as follows
- set the name to
default OAuth, matching the provider- Once again, there’s a separate application per provider, but I’m using a single provider so am just using a “default” application
- Set the slug to OAuth
- This more just that I need one, but if I was running a multiple application, single provider setup, I would use the slug to differentiate between the applications
- choosing the
default OAuthprovider I’ve just created- This should be the only option, if it’s a fresh install
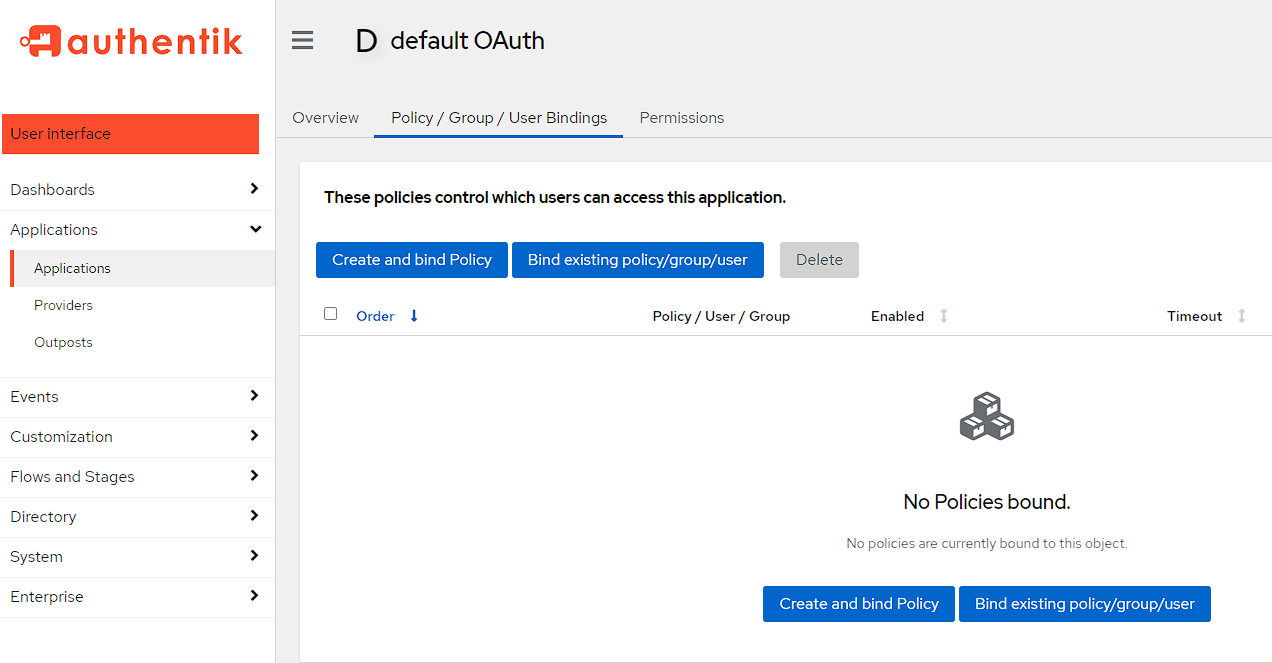
After clicking Create, I can see the new Application, and if I swap back to Providers I can see the warning from the previous step has gone away.
By default, this flow is open to access for everyone, but as I explained earlier though, I want only the group users to have access to these flows so I’m going to make sure it does that now by going to Applications -> Applications, selecting the Default OAuth application I’d created, switching to the Policy/Groups/User Bindings
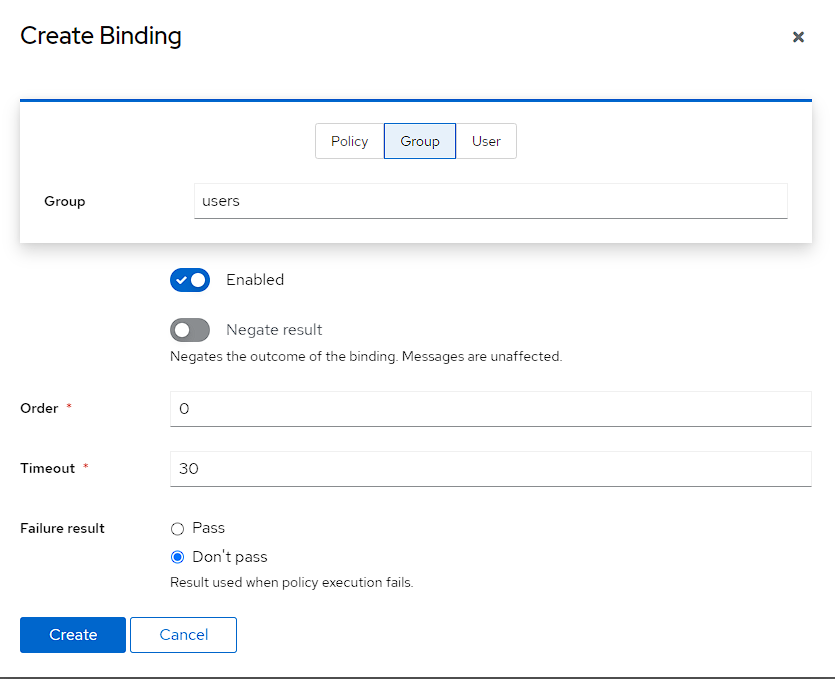
I can then create the new policy for a group, by swapping to Group at the top and then selecting the users group.
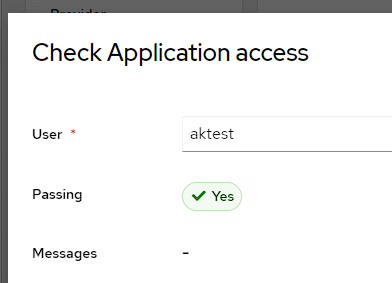
I can then check this is working by moving back to the Overview tab and pressing the Check access button:
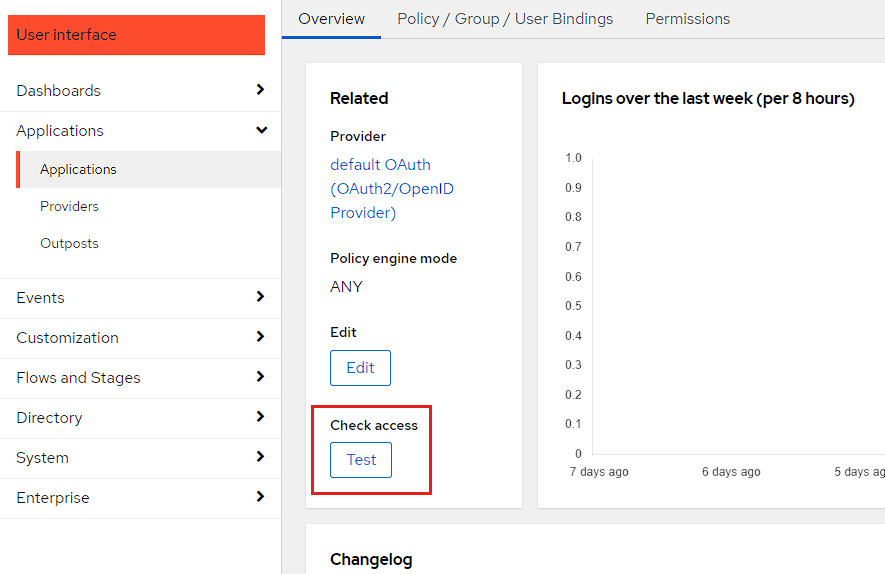
From here, I can see that the aktest user has access, and the aknoaccess user doers not, meaning it’s now secured to the group I want.
Testing
The easiest way I found to test that this setup is working was actually to use Postman with authorization.
There’s a gist here that contains the files that can be imported to Postman, with only the environment needing to be modified, but the steps to do this are here:
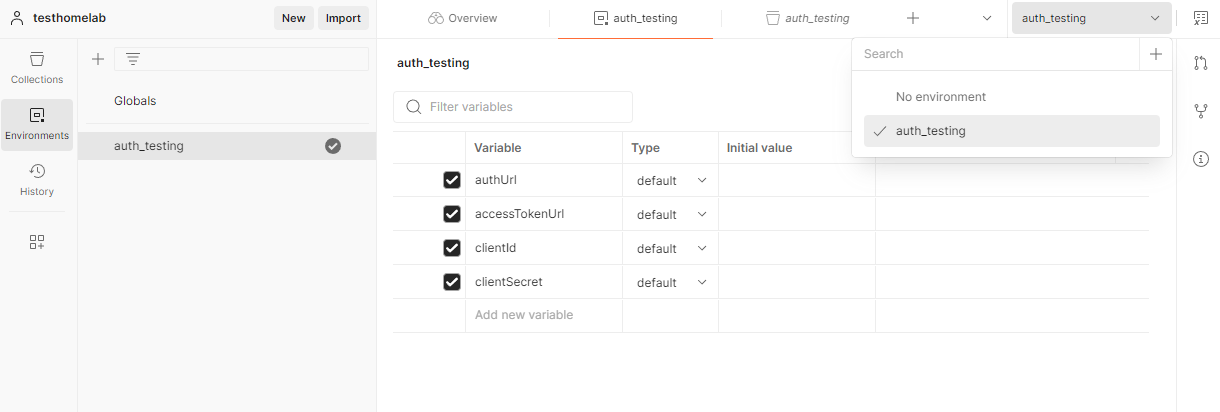
First up in Postman, I create an environment named auth_testing with the following variables in it:
authUrlaccessTokenUrlclientIdclientSecret
NOTE: the auth_testing_env.json file in the gist will set these up for you as well
I then make sure to select the environment in Postman:
I now need to grab the environment variables from Authentik by going to Applications -> Providers and selecting default OAUth:
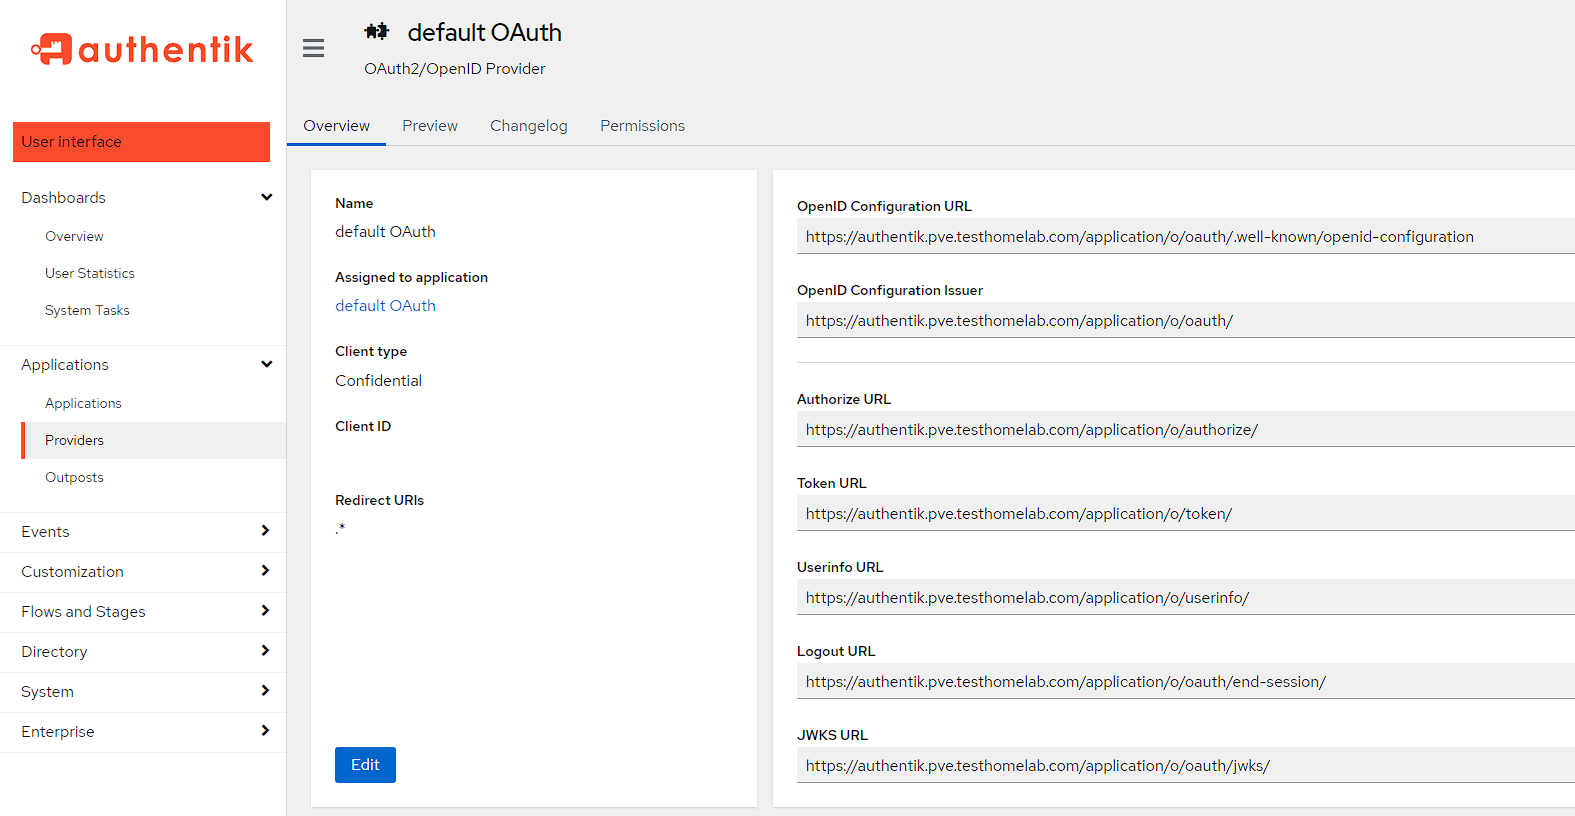
From here, I can grab all the variables needed and are filled out like the following:
authUrlis theAuthorize URLaccessTokenUrlis the token URLclientIdis theClient IDclientSecretcan be retrieved by pressing theEditbutton, if it hasn’t been copied previously
NOTE: make sure to save the environment in Postman and that the Current value column is filled out, otherwise these values won’t be pulled through correctly
I then create a new empty collection called auth_testing, head into the Authorization tab and select OAUTH 2.0 for the Auth type:
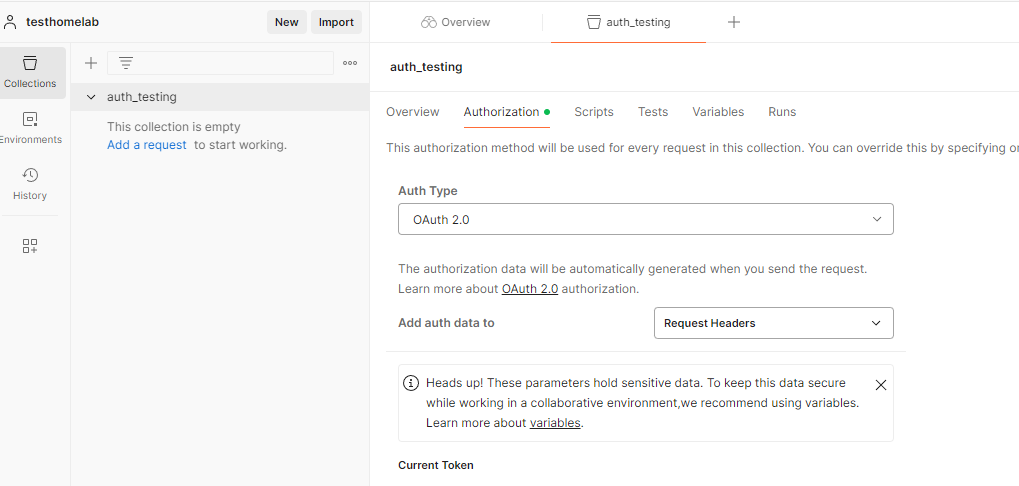
At this point, I just need to set the following values:
- Grant type is
Authorization code (With PKCE) - Authorize using browser is ticked
- Auth URL is
{{authUrl}} - Access Token URL is
{{accessTokenUrl}} - Client ID is
{{clientId}} - Client Secret is
{{clientSecret}}
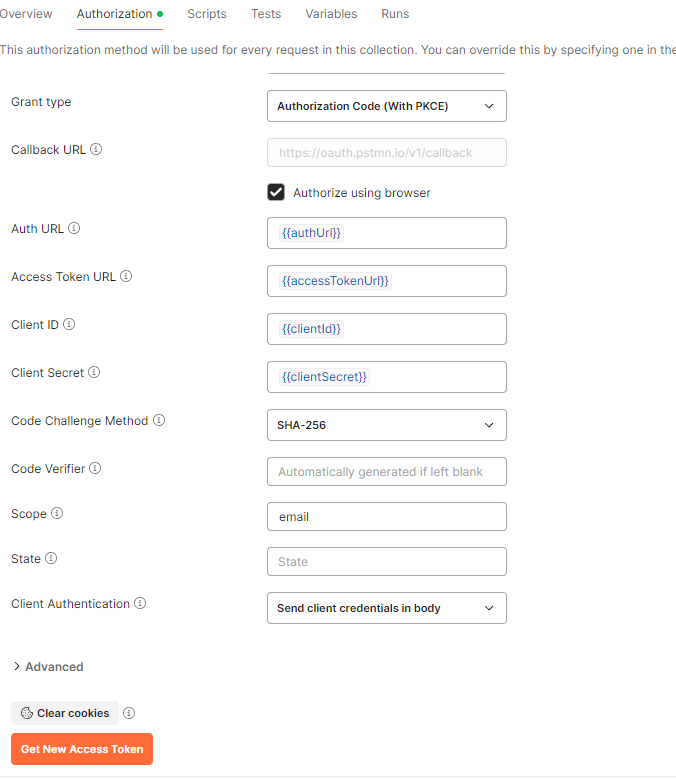
now I can press the Get New Access Token button at the bottom, and a browser window will launch asking me to log in:
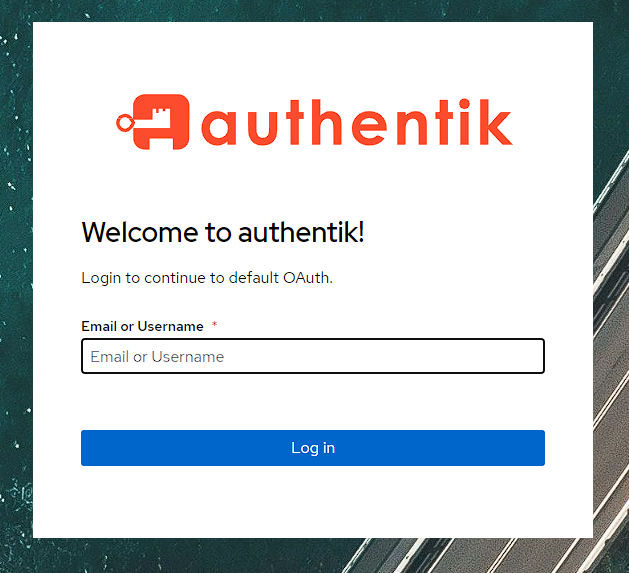
NOTE: if you are logged into the admin console on an account with access to the users group, this screen will be bypassed for a checkmark showing you’re authorized.
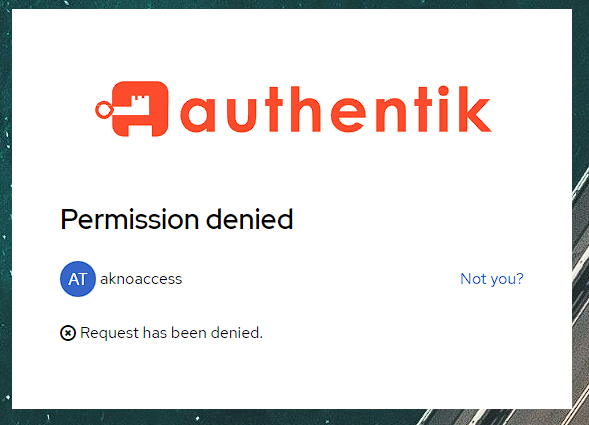
I can then log in with the aktest account, or more interestingly, I can check that the aknoaccess user gets a denied message:
LDAP setup
NOTE: this is a simplified setup instruction from the one provided here
Provider
In order to create an LDAP provider, I need to go to Applications -> Providers, press the Create button and then select the LDAP provider:
I then can setup the LDAP provider, but I’m leaving it fairly stock:
- Setting the name to
default LDAP - Set the Bind Server to
default-authentication-flow (Welcome to authentik!)- As mentioned above, the other option is
default-source-flowwhich is for a federated identity provider
- As mentioned above, the other option is
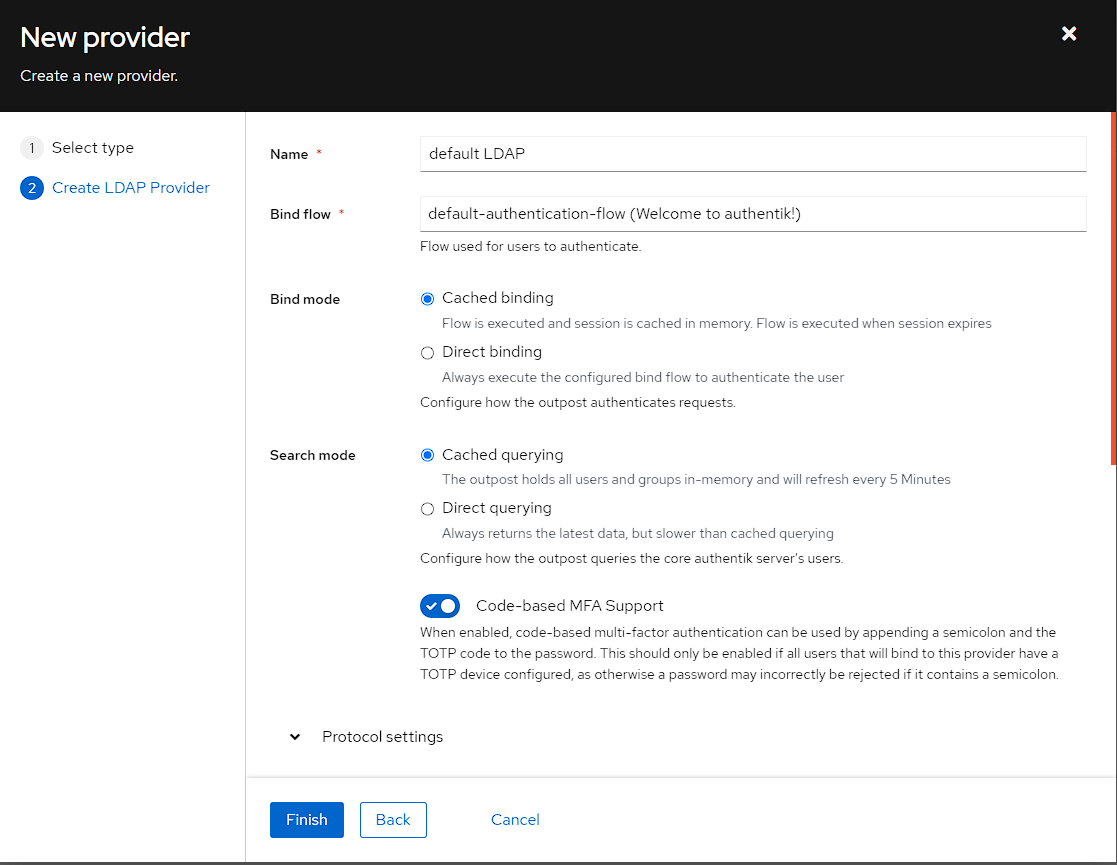
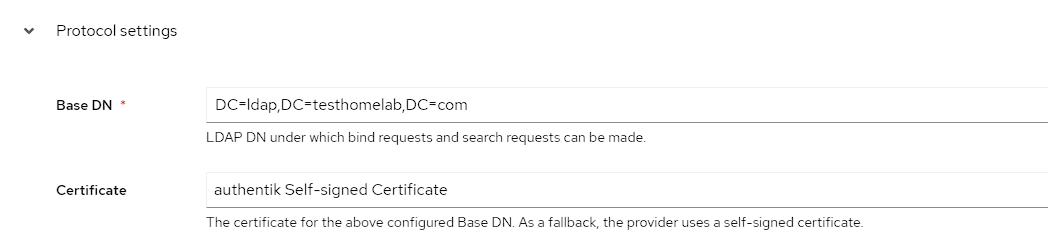
In the Protocol settings section, I then set the following:
- Set the Certificate to be the
authentik Self-signed Certificate - Change the Base DN to be
DC=ldap,DC=testhomelab,DC=com- meaning use LDAP with a domain name ofldap.testhomelab.com
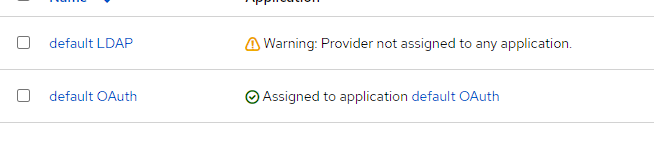
Once again after selecting Finish, I get a warning about the Provider not being assigned to an application:
Application
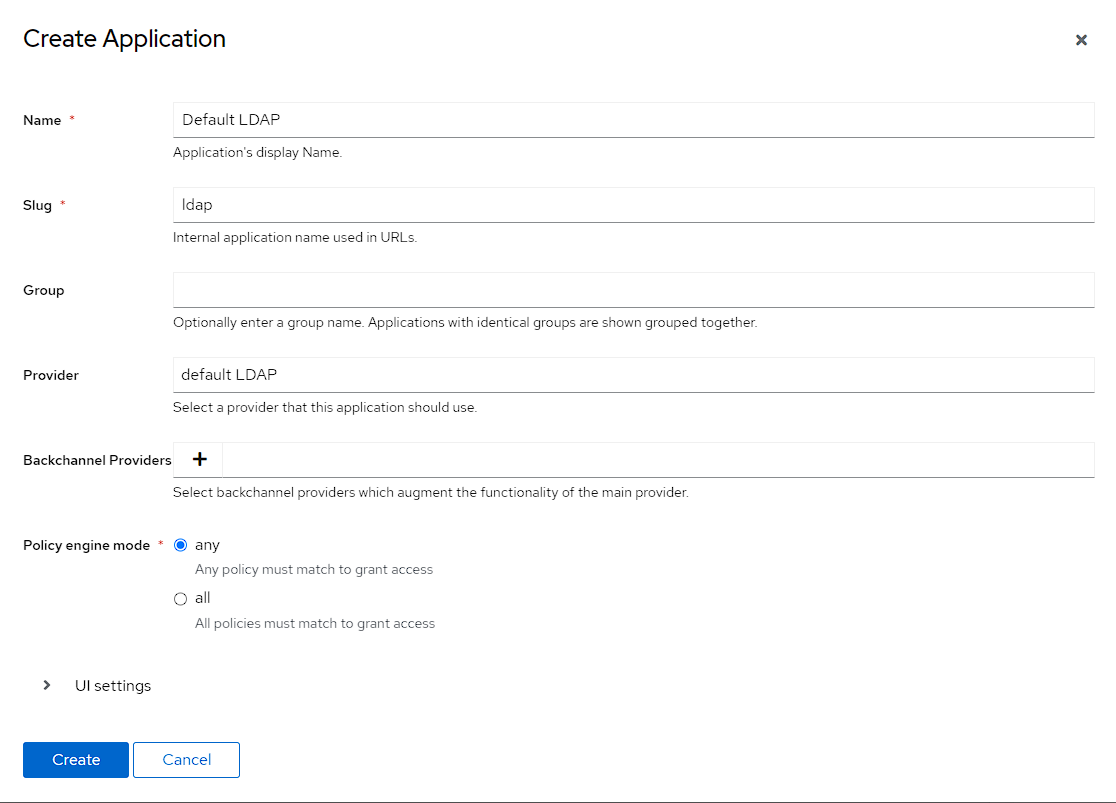
To fix this, I go to Applications -> Applications and press the Create button, then fill out the application with the below:
- Name is
default LDAP - Slug is
ldap - provider is
default LDAP
Finally, I need to bind the application to the users group, and is the same process as used for the OAuth application. To do this, I click on the newly created application, swapping the top tab to Policy/Groups/User Bindings, selecting Bind existing policy/group/user. In the modal, I can then select Group and use the drop-down to use the users group:
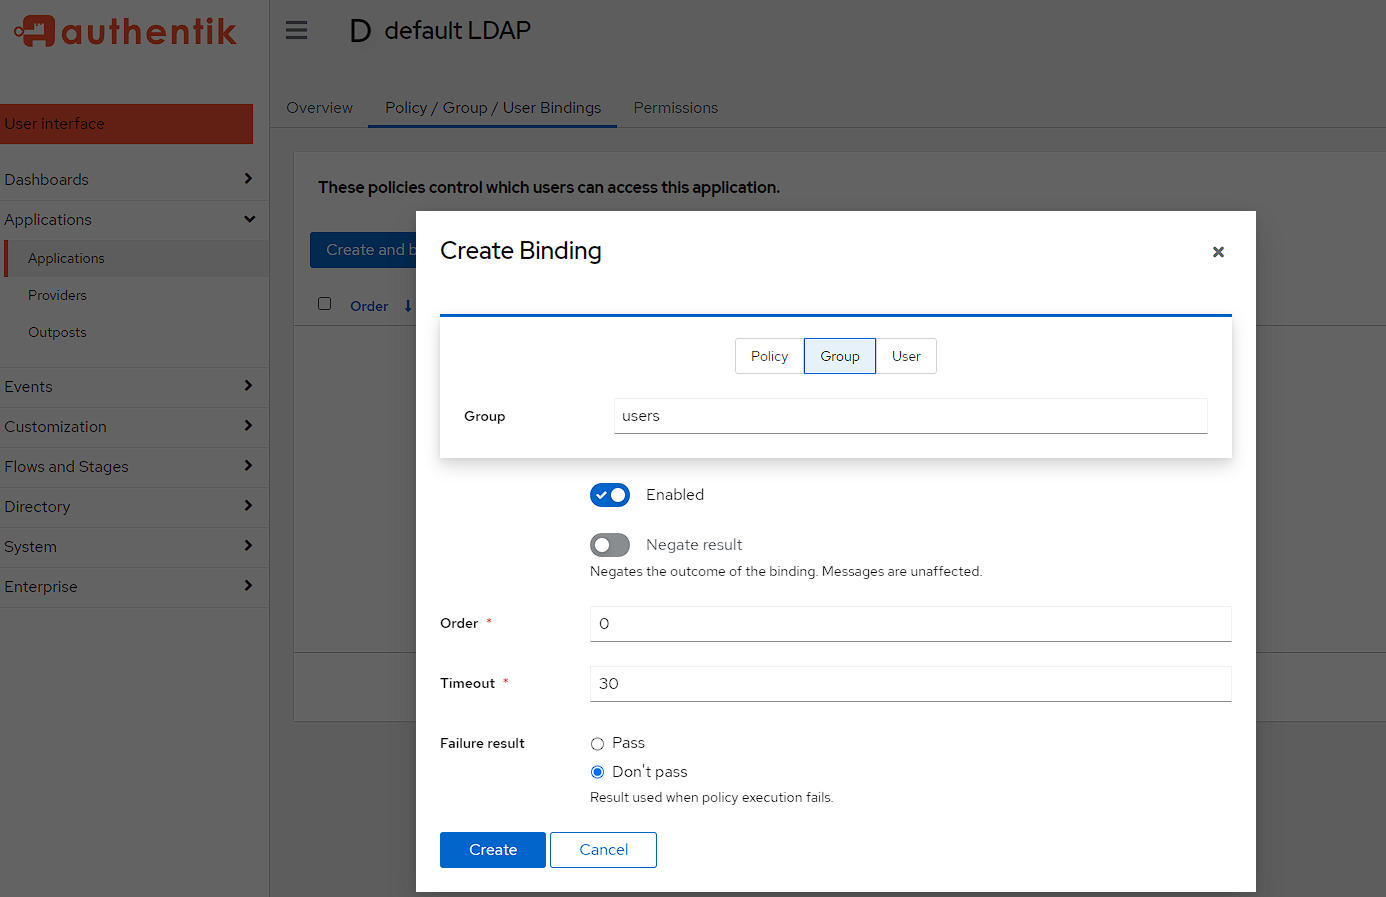
I can then check the access from the Overview page of the application and can see that the aktest user has access:
Outpost
The LDAP provider also needs an Outpost configured for LDAP, which can be done by going to Applications -> Outpost and clicking Create:
I then create an Outpost with the following settings:
- Name is
default LDAP - Type is
LDAP - select the
default LDAPapplication

Then the new Outpost should begin to deploy and come up:

NOTE: What this is doing, is creating a new docker container for the LDAP outpost
Testing the LDAP configuration
I can test the LDAP configuration from the docker host
First I need to install LDAP utils:
bash
Then I can then test with the following command:
bash
This command will ask for the password of the user, and in my specific case, it gave the following outputs:
bash
Forward auth setup
The forward auth setup is pretty similar to creating an LDAP setup. What this authentication is doing, is creating a proxy authentication provider for adding authentication to applications which either don’t have it, or do not fit into one of the previous providers. This setup is also based on documentation created by Helge Klein
Provider creation
To start with go to Applications -> Providers -> Create and then selecting the Proxy Provider:
I can then set the following:
- I chose a name of
default forward auth - I’m using the
default-provider-authorization-implicit-consent (Authorize Application)Authorization flow - I swap the tab from
ProxytoForward auth (domain level) - The Authentication URL is the same as the URL I use for authentik
- The cookie domain is the subdomain I’m using for my homelab, which is
pve.testhomelab.com

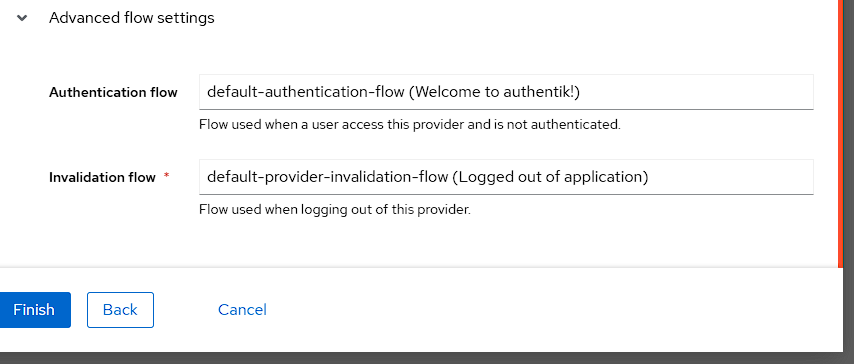
Finally, I set the Authentication flow to the default flow under Advanced settings, and then press Finish:
Application creation
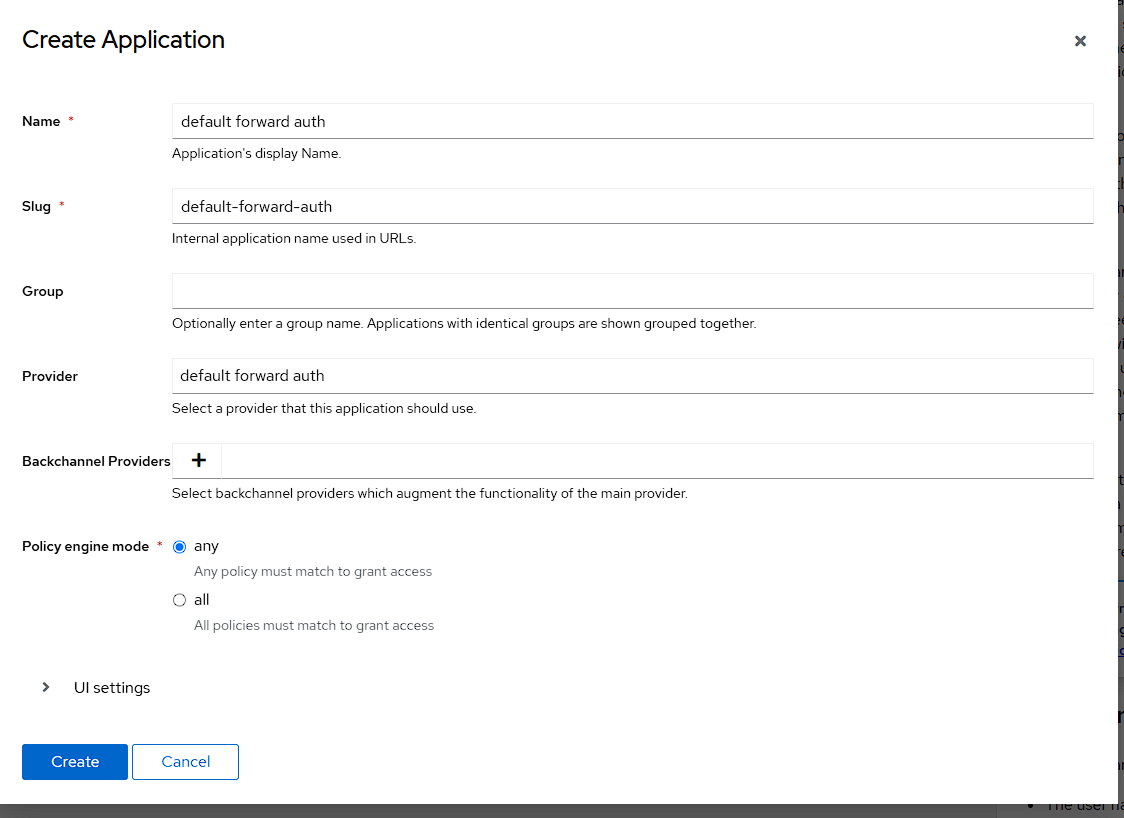
Now I need to create an Application to take advantage of the provider and I ca do this by going to Applications -> Applications -> Create and filling out the following settings:
- The name matches the provider with
default forward auth - The slug should be automatically set as
default-forward-auth - Selecting the
default forward authProvider from the dropdown.
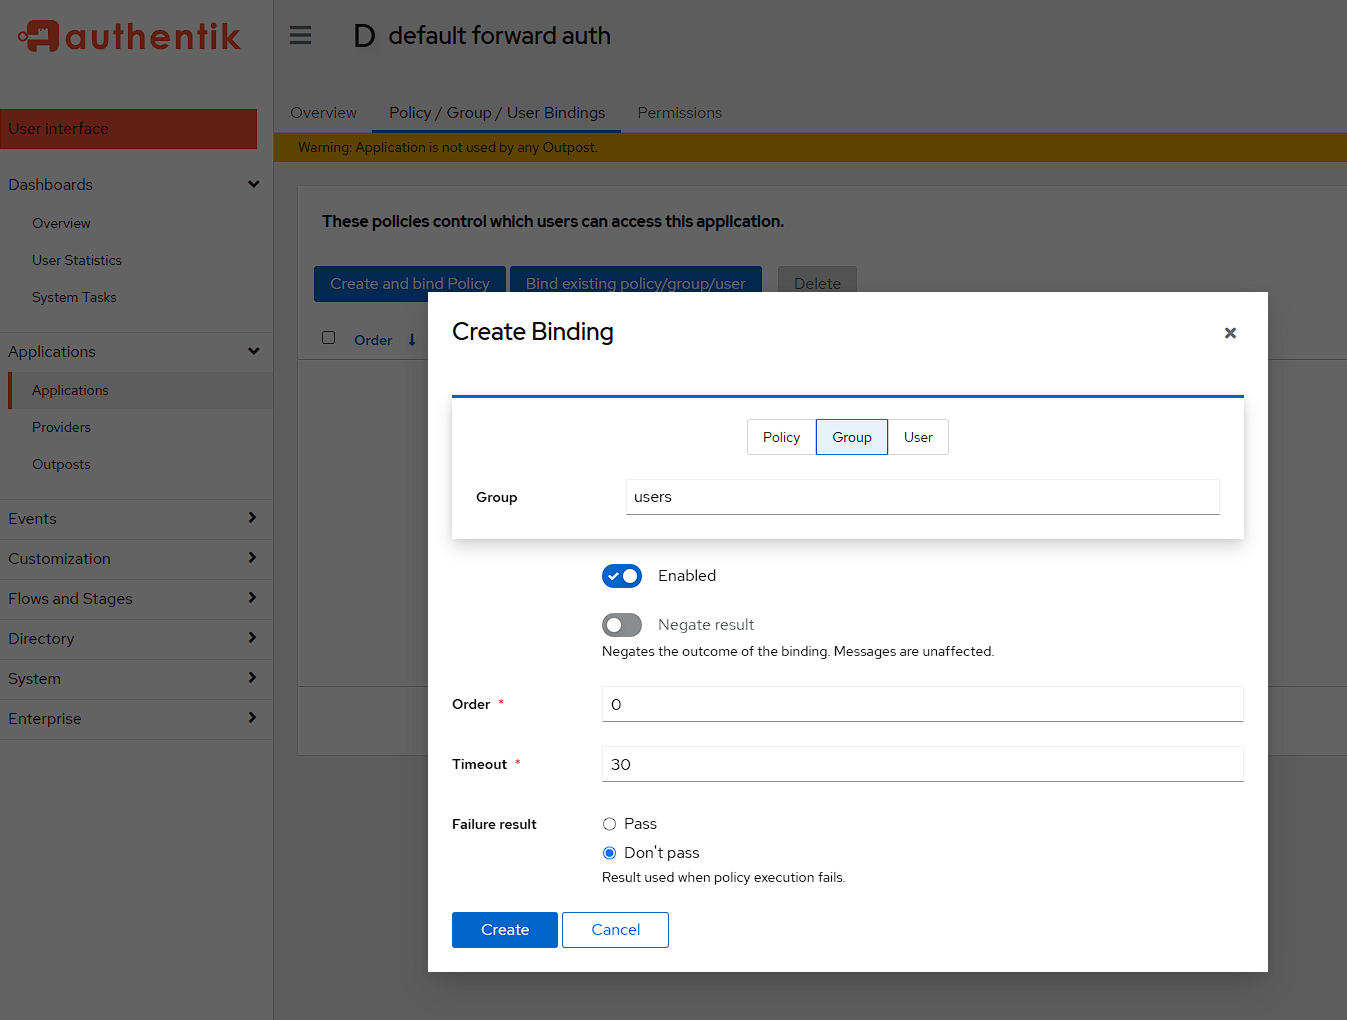
After I’ve pressed Create I need to go add the group bindings by selecting the new Application, going to Policy/Group/User Bindings, selecting Bind existing policy/group/user, swapping to the Groups page and finally choosing the users group:
Outpost creation
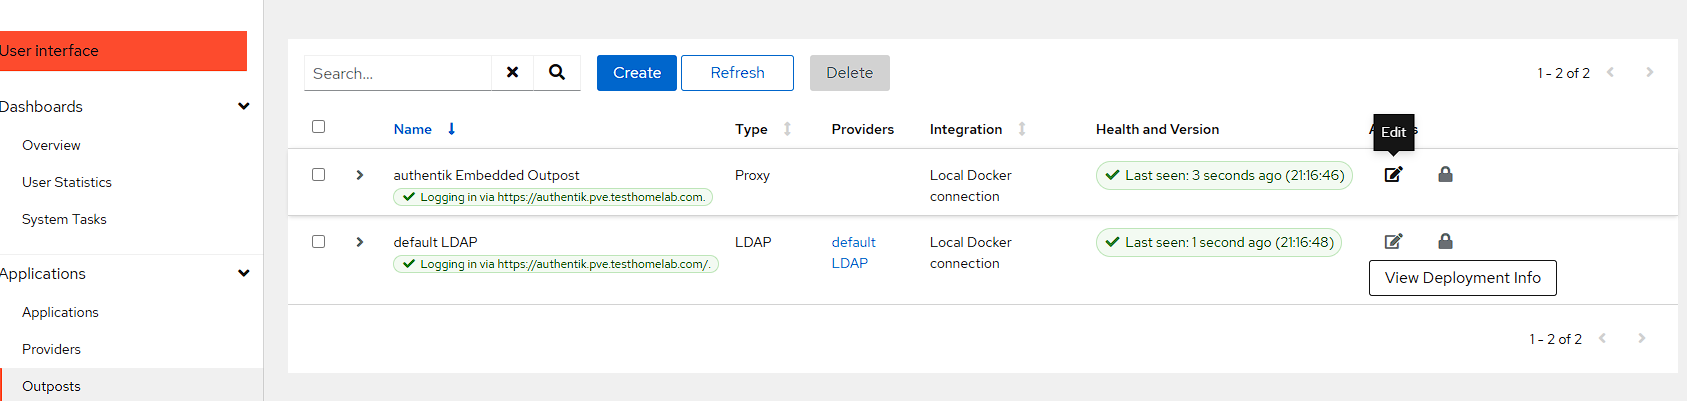
The final part of the setup in Authentik is to assign an outpost to the new provider. To do this I once again go to Applications -> Outposts. I could create an entirely new outpost just for this, but the default outpost does work, so I use the authentik Embedded outpost by pressing the Edit button:
I can now see the default forward auth Provider under Applications, and I can bring it into the outpost by selecting it and pressing the >> button:
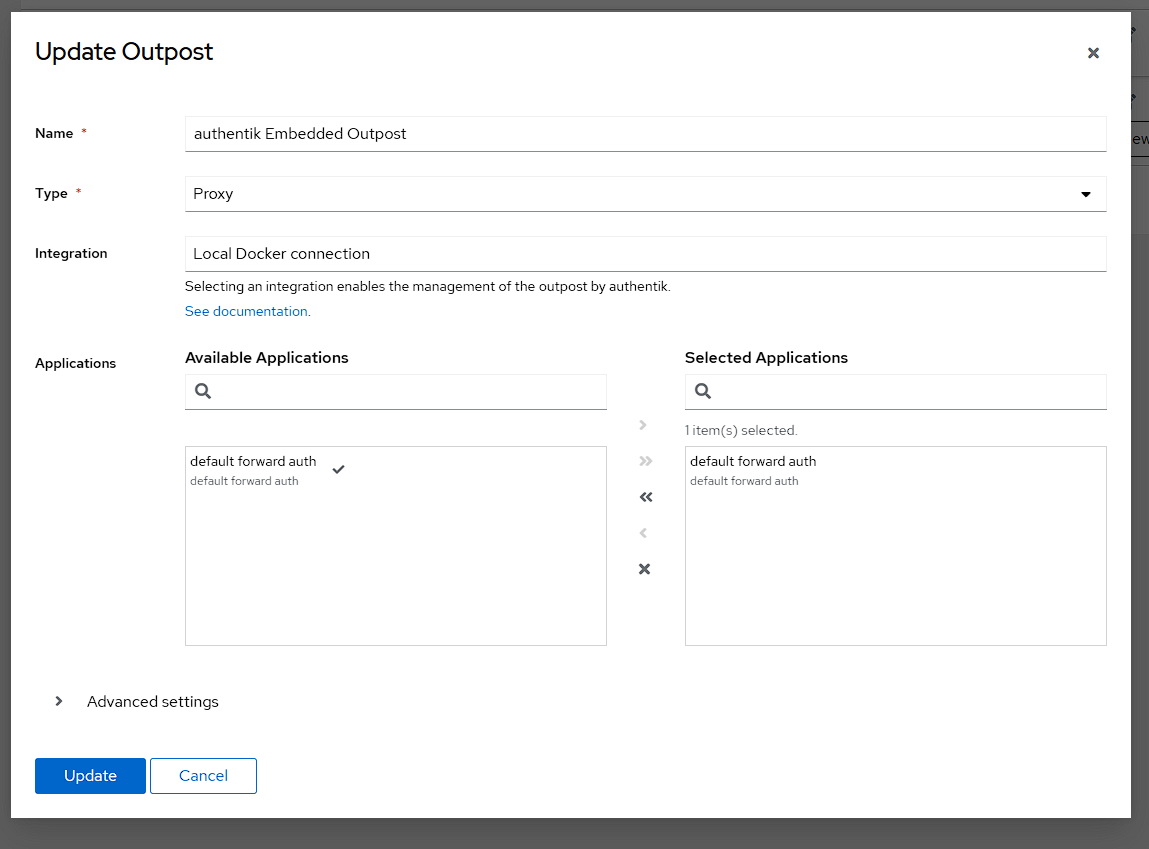
After pressing update I can see that the Outpost has been created with the correct provider:
Caddy setup
In the previous article, I set up Caddy and now I need to go back to the Caddyfile (this should be located under networking/caddy/Caddyfile if following my guide) and adding the below to the bottom of the file:
(authentik_server) {
  # Always forward outpost path to actual outpost
  reverse_proxy /outpost.goauthentik.io/* http://authentik_server:9000

  # Forward authentication to outpost
  forward_auth http://authentik_server:9000 {
    uri /outpost.goauthentik.io/auth/caddy

    # Capitalization of the headers is important, otherwise they will be empty
    copy_headers X-Authentik-Username X-Authentik-Groups X-Authentik-Email X-Authentik-Name X-Authentik-Uid X-Authentik-Jwt X-Authentik-Meta-Jwks X-Authentik-Meta-Outpost X-Authentik-Meta-Provider X-Authentik-Meta-App X-Authentik-Meta-Version
  }
}
The above configuration is creating a snippet that allows Caddy to correctly forward authentication to Authentik, along with the required headers.
Testing the setup
There is currently a single container that can be used to test the forward auth is working, and that’s the whoami container created in the previous article. In order to get this to work, a label just needs to be added for caddy.import: authentik_server. The new full compose record should now look like this:
yaml
Getting this to be enabled, just requires a sudo docker compose up -d to be run from the networking container.
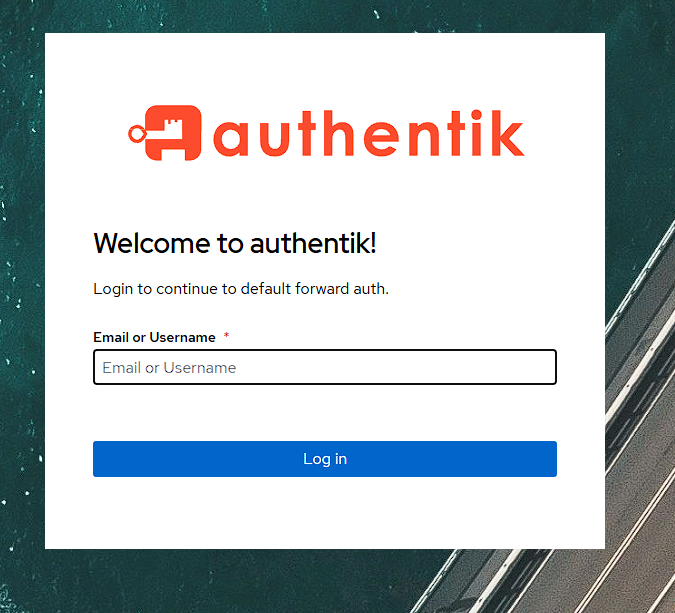
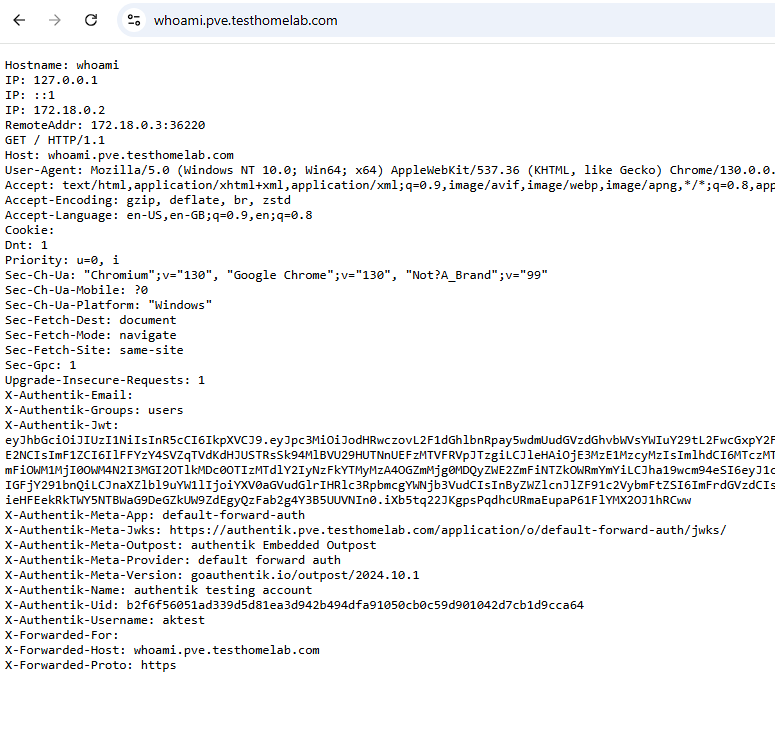
Now when I navigate to https://whoami.pve.testhomelab.com I get a login screen to access the whoami container:
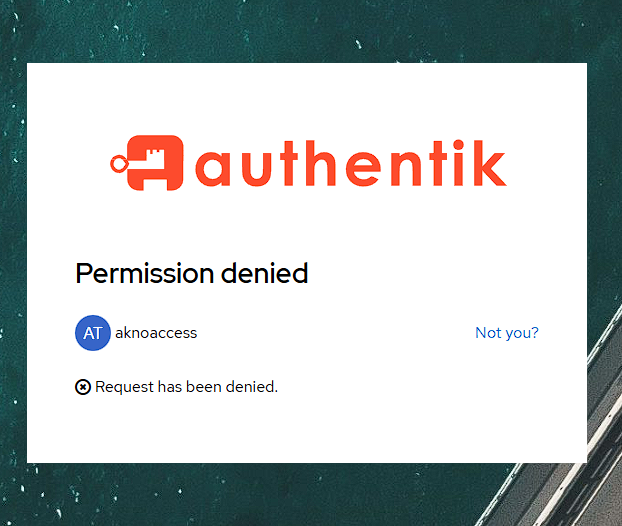
Like with previous auth providers, I can check that I can’t access the application with the aknoaccess user:
However, if I login with the aktest account, I can see the whoami website, along with additional Authentik headers:
Invitations
By default, there’s not really a way to invite a user to Authentik, but there is documentation to add this found here, of which this section of the documentation is essentially following these steps.
Setting up invitations
To start with, there’s a default-enrollment-flow which needs to be downloaded from Authentik here and then imported into Authentik. To Do this go to Flows and Stages -> Flows and press the Import button:
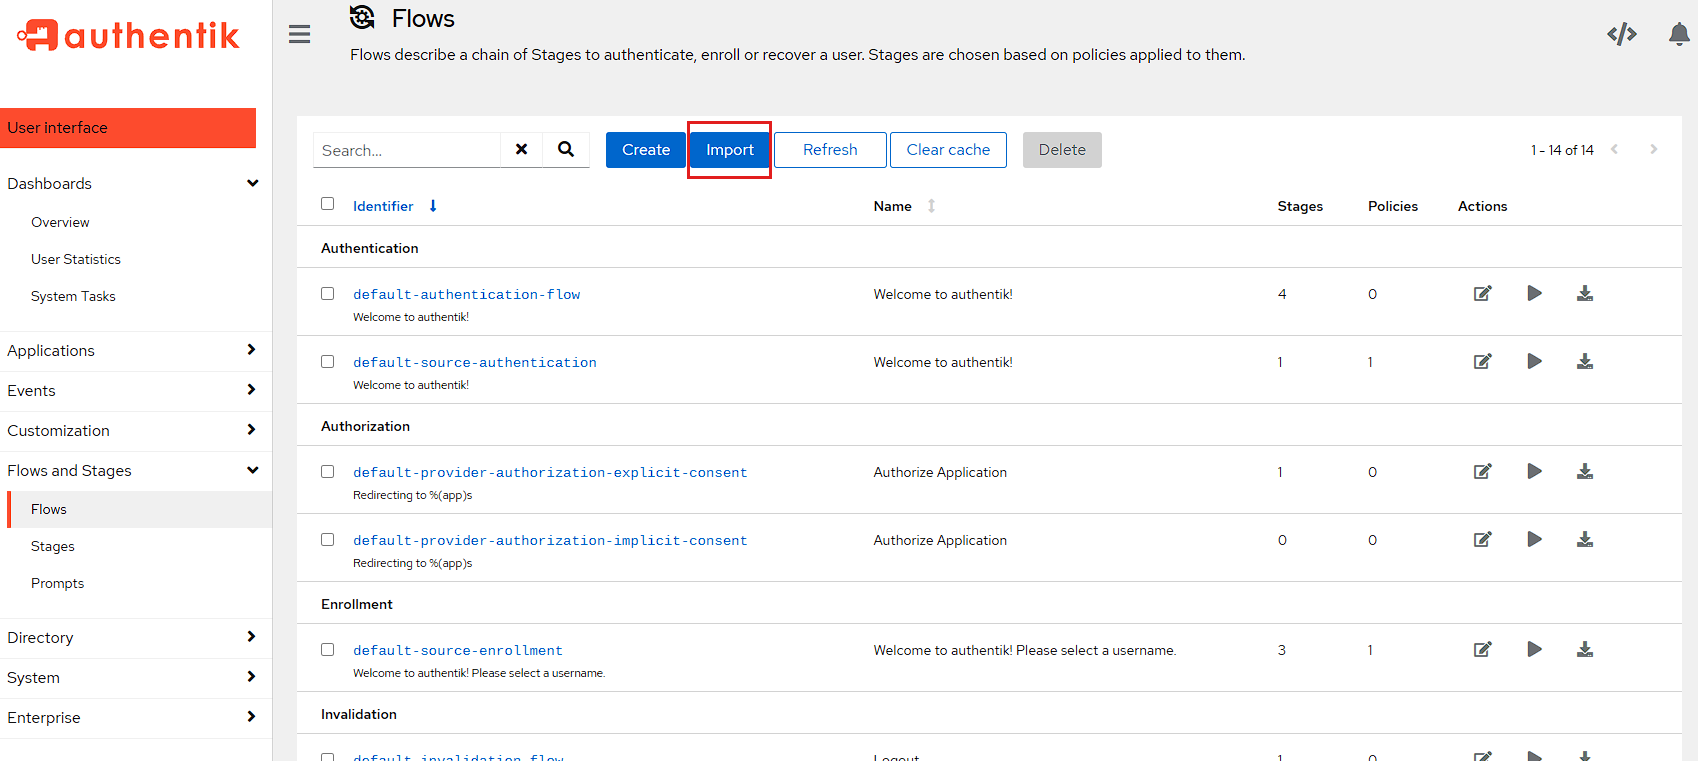
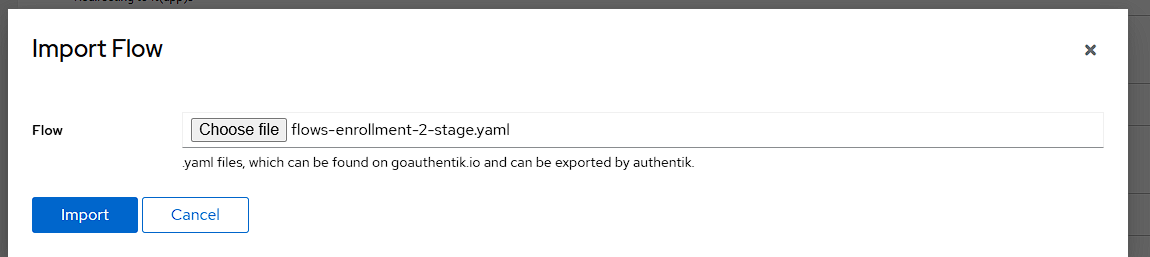
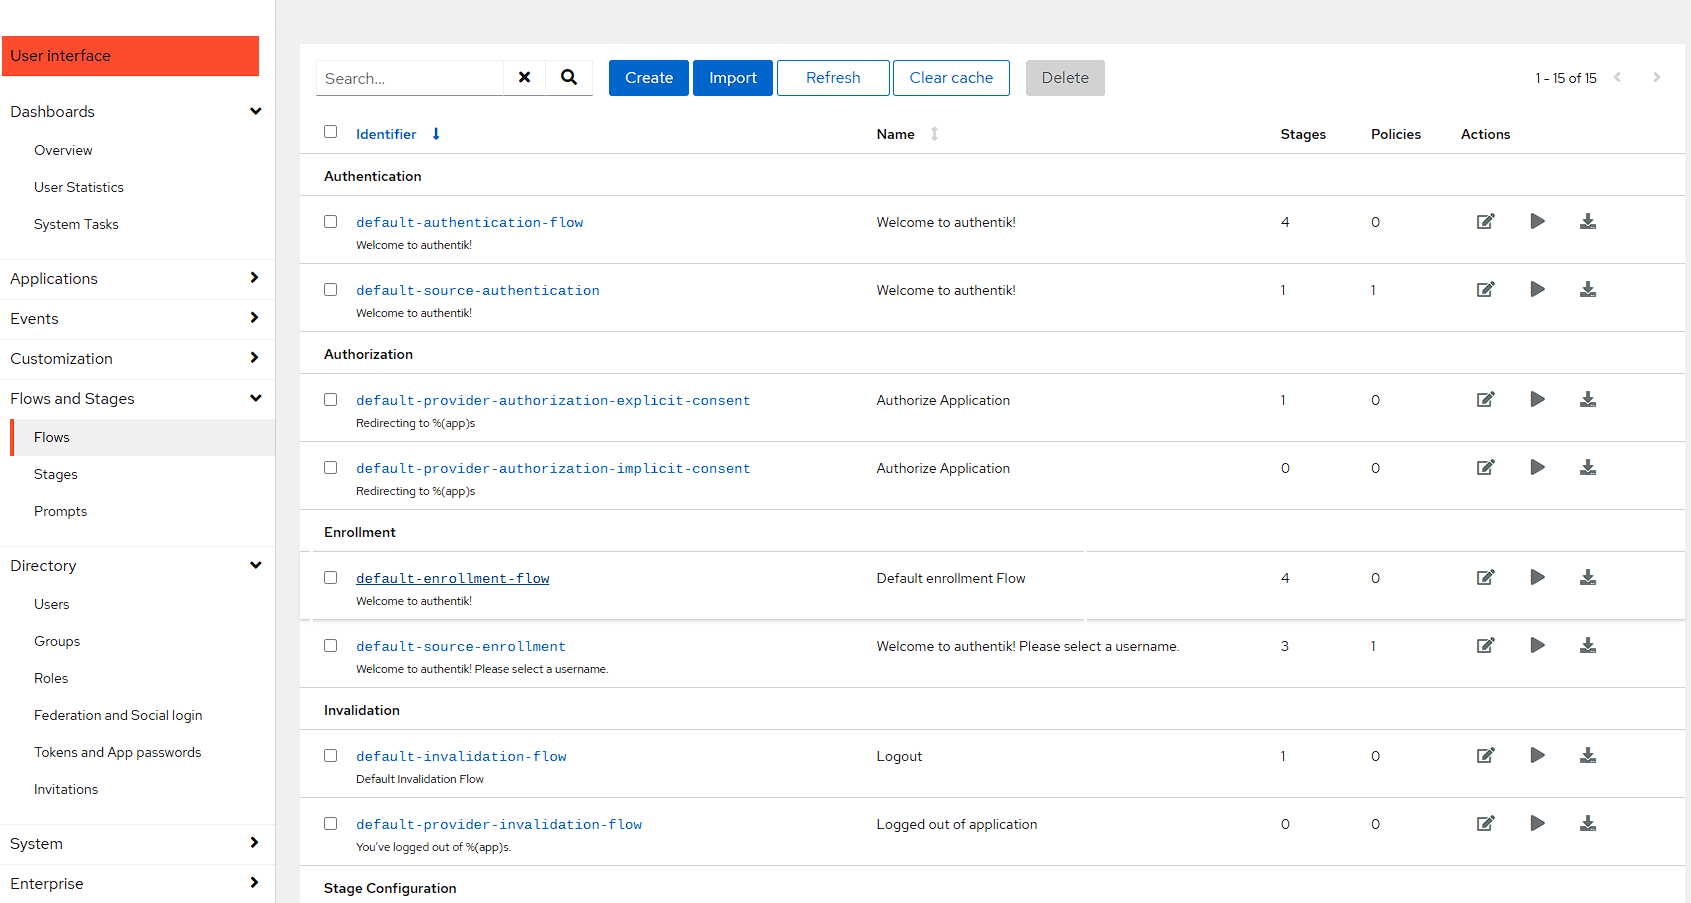
Then choose the file downloaded from the link above, and then import it:
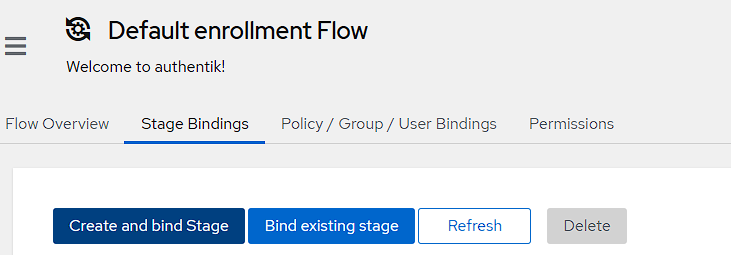
Now that the flow is created, I need a way to use this flow. The current way I want to use this flow is to provide an invitation and I can do this by editing the default-enrollment-flow I just imported and opening it by clicking the blue hyperlink.
I then swap across to the Stage Bindings tab, and press the Create and bind Stage button:
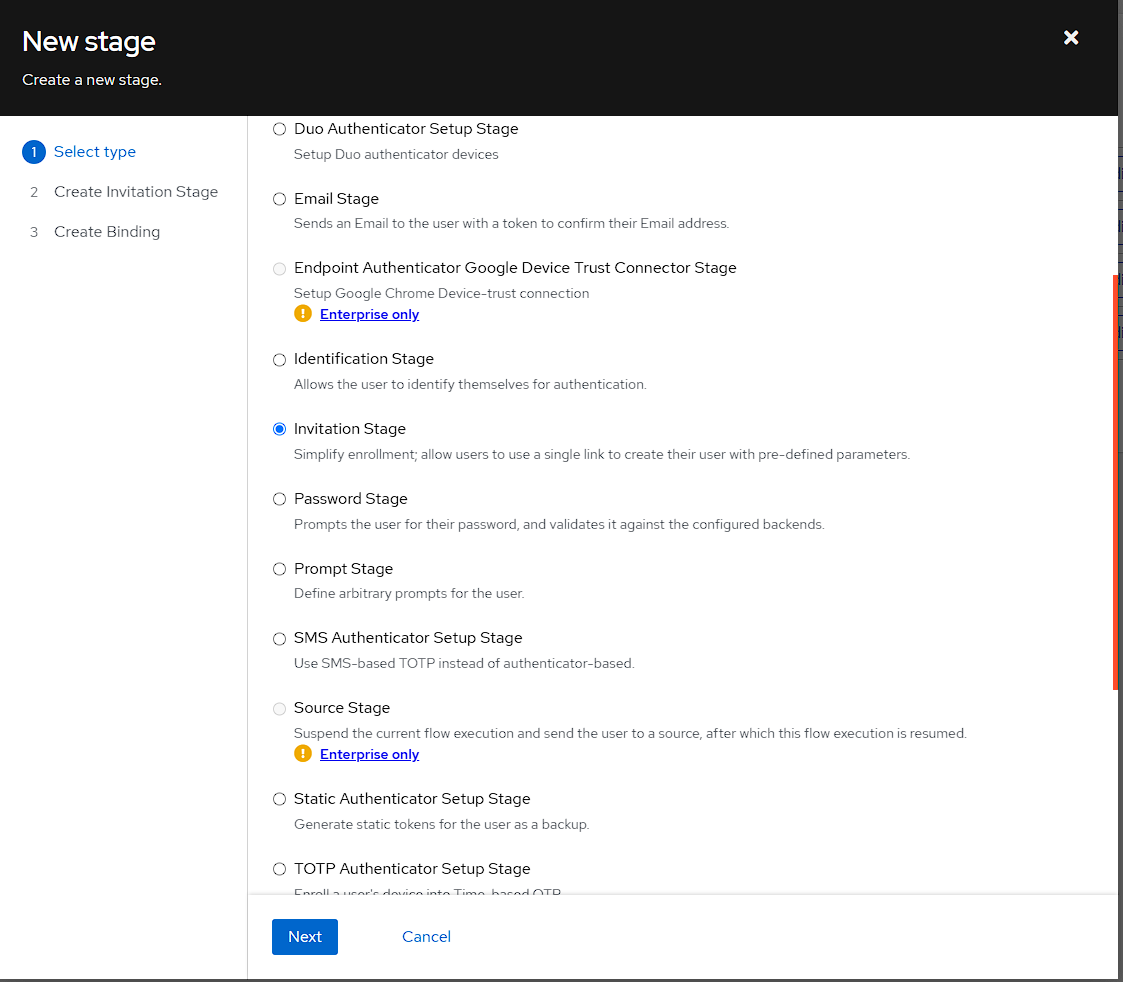
In the first screen, I want to select an Invitation Stage:
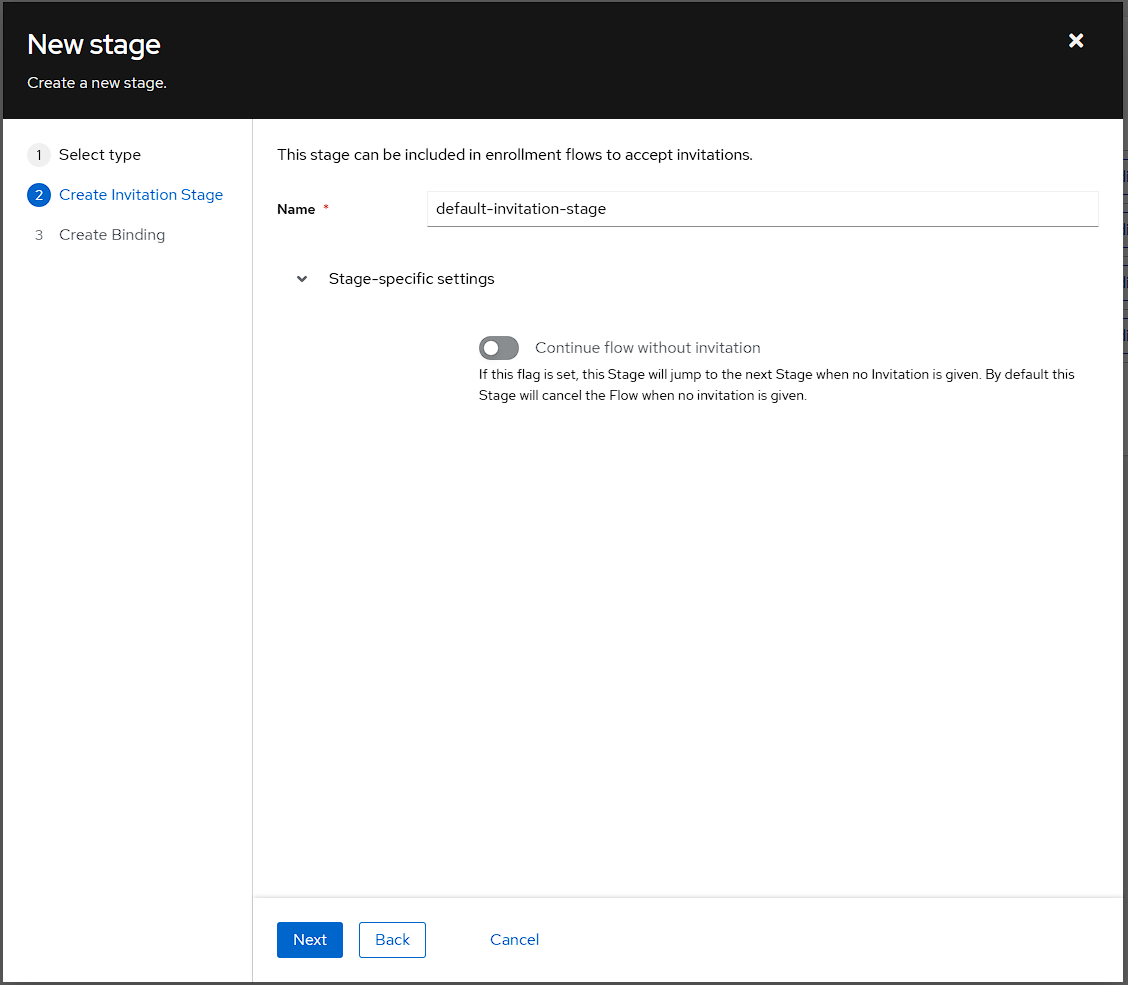
In the Create Identification Stage I’m setting the name to default-invitation-stage:
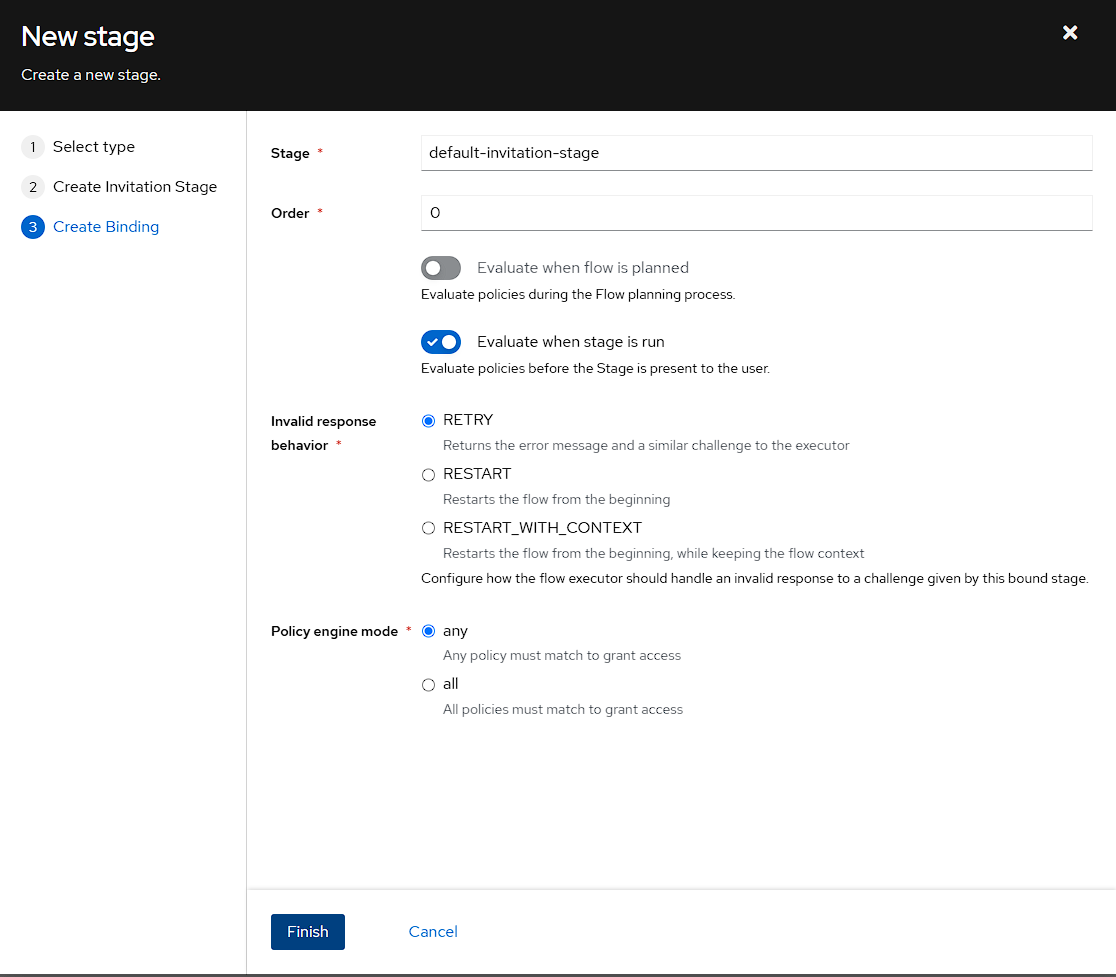
For the Create Binding step, I’m just leaving everything as default, but it’s important to note that leaving the Order as 0 will set this as the first stage to be evaluated
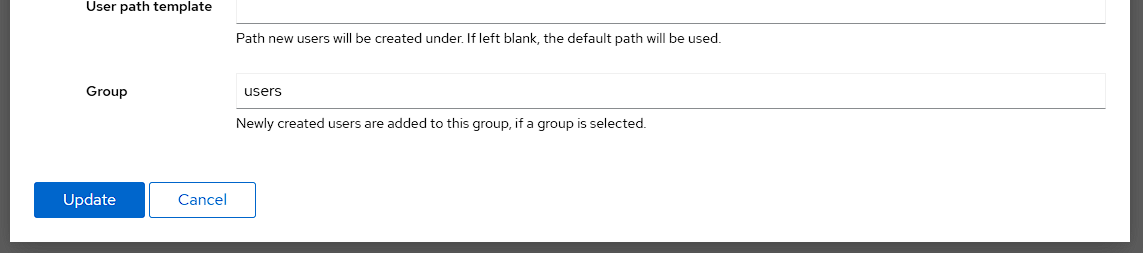
Finally, I can add a user to the user group by default by editing the default-enrollment-user-write stage:
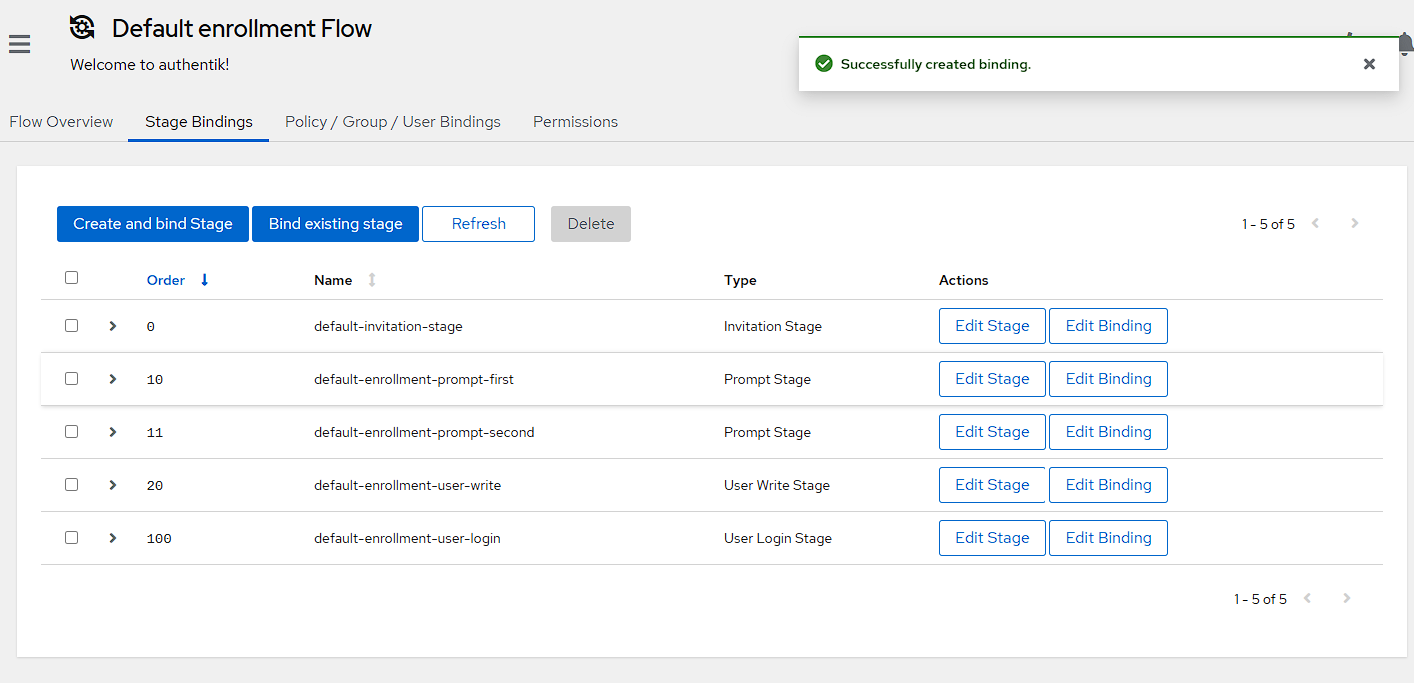
Then I set the users group in the Group field, and update the stage:
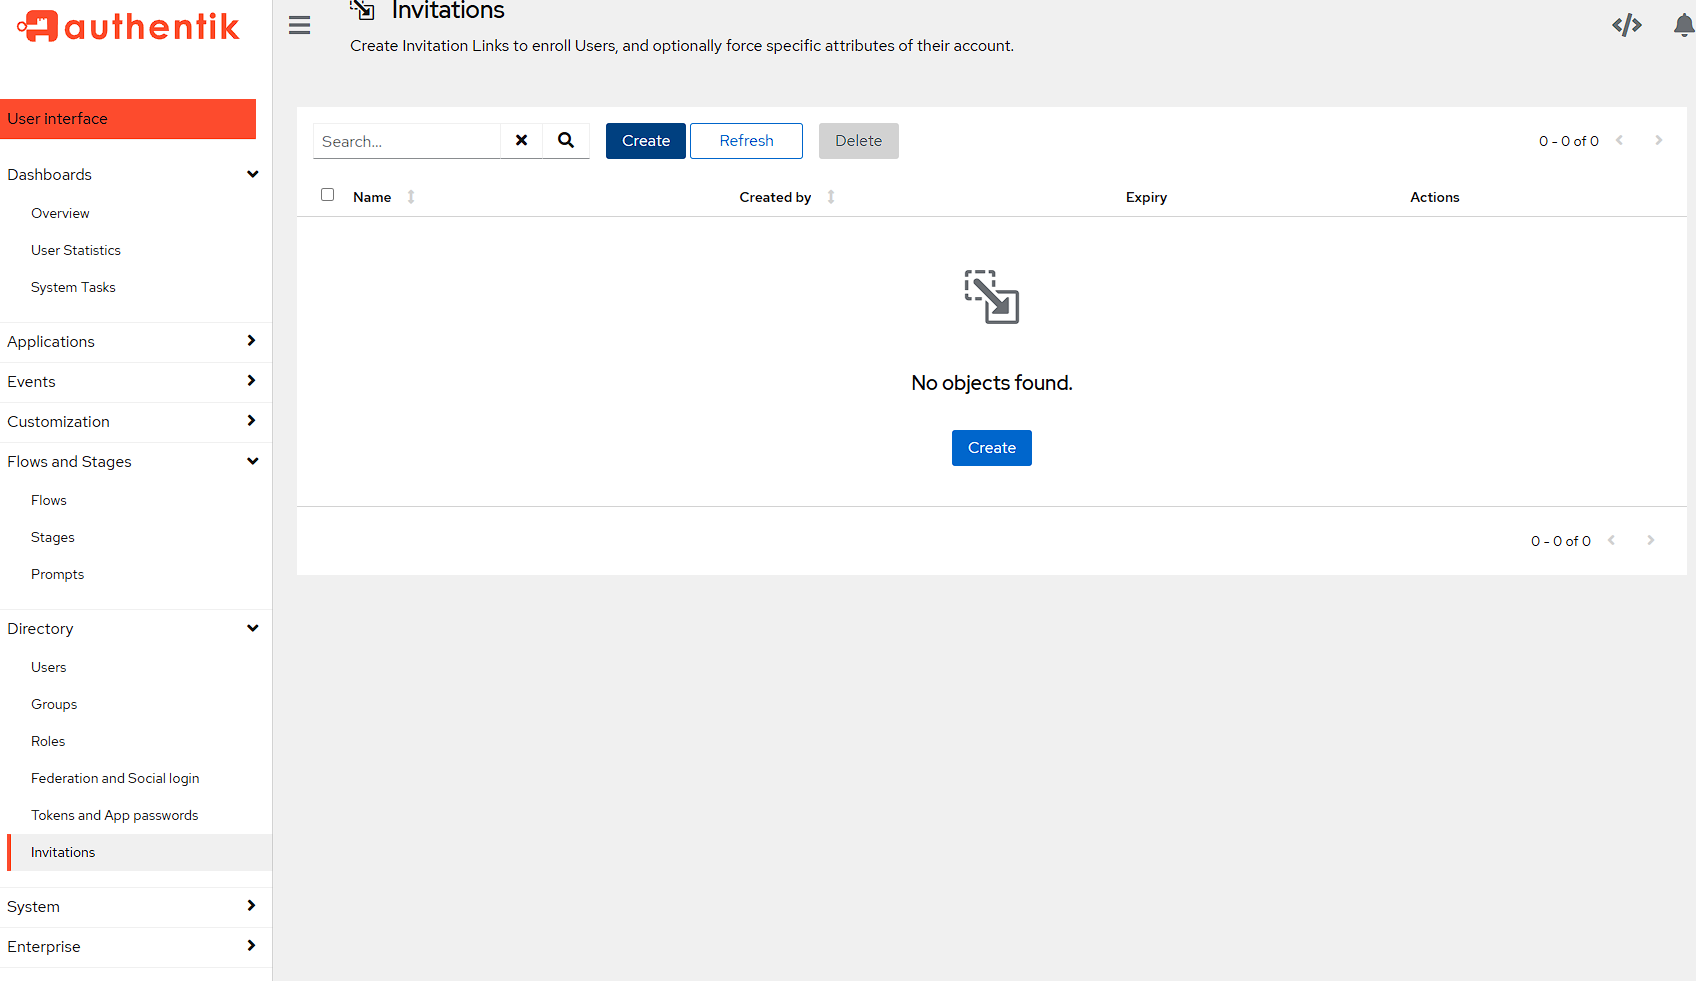
Creating an invitation
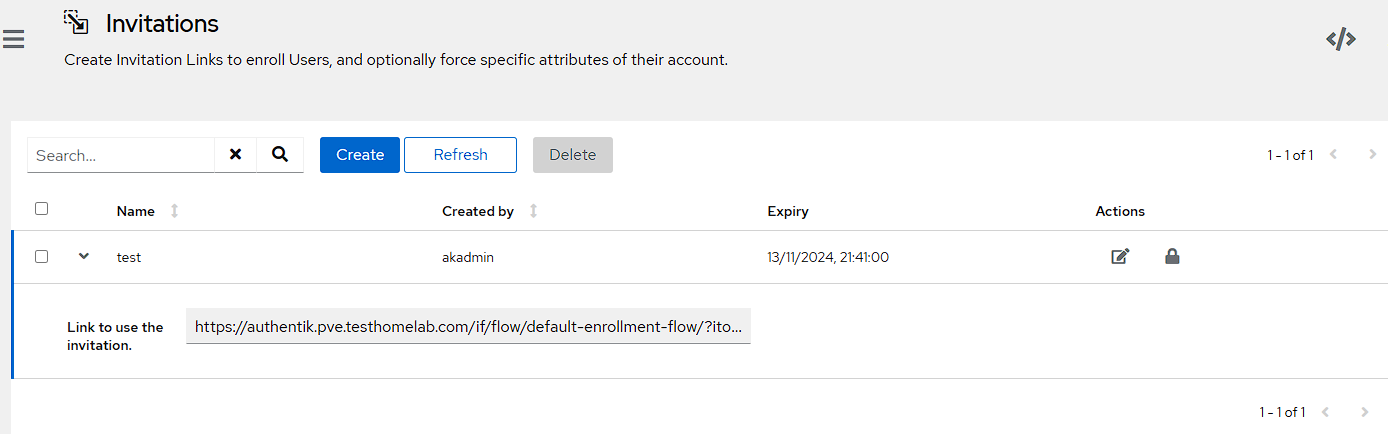
In order to actually send an invitation, it needs to be created, which can be done via the Directory -> Invitations page and pressing the Create button.
In the modal, I’m just setting a name to test to show this off, setting Flow to the default-enrollment-flow I’ve modified and leaving the Single use checkbox checked:
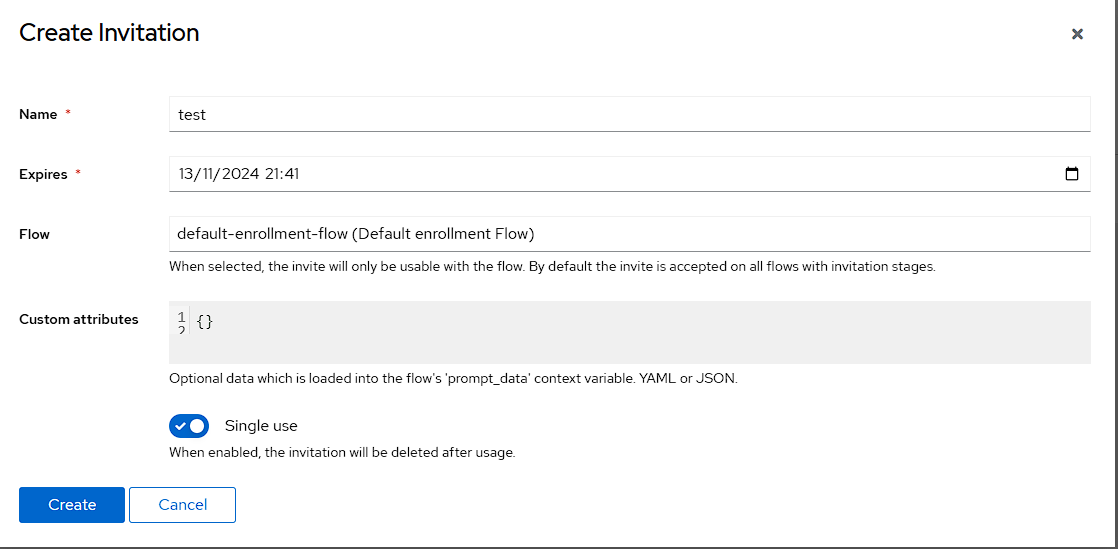
I can then grab the link to the invitation by opening up the newly created invitation by clicking the chevron to the left of it:
Testing the invitation
To view the invitation for testing purposes, I can paste the link into an incognito browser, and I can see the dialog to create a user, and for the purposes of this demo, I’m using akinvite:
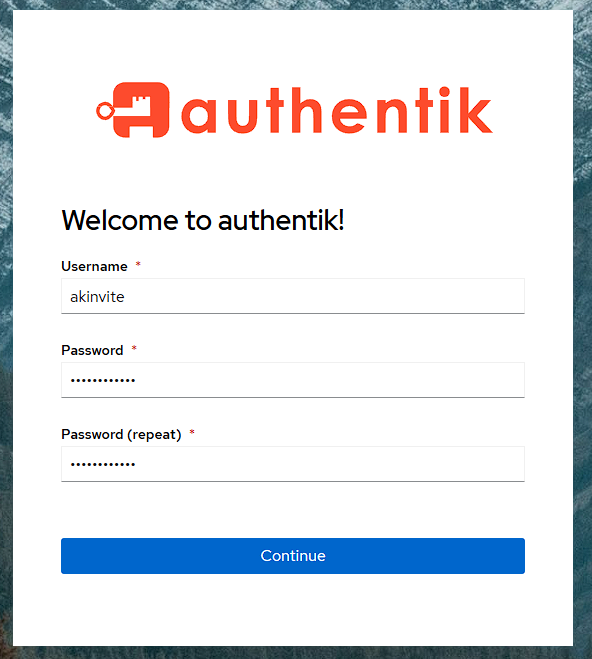
Once I’ve set an email address and name I will see an access denied message, which is because a user is automatically created as an external user, which doesn’t have access to the authentik admin console. However, if I check the users group, the user has been added and if I try and access the whoami container from the incognito window, I can see the information I need and that I’m logged in with the akinvite user.
Notifications
I’ll again be using discord to store notifications as it’s a centralized place for me to view what’s happening in my homelab.
Creating notifications
To start with, I just need to create an integration in Discord that I can use to create the notification, and make sure I’ve got the webhook URL:
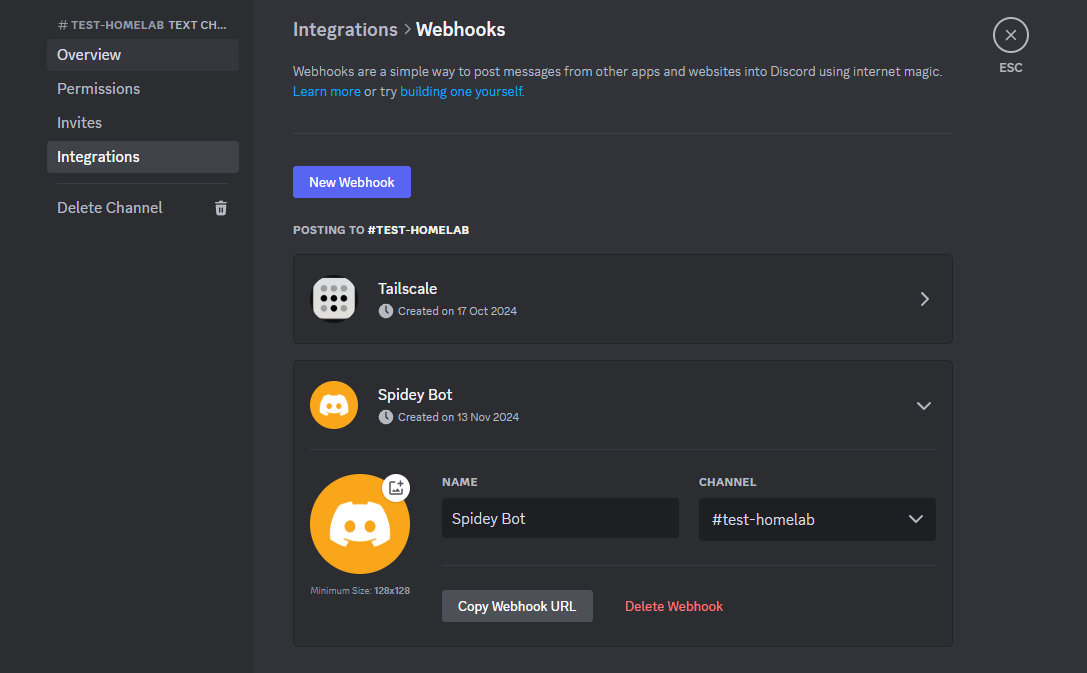
NOTE: the webhook does not need to have the name or picture modified as the notification transport will set the name and picture correctly
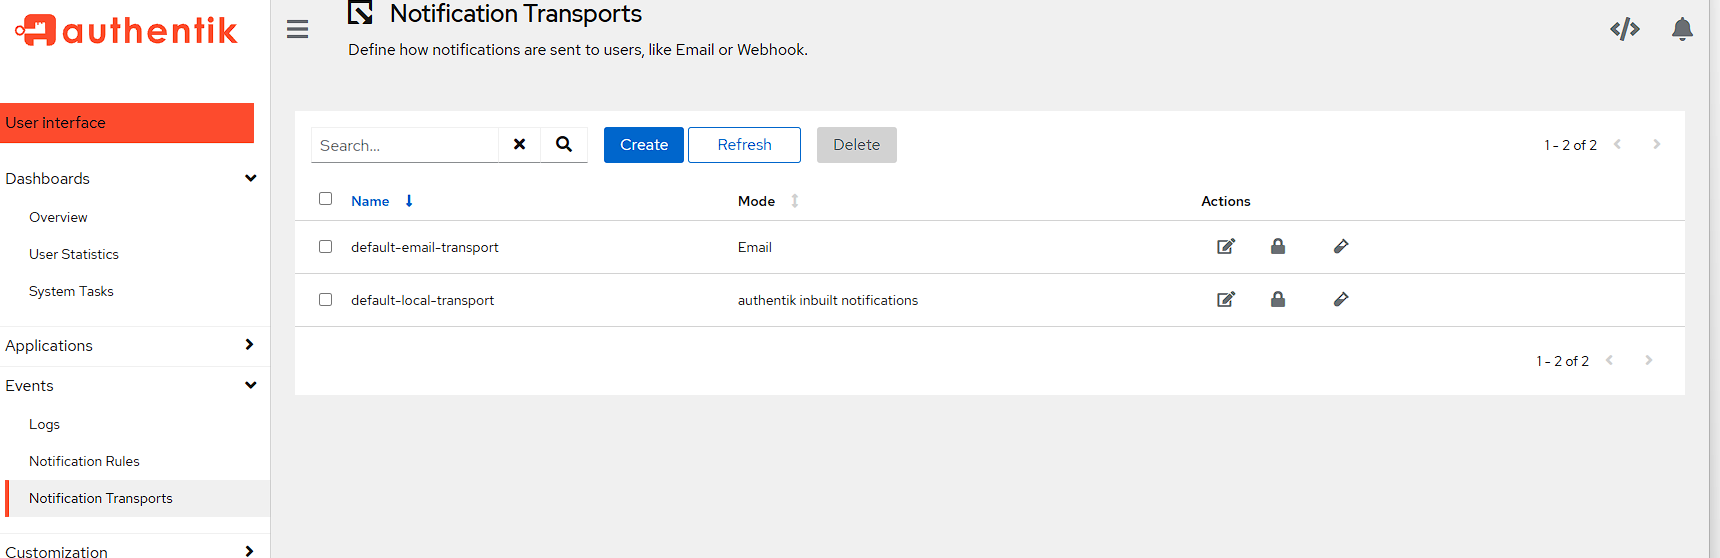
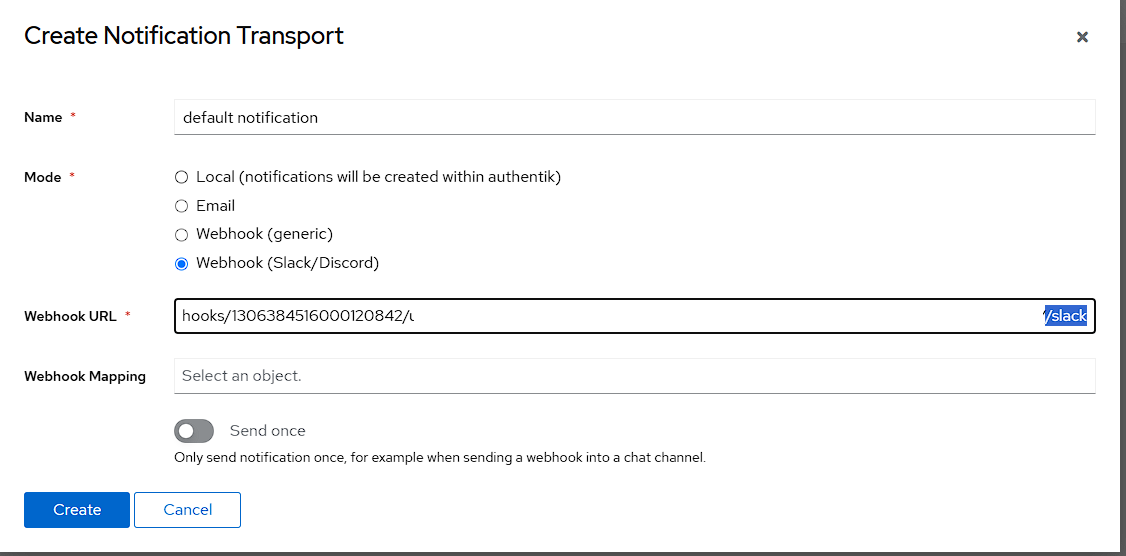
Back in the Authentik admin API, I need to go to Events -> Notification Transports and press the Create button:
For the settings here:
- I set the
Namefield todefault notification - select
Webhook (Slack/Discord)as theMode - Add the discord URL to the
Webhook URLfield
NOTE: the Webhook URL needs /slack adding to the end of the URL as this notification transport is actually in the Slack format.
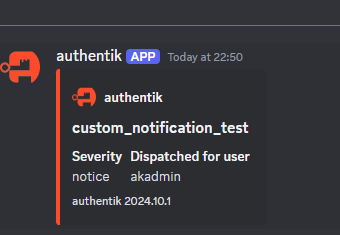
Testing notifications
To test the notification, all I need to do is press the test tube to the right of the newly created notification transport:

If this has worked, I can see the notification in Discord:
Closing notes
While I’ve configured a single application in this article, it’s one of the most complex containers for initial setup. However, getting this right now means that there should be very little that needs to be done in this container later. There are more things that I could do with Authentik, like linking in a federated identity provider or modifying the default login HTML with custom CSS, but none of these options are necessary for using this service.
In the next article I’ll be taking a look at containers I use for management of machines and the environment, as well as logging.