
Preface
This article is going to discuss the containers I use to manage my homelab as well as the installation process for getting everything setup. It’s best to think of this set of containers as only really useful to me as the administrator of the system, and will likely not be looked at by anybody else. This will build on the previous articles in my homelab series (such as container networking), so if something isn’t explained, it might be a good idea to look at one of the previous articles.
This set of containers can essentially be split into 2 parts, the first set allow for the management and viewing of information related to my containers, the second set is for the configuration management of other servers and machines within my homelab (i.e.: not part of my proxmox setup). There’s some overlap between the two, but I think that it’s still useful to think of the containers like this.
Considerations
As with all the other containers I’m choosing to use in my homelab, I’m following the same rules I’d laid out earlier, but in addition to those I’m looking for containers which will provide the following:
- Access to logs
- using
docker logs <container>is fine, but it means I need to be logged onto the server to see them and it can be a little clunky with the number of services I’m running
- using
- Remote desktop
- I occasionally use machines that don’t have an SSH client installed, so having a web service that is ready to go can speed me up.
- Container management
- Really just a place to start/stop containers without having to log into the box and use the
docker restart <container>command and get an overall view of my docker installation
- Really just a place to start/stop containers without having to log into the box and use the
- Automatic container updates
- I run a lot of services, having something that can update containers without manual intervention means I need to spend less time maintaining the environment, even when including the effort to fix breaking changes
- PXE network boot support
- This allows for a machine to install an operating system over the network and is traditionally called a PXE boot server
- Machine management
- I want to use a tool of some description that can help me when setting up new machines, so that I can automate the provisioning process.
Choices
There’s a lot of options within this space, but I’ve ultimately decided to implement the following containers:
- Docker Socket Proxy
- This limits access to the docker socket to only the surfaces that I want to give access to for services that I’m using over the internet. As these containers require a lot of access to the underlying machine, I’ve opted to provide access to functions required by the docker socket through a docker socket proxy.
- Dozzle
- This provides access to logs and it’s deep focus on only logging gives an excellent experience for quickly finding what the issue is along with some great features like built-in filtering using regular expressions and essentially instantly pulling in new log files when I start a new container. Over the past 6 months I’ve found Dozzle so useful for troubleshooting that I automatically open it whenever I start messing around in my homelab.
- Portainer
- I’m definitely not making use of the full abilities of Portainer around deploying containers, but as I mentioned it’s useful for viewing what’s happening, how my containers are setup (i.e.: labels attached and environment variables etc) and restarting containers. It does have the ability to view logs, but I’ve found Dozzle more user-friendly for this function. However, I’ve personally found the most useful function is the ability to connect to the console of a container as this can be a little time consuming to find the right shell.
- Apache Guacamole
- This is a remote desktop client that can be used through a web browser. While I’m currently only using SSH, it does have support for RDP, VNC, Telnet and Kubernetes. This is a nice to have, but I do tend to log onto the machines directly as I do often have an SSH client on the machine I’m using to connect. However, it is useful for having access to all my machines in one place and it does offer copy/paste, which is better than the default Proxmox client.
- Watchtower
- This automatically updates my containers to the latest version of the tagged container. As mentioned, this can be dangerous, so I do use specific version tags for some of my containers. Watchtower is an entirely command line based tool and doesn’t have a web UI, but I’ve found it’s very stable once running correctly
- Netboot XYZ
- This container is a really simple PXE server that contains a lot of default tools and operating systems with a handy UI for selecting the version I want. It’s really made setting up new machines a breeze.
- Semaphore
- This is essentially a frontend to Ansible, which unlike Ansible tower, doesn’t require Kubernetes to run. Instead it works by using git repositories as playbooks and I’ve found this really useful to make sure I keep everything backed up correctly.
- In the past I have setup Ansible AWX which is a first-party solution, but that requires Kubernetes to run, and that’s overkill in this setup and as of writing, development has been paused for 10 months for a major refactor.
Setup
File structure
The file structure is similar to what I’ve previously discussed and requires the following folders and files to be created:
text
Common compose
This is a set of common compose declarations. As mentioned in a previous article, I group my services by type as it currently feels more manageable to do this, but is different from the recommendation of 1 Compose file per service. as such, here’s a set of resources that will be used across services:
environment variables:
shell
Setting a time zone isn’t really necessary as it should be picked up normally. However, having it set like this doesn’t hurt and can occasionally catch weird errors.
YAML:
yaml
In future Compose declarations, I’ll mention the top level statement that it slots into. For example, when creating a service I’ll show it like this:
yaml
Docker proxy socket setup
This is a secondary container that’s only used by other containers within this YAML file, as such the only ways to see it works correctly is to use a health check and try it with another service.
yaml
After this just run sudo docker compose up -d and the container should start.
I can then see that this container is running and healthy by calling sudo docker ps -f name=docker_socket_proxy and I should get the following data:
text
Dozzle setup
Dozzle would be really straightforward to setup as it doesn’t require any other services, but I’ve complicated the setup slightly by using the docker socket proxy to replace direct access to the docker socket.
NOTE: this container will require the networks and environment variables discussed in the Common compose sections, as well as the docker_socket_proxy container
yaml
Once again, I can start the container by running docker compose up -d and then view the running container details with sudo docker ps -f name=dozzle:
text
I can now navigate to https://dozzle.<homelab domain> in my browser and view the front page of Dozzle:
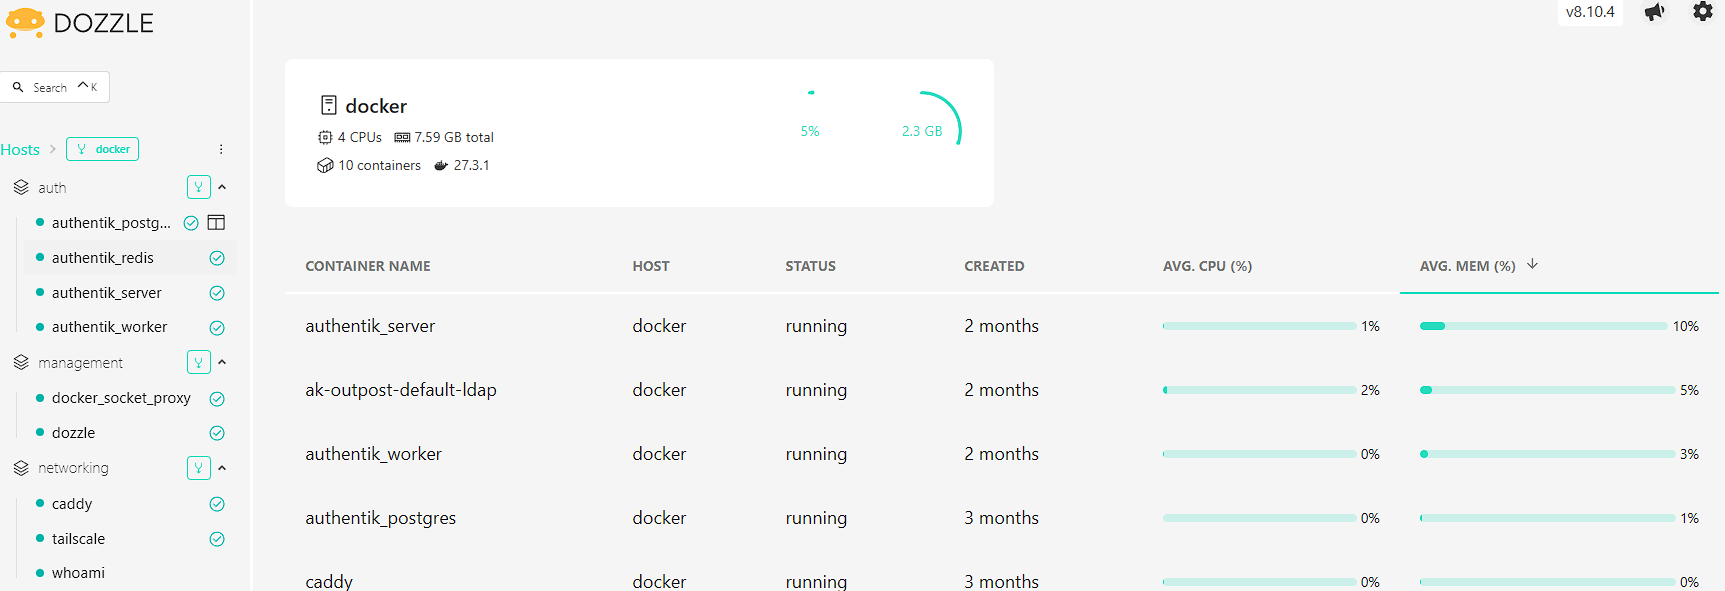
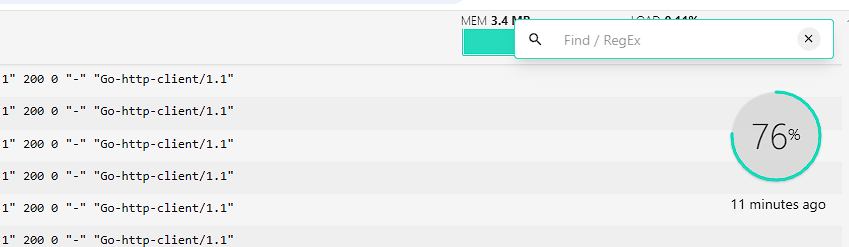
As can be seen, there’s some basic information on the state of the containers in my homelab, but this application is designed around viewing logs easily. There’s a lot of features around how to interact with Dozzle, but my favourite is the text/regex search function that can be accessed by opening a log and pressing ctrl + f to quickly search through my logfiles:
Dozzle closing thoughts
I now have the ability to quickly access logs over the network that vastly improves my workflow for checking for errors in my homelab.
Portainer setup
Portainer uses a single volume to store configuration values between restarts and has been slightly complicated due to the use of the docker socket proxy.
Portainer environment
bash
Portainer docker
NOTE: This docker file depends on the common configuration above for setting the caddy URL and accessing the caddy network. In addition, this container takes advantage of the docker socket proxy created above.
yaml
After this is in the Docker compose, I can start the container by running docker compose up -d and then view the running container details with sudo docker ps -f name=portainer:
text
Portainer configuration
Portainer needs some configuration to be done after start-up. I can do this by navigating to https://portainer.pve.hostedlab.co.uk in my browser, and am greeted with an admin login screen:
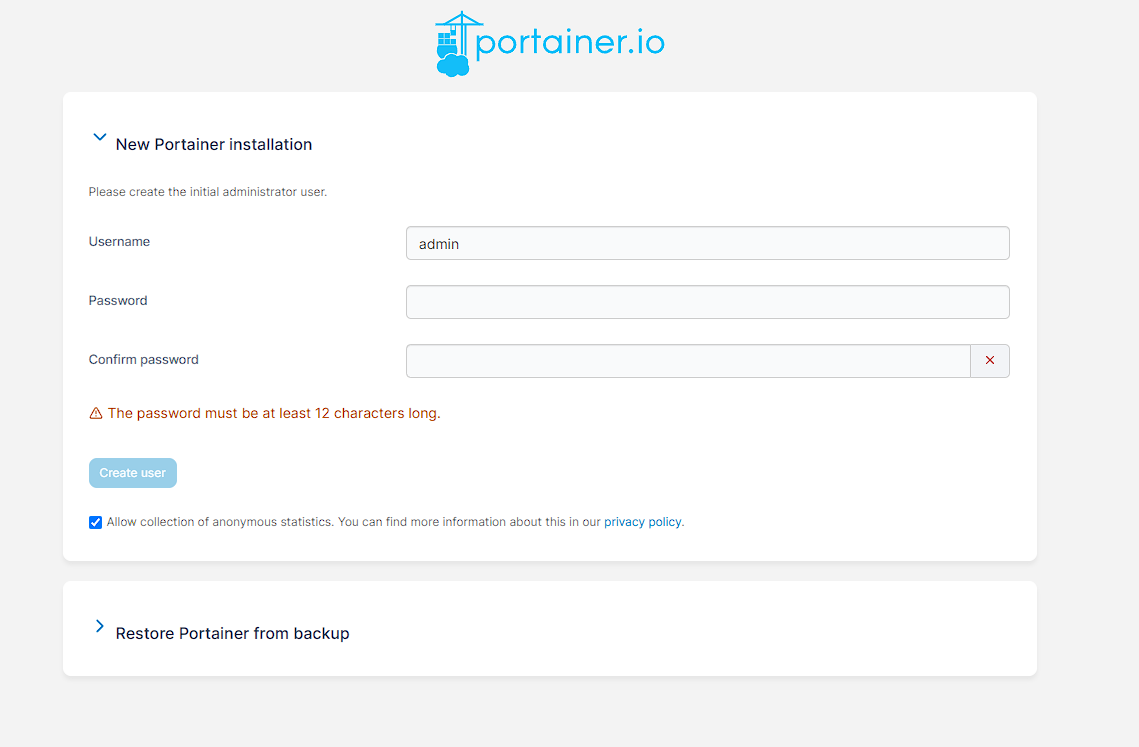
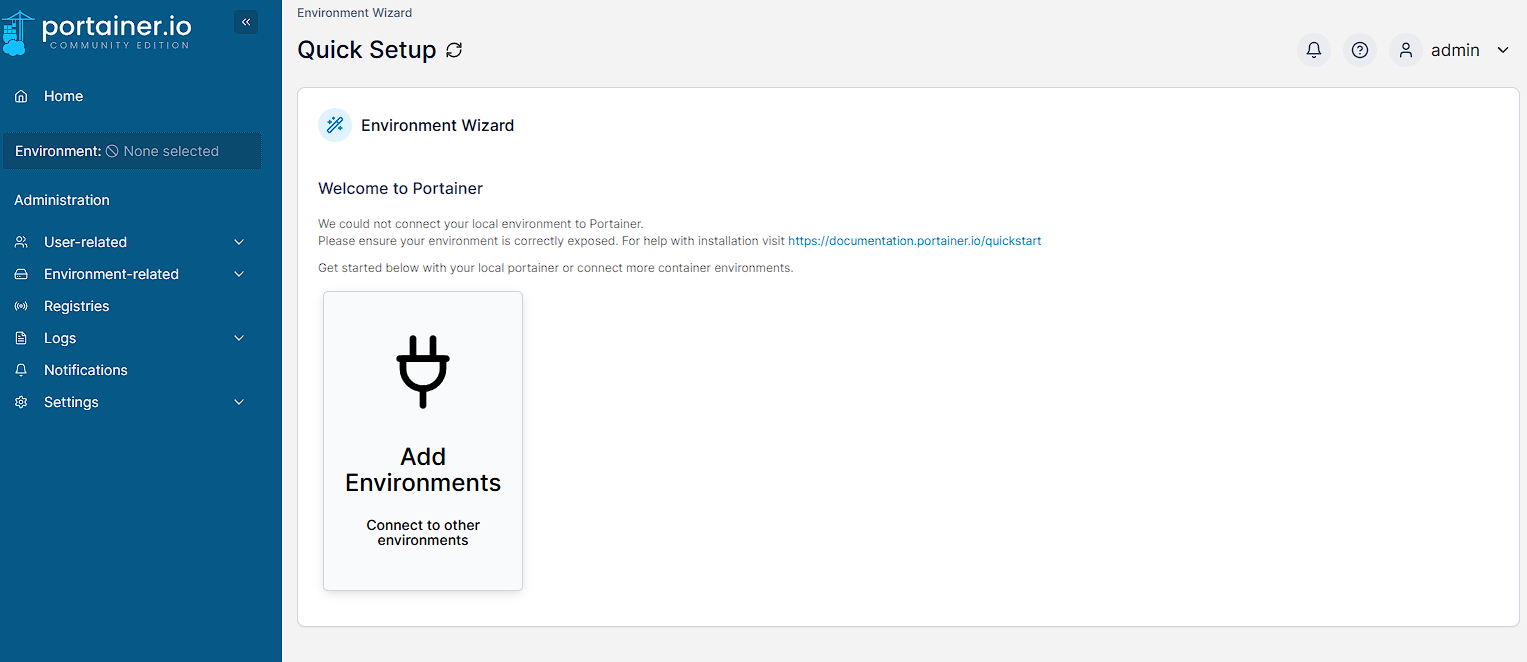
As I’m not restoring from backup, I just fill out the details with a username and admin and create a password for portainer. Once this is done I click Create user and I can then connect to my current environment by clicking the Add Environments button on the next screen:
I’m using a Docker Standalone installation, so I then select that:
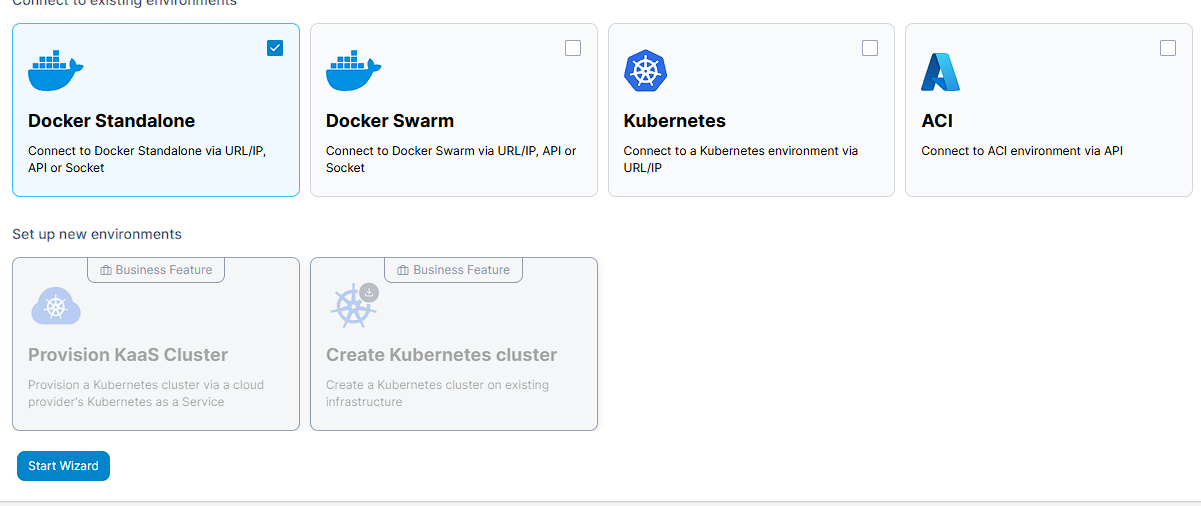
I can finally add the environment by going to API, calling this environment something (I chose local) and entering the Docker API URL of docker_socket_proxy:2375. I’m also not using TLS as this is running locally, so I make sure to leave that unchecked:

Selecting Connect causes a toast to appear in the top right with my new environment:
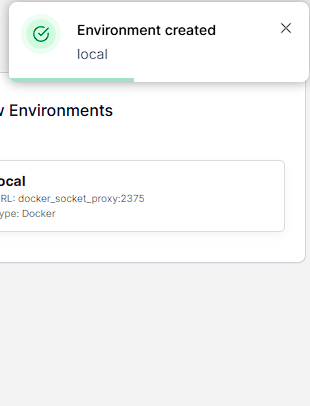
Navigating back to the front page now shows that I’m connected to the local environment:
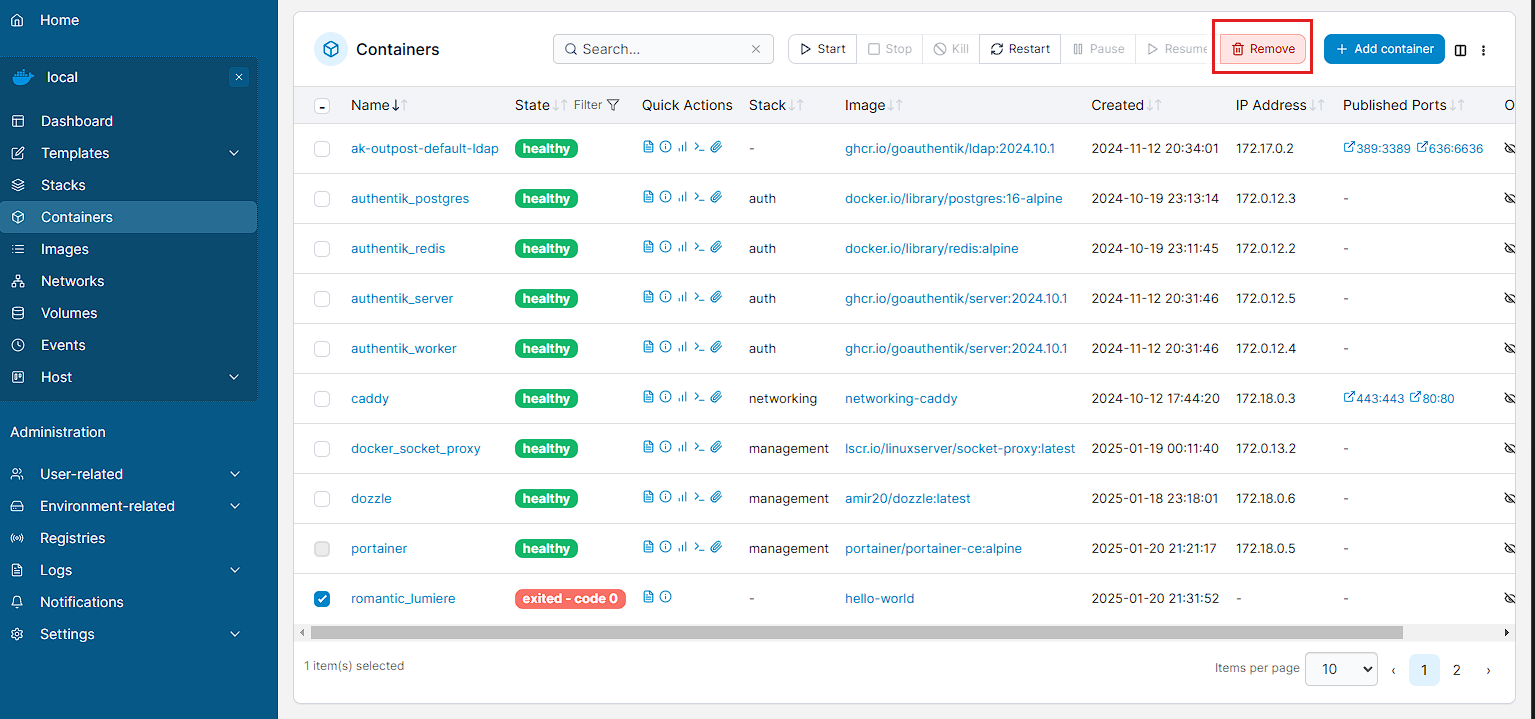
As can be seen, there’s a fair amount of information here, but importantly I can see that there’s a stopped container, which is a hello world container I’d initially run to check that Docker was running. In order to make sure that everything is fitting together, I’m going to remove it by going to Containers, highlighting the stopped container and selecting Remove in the top right:
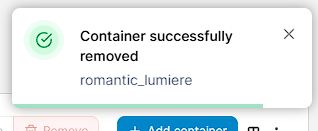
After confirming I want to delete the container, it disappears from Containers list and I get a toast notification in the top right:
Portainer OAuth setup
Portainer is set up with it’s on authentication by default, but it’s easy to add Authentik as an OAuth provider. This can be configured by going to Administration -> Settings -> Authentication and selecting OAuth:
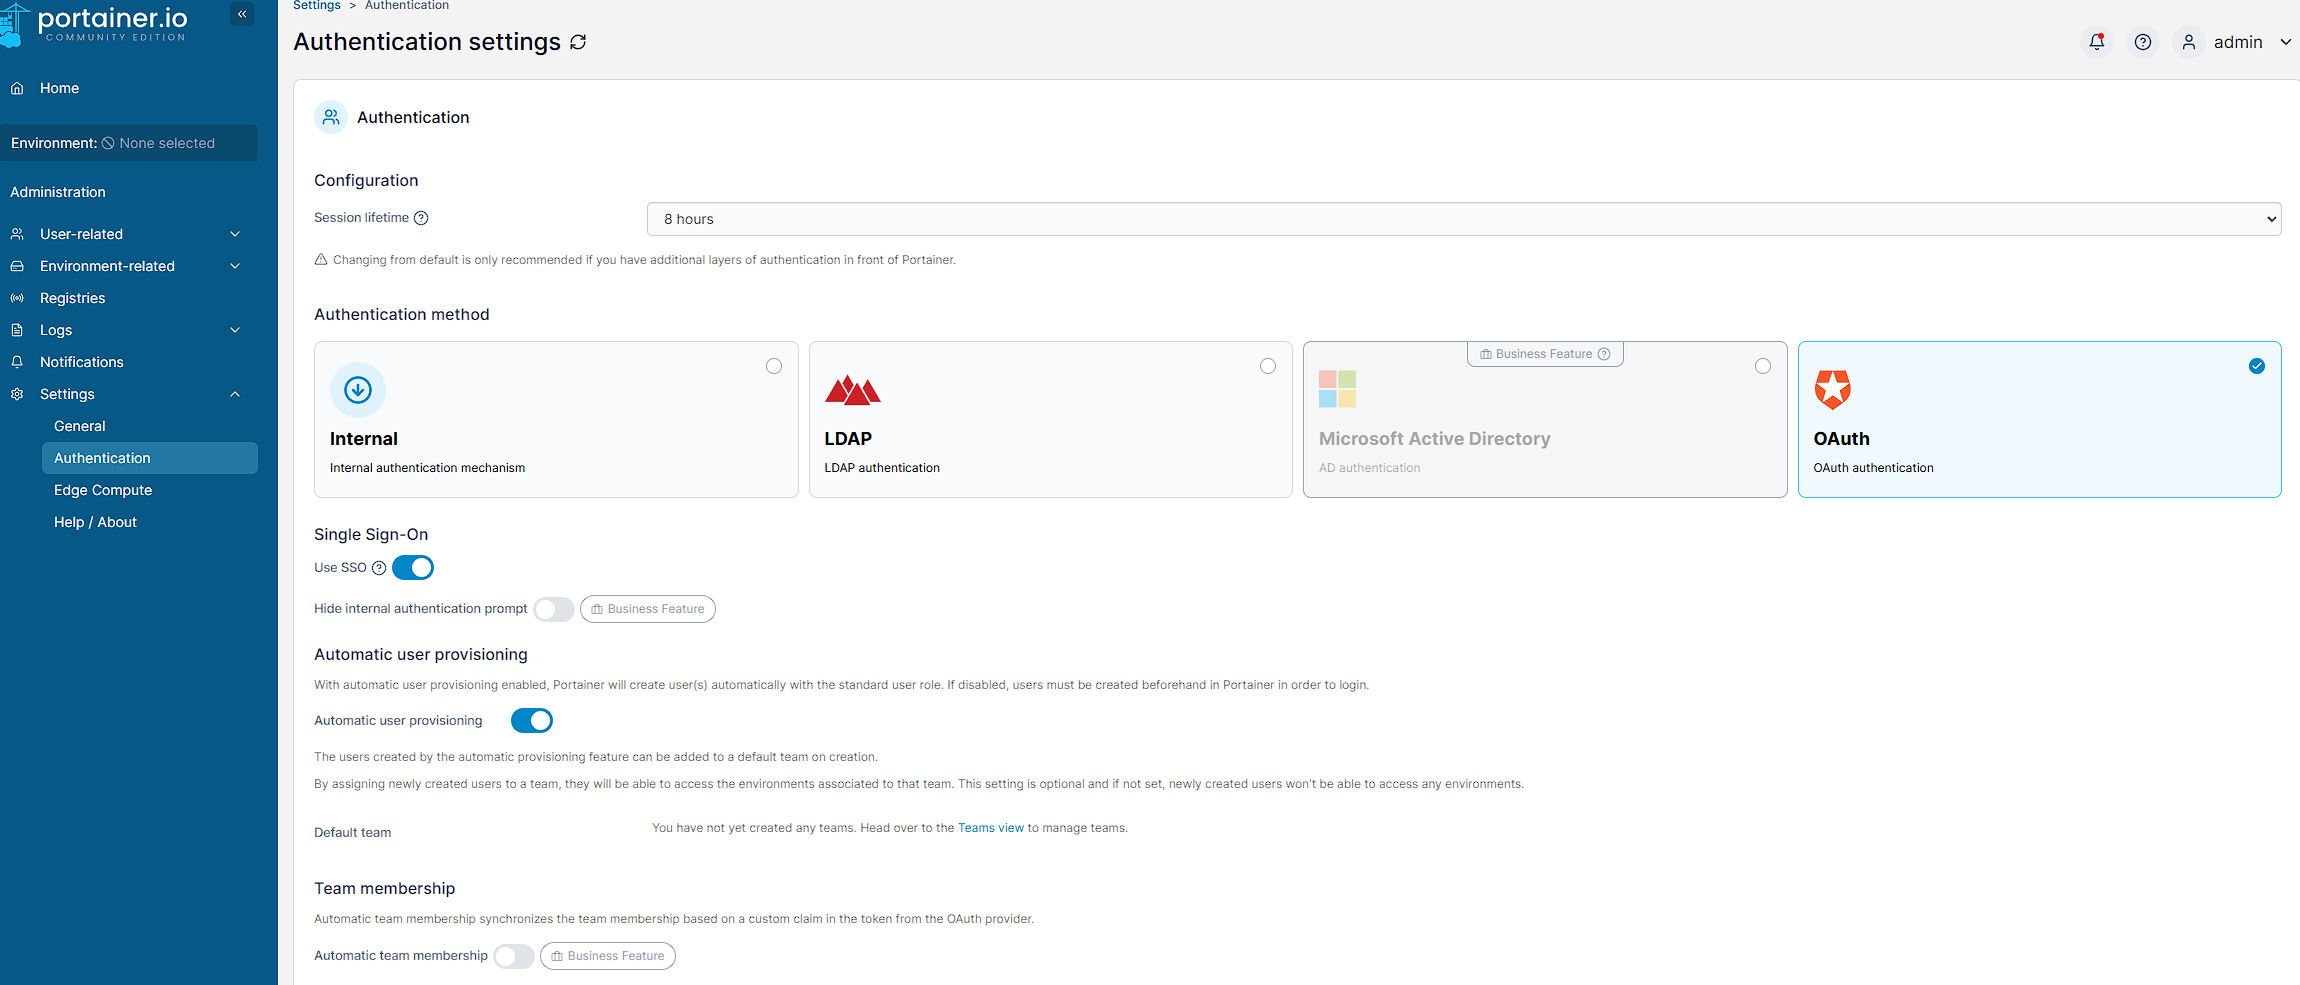
I also leave the Use SSO slide toggle checked as this allows Portainer to log in without prompting. Additionally, I turn on the `Automatic user provisioning slide toggle as it means I don’t need to manually create a user in Portainer to map to my Authentik users.
Additionally, Automatic user provisioning is left enabled so that users are added to Portainer by logging in with an Authentik account. This can be disabled later on if required.
Meanwhile, open up the OAuth provider setup in the Authentik admin UI so that the configuration can be seen:
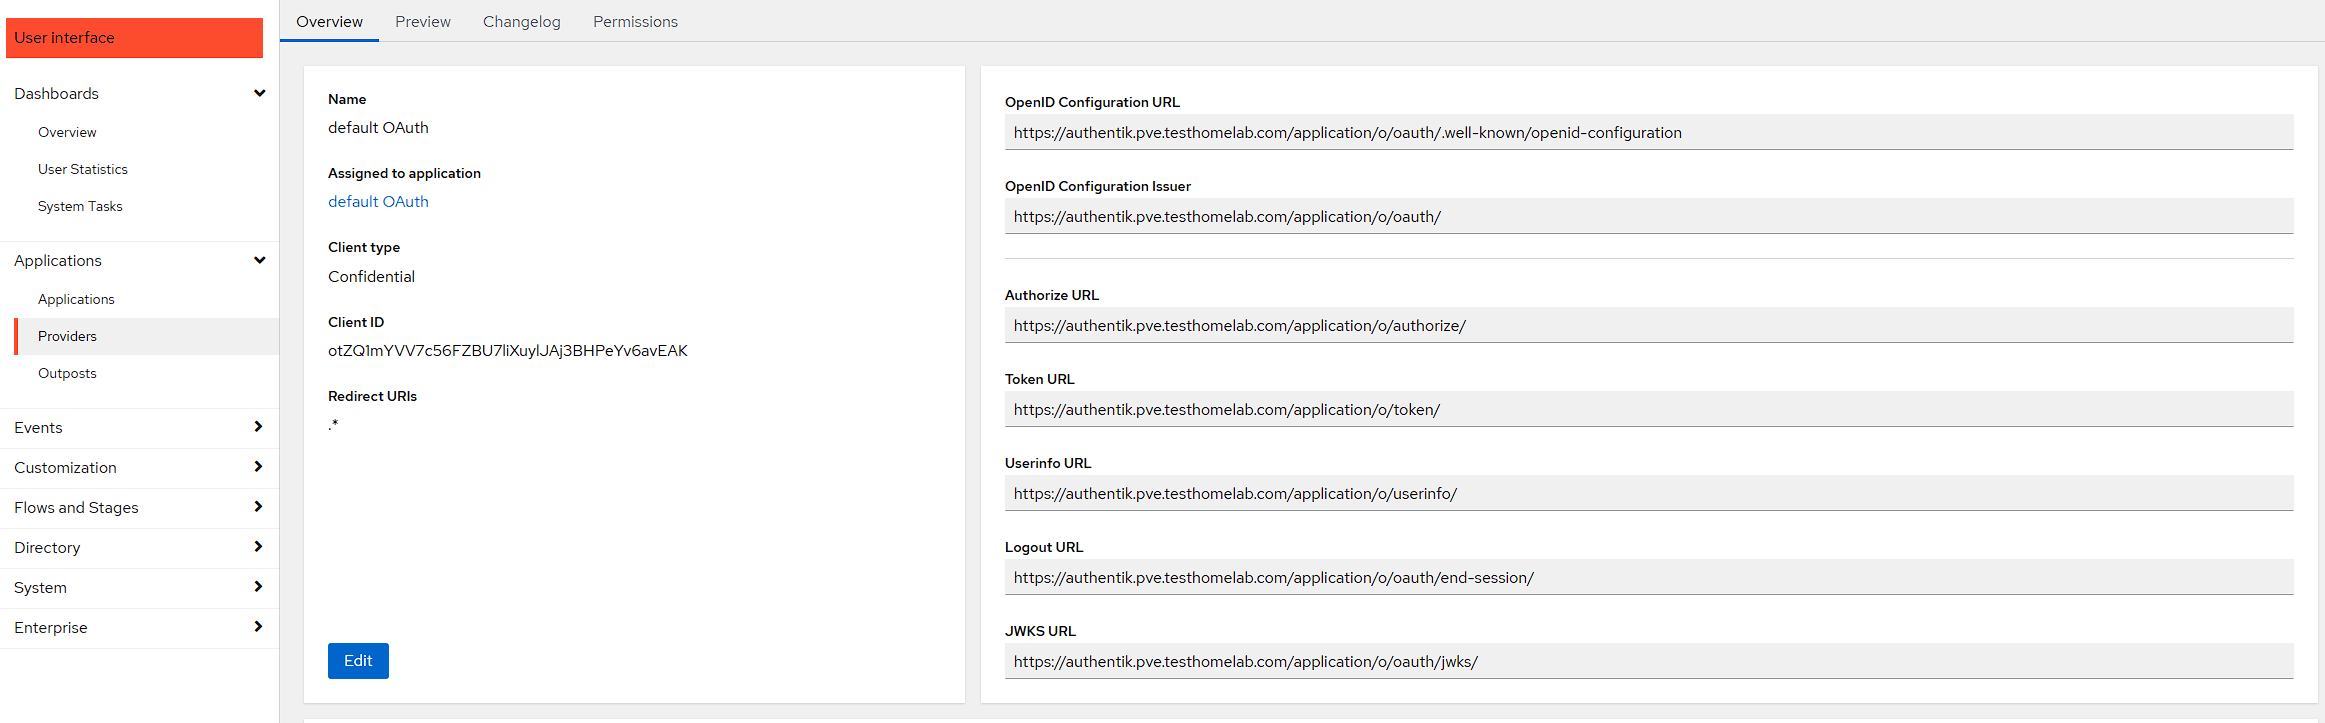
NOTE: the client id and secret can be found by pressing the Edit button.
Then I can fill out the details with the following mappings:
| Setting value | Portainer setting |
|---|---|
| Authentik Client Id | Client Id |
| Authentik Client Secret | Client Secret |
| Authentik Authorize URL | Authorization Url |
| Authentik Token URL | Access token URL |
| Authentik Userinfo URL | Resource URL |
https://portainer.<homelab domain>/ |
Redirect URL |
https://portainer.<homelab domain>/ |
Logout URL |
preferred_username |
User identifier |
email openid profile |
Scopes |
Auto Detect |
Auth Style |
NOTE: the spaces in Scopes are important, other punctuation (like a comma) won’t work.

Once I click save, I get a toast popup in the top right and I can test this works by just logging out, and I can see that the login page has changed to include an option for OAuth:
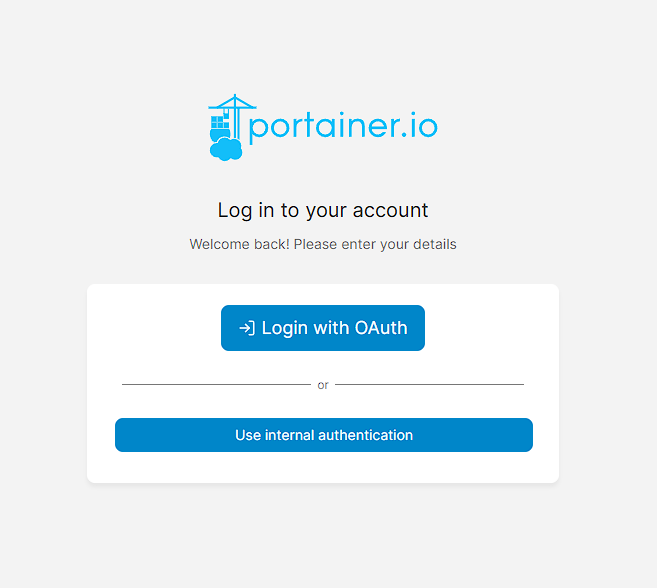
Provided the authentication setup is correct, I can login straight away using credentials from Authentik and can see the following screen:
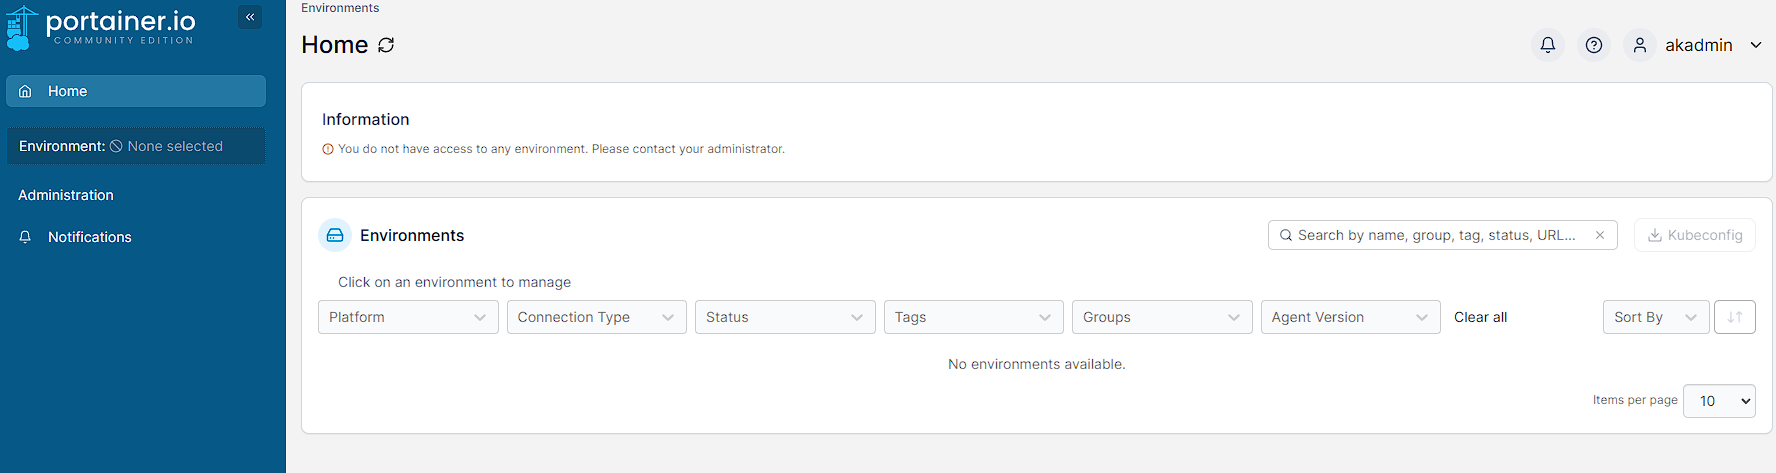
As can be seen though, this new user doesn’t have any permissions to view details in Portainer. The next section of this guide will show how to do this.
Portainer user management
Unfortunately, a lot of the user management features are locked behind the business edition of Portainer and I pretty much only have an option to choose if a user is an administrator or not. While not ideal, it is workable and this is the process for enabling an Authentik user to view details in Portainer.
As Automatic user provisioning has been left enabled, by logging in with an Authentik user, they will automatically be provisioned onto Portainer. So from the login screen I press Login with OAuth and then log into the service. After this I am greeted with the following screen:
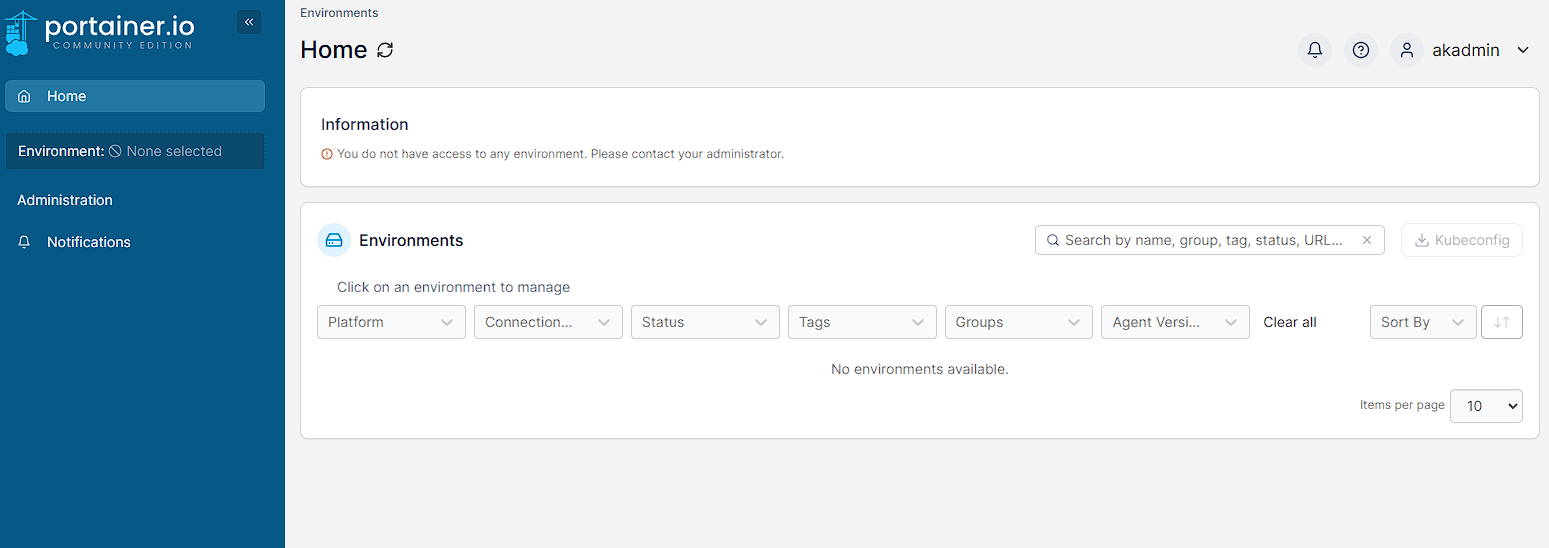
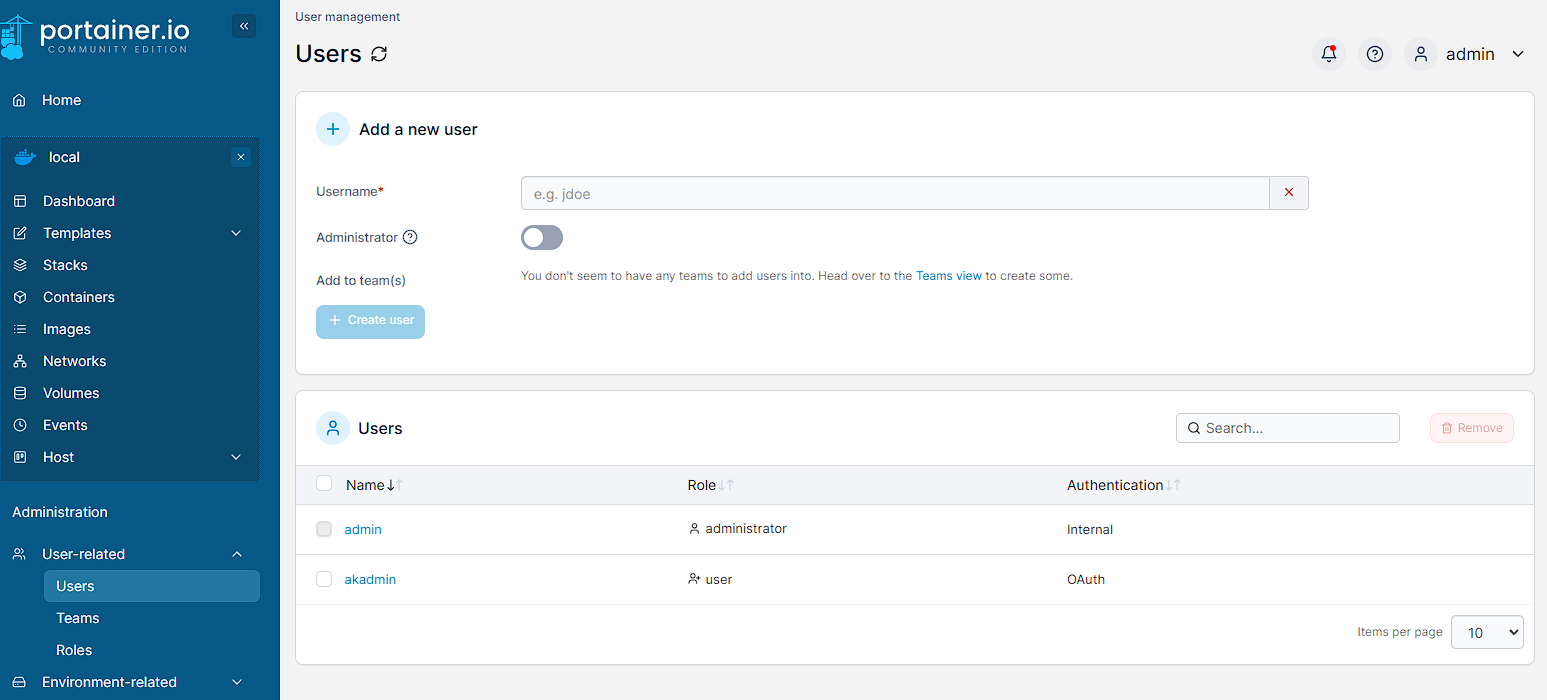
However, as akadmin can be seen, there is no Environments available to view and this is because this user currently has no permissions, I need to enable them from the current admin user in portainer, by re-logging as the this previous admin user. Under Administration -> User-related -> Users, the “new” akadmin account can be seen:
By opening up the akadmin user, there’s a toggle to enable Administrator:
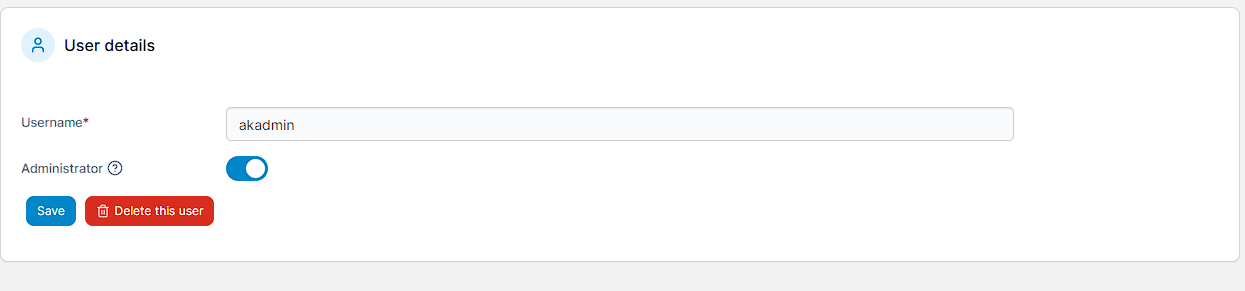
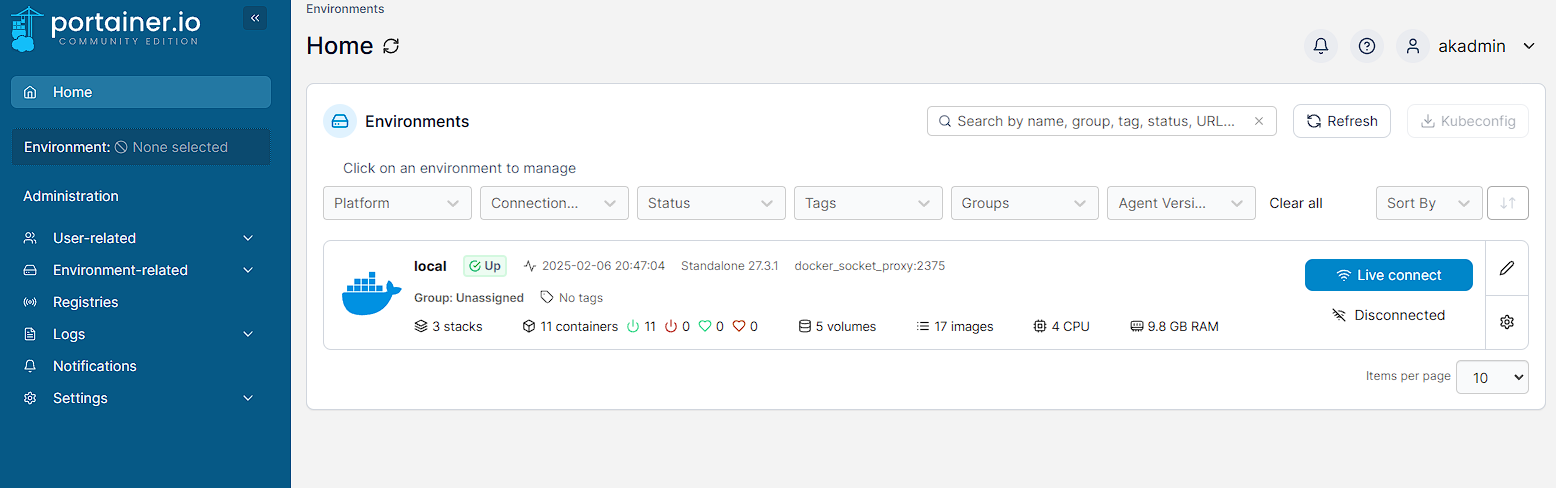
Pressing Save causes a toast confirming the user is saved, and then I can log in as akadmin again and see I now have access to the local environment:
Apache Guacamole setup
Guacamole is initially pretty simple to setup, but does require a small amount of additional configuration based on using an extension that provides SSO support.
Apache Guacamole environment variables
In addition to the general environment variables, Guacamole uses a few environment variables:
bash
Apache Guacamole docker
Finding a container to run Guacamole was actually pretty hard. I ended up using flcontainers as running Apache Guacamole requires 3 separate applications: Guacamole itself, a database and a webserver. the Docker image from flcontainers packages Guacamole, Postgres and Tomcat into a single container which massively simplifies deployment. Additionally, this container includes a set of extensions that allow single sign on to work.
yaml
As with the previous containers, I can start this by running docker compose up -d and then view the running container details with sudo docker ps -f name=guacamole:
text
Initial boot of this container takes a while, fortunately Dozzle provides quick feedback for when this container is ready
Once this container is running, I can then check this is working by going to https://guacamole.<homelab domain>/. However, there should be an error shown:

This is because in the default install, environment variables aren’t enabled. So I need to do this via a config file that has been generated into the volume I’m using. Specifically, the guacamole.properties file. in the flcontainers image, this lives in the guacamole of the volume found at <homelab folder>/data/management/guacamole/guacamole/guacamole.properties. This file will have some initial config in it around the Postgres database, but needs to have enable-environment-properties: true added, so that the full file will look something like this:
yaml
After doing this, use the save as root extension in Visual Studio Code to save the file and restart the Apache Guacamole container with the command sudo docker restart guacamole.
Once the container has restarted, the login screen will show up correctly:
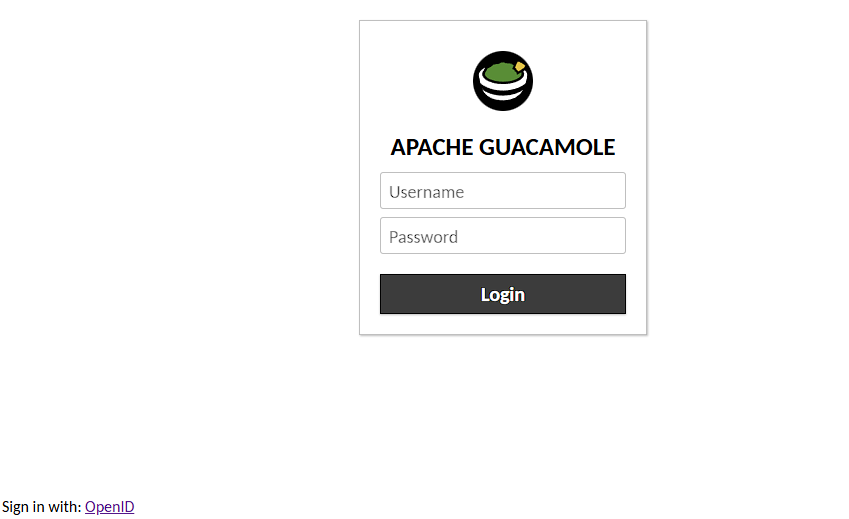
I can test that the Authentik integration is working by pressing the Sign in with: OpenID link in the bottom left:
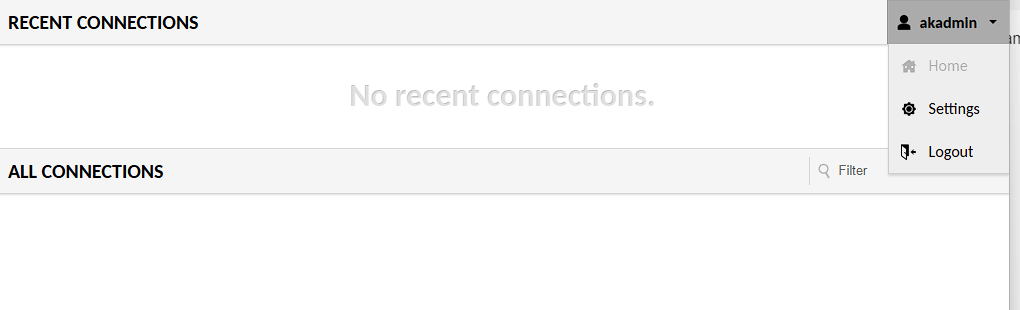
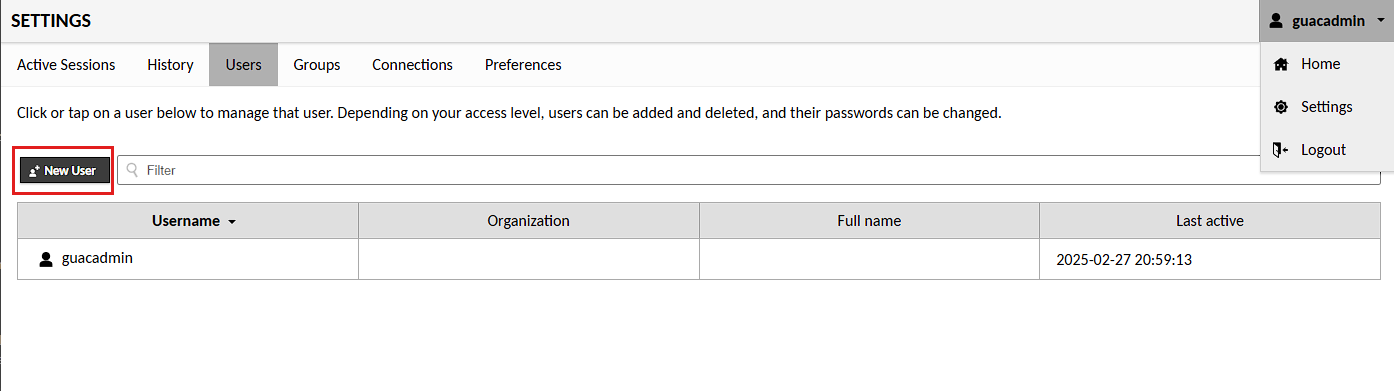
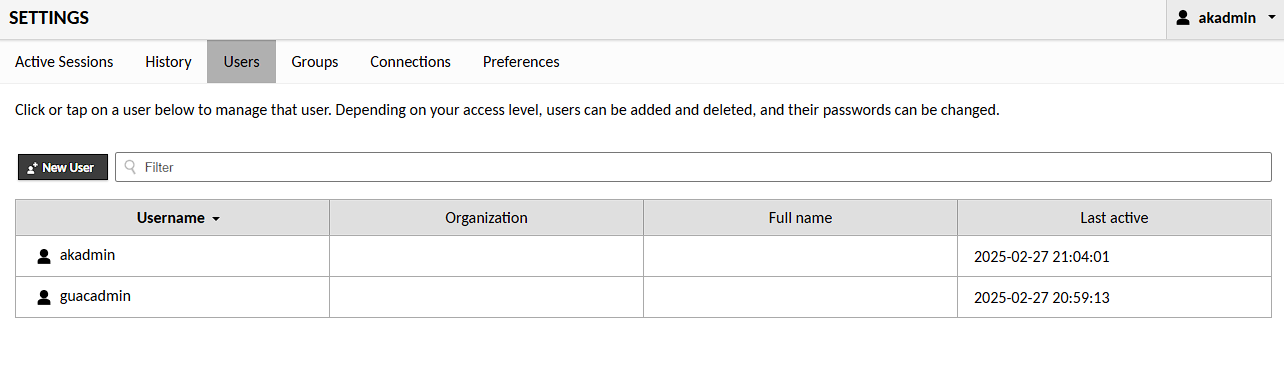
However, by default this user is not an admin, and so can’t be used to configure clients. Instead I need to login with the default admin user, which is guacadmin. The default password for this user is also guacadmin. Once logged in, I go to settings in the dropdown, select Users and then press New User:
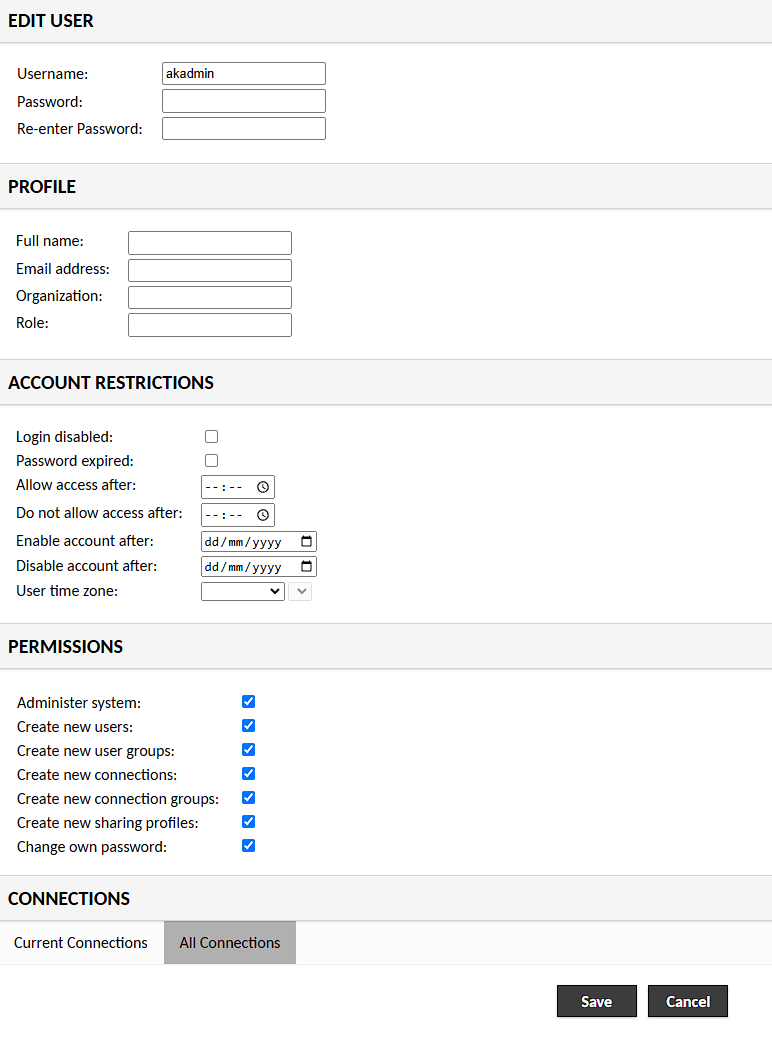
In this screen, I set the username to the name of my authentik user (akadmin in my case), and then select all the permissions I want to give this new admin user, followed by pressing Save:
This is all I need to do with this user, so I can then logout and log back in with the Authentik user. I can then verify that this user is working as an admin by going to the settings page and I can now see the option to view and create users:
NOTE: at this point, it’s a good idea to either delete or change the password for the guacadmin user as this is no longer required.
Creating an SSH connection
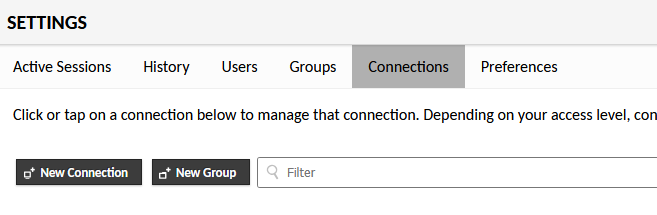
Apache Guacamole has a large amount of supported protocols, but the one I’m most interested in is SSH as it’s the one I need to access my various virtual machines remotely. In order to demonstrate this, I’m going to add a connection to the Proxmox instance that my Docker VM is running on. To do this I need to go to Settings -> Connections -> New Connection:
There’s a lot of settings here, but what I’ve set is as followed:
- named the connection
Proxmox - changed the Protocol to SSH
- set the hostname to be
https://proxmox.<homelab domain> - set the port to
22
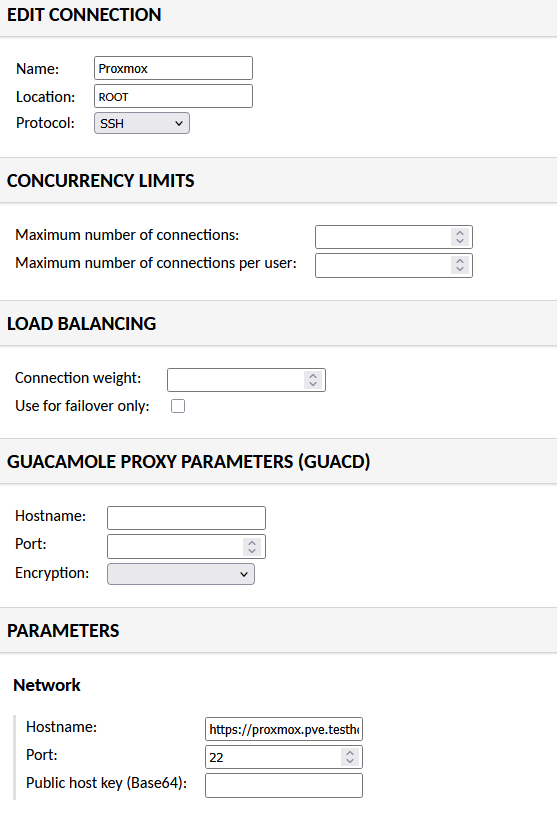
I can also set a private key or username and password for authentication, but I’m not going to do that as I don’t want anybody with access to the console to be logged in straight to the console of my virtual machine.
After I’ve saved the new connection, I can now view and login to the connection from the guacamole homepage:

Clicking on the link allows me to access an SSH console to login to my Proxmox instance.
NOTE: I can exit the full screen SSH session by entering the command logout.
Apache Guacamole losing thoughts
This is a really powerful tool that I’m not currently making full use of. For instance, I currently have sessions created for Proxmox, the Fileserver, the Docker VM and my OPNsense router but I could extend this out to my Windows desktop and various other computers in my house. However, I really like the ability to log into a browser window from essentially anywhere in the world (using Tailscale) and be able to quickly launch an SSH session to do what I want.
Watchtower setup
Watchtower is entirely driven by the Docker compose file and has no GUI. As such it’s both simple to setup and has a lot of options that need to be searched for to access. However, as of writing this article, Watchtower hasn’t actually been updated in a while, but it’s pretty feature complete and as such I don’t have any issues running this in my environment. However, I might look for something a little newer in the future.
NOTE: Watchtower will only work with containers being pulled from a Docker repository, containers that are built using a Dockerfile (like Caddy) will still need to be updated manually
Watchtower environment variables
Watchtower uses a single environment variable that requires some explanation. This is a Discord Webhook and Watchtower uses Shoutrrr for it’s notification system. In order to get this URL, within Discord I go to Channel Settings -> Integrations -> Webhooks and create a new Webhook called watchtower:
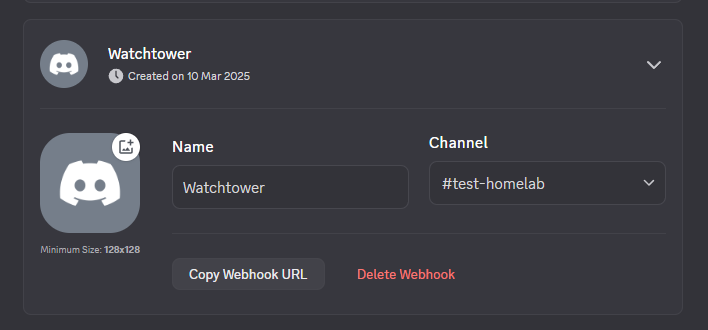
From here I can grab the Webhook URL using Copy Webhook URL, which contains the 2 variables needed by Watchtower to connect to Discord properly and is something like this - https://discord.com/api/webhooks/<webhook id>/<token>, which can then be converted into the environment variable below:
bash
Watchtower Docker
As mentioned earlier, this is an older container, but it does work perfectly well at what it does.
yaml
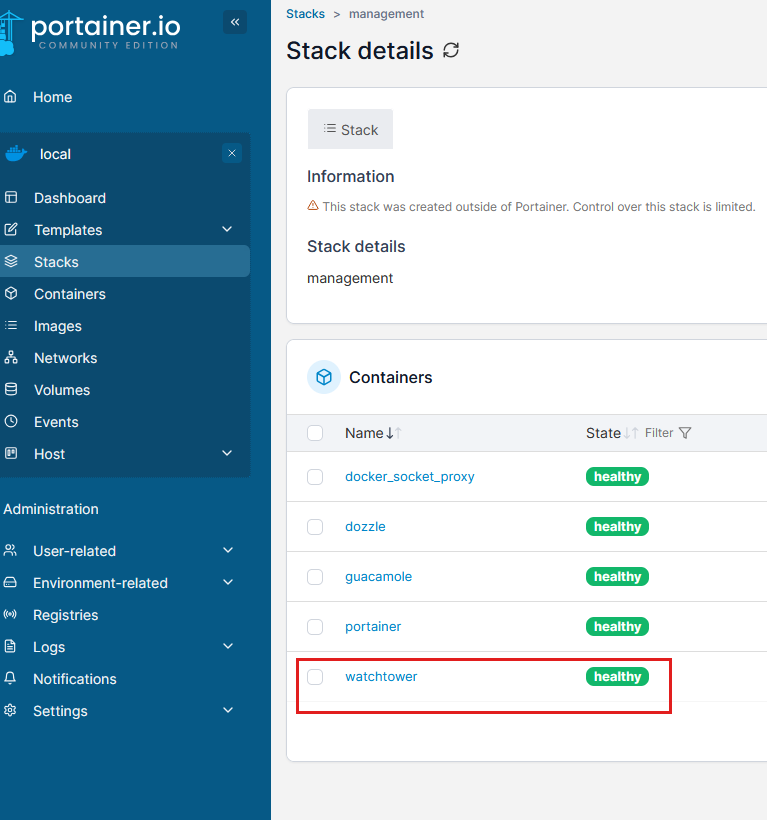
After running the container using docker compose up -d I can view view the running container details with sudo docker ps -f name=watchtower, but I can now use Portainer or Dozzle to view that the container is running and healthy:
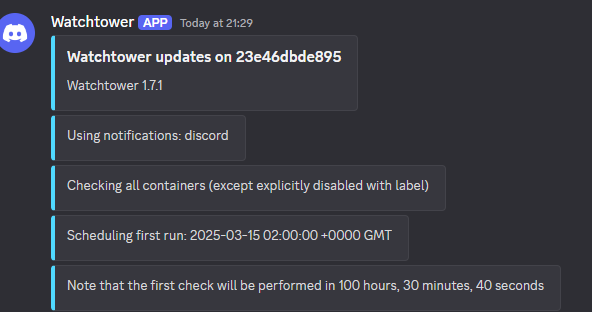
Additionally, I can see a notification in Discord to show that Watchtower has started listening for container updates:
Disabling watchtower
While I don’t personally have any containers I’ve disabled watchtower on, it’s possible to do this by adding to the labels block of the Docker compose in the container that we want to disable Watchtower, for example:
yaml
Watchtower closing thoughts
I like how simple it is to get Watchtower running and that it’s silent in the background. However, as mentioned it’s nearly unmaintained now so I will probably look for an alternative at some point.
Netboot XYZ setup
Netboot just requires a single container to setup, but it does use an interesting way of pulling images from the networked storage created in a previous article, as well as setting OPNsense to use netboot as the network boot server.
However, Netboot does use storage pulled from the NAS discussed earlier in this series. In order to allow Docker to work with the NAS, I’m using CIFS as it’s cross-platform and works out of the box with Docker. It is an older format now, but it does still work.
Fileserver setup
Really all the fileserver needs is a folder created to hold the images and other assets that could be useful for Netboot. This structure looks like this:
text
I should note, I don’t actual use networked assets, but it’s useful to have in case I want to start working with it later.
Netboot environment
bash
Netboot docker
yaml
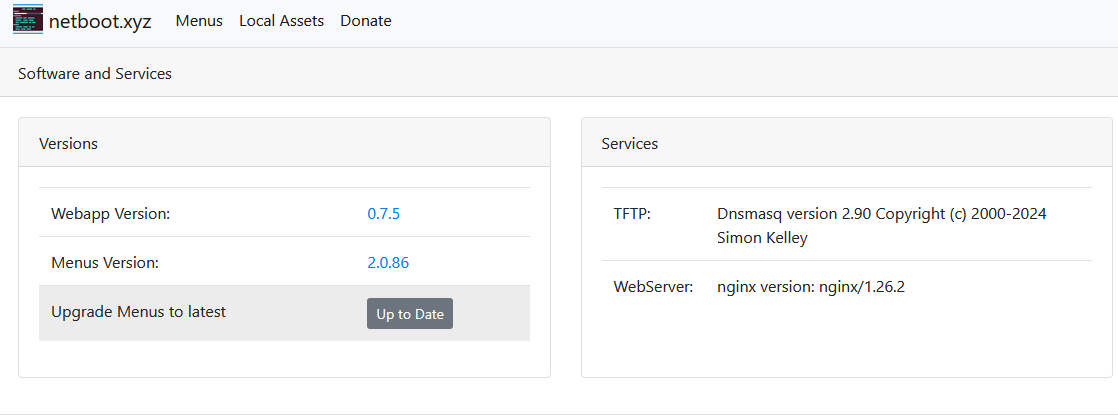
Getting the container to start can once again be done with sudo docker compose up -d and waiting for the container to start up. Once this is done, I can either use sudo docker ps -f name=netboot, or go to Portainer to view the container is working. However, it’s easy to view this service through the web portal, by going to https://netboot.pve.<homelab URL> and viewing the frontpage of the admin console:
Using netboot as a PXE server
A PXE server requires some configuration on the router that is used to connect to the internet and each make/model of router will have a slightly different format for doing this. In my case, I’m using OPNsense and so this documentation will focus on how to setup this functionality.
Before moving onto configuration, it needs to be understood that there are 2 main forms of firmware that are used to run the software on a computer. BIOS, which is older, but still common in the enterprise space, and UEFI, which is newer and used in the consumer space. Additionally, there are differences between ARM and x86/x64 architectures. I want to be able to launch all of these from a single configuration. In order to do that, I need to do the below.
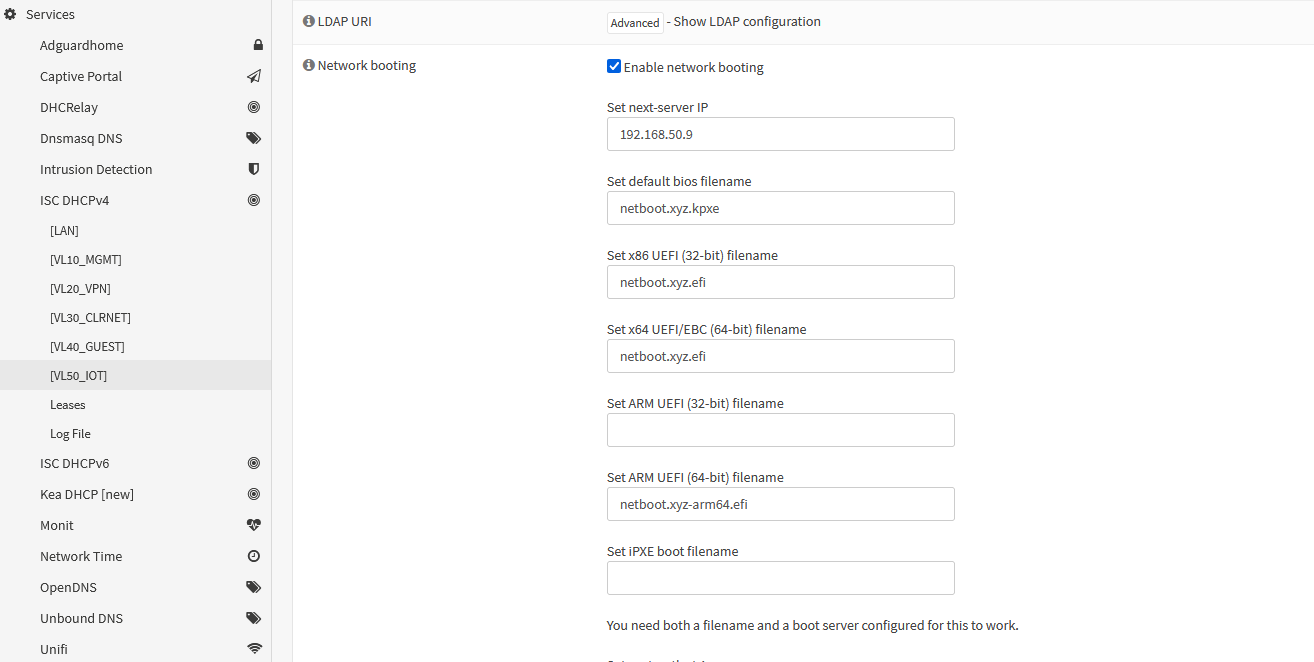
Within OPNsense head to Services -> ISC DHCP V4 -> the VLAN/network that needs to be configured (VL50_IOT in my case) -> expand out the Network booting option and then fill the following settings out:
| Setting name | Value | Meaning |
|---|---|---|
| Set next-server IP | 0.0.0.0 | The IP address that points to the Docker server hosting Netboot |
| Set default bios filename | netboot.xyz.kpxe | The name of the configuration file for a BIOS machine |
| Set x86 UEFI (32-bit) filename | netboot.xyz.efi | The name of the configuration file for an x86 UEFI machine |
| Set x64 UEFI/EBC (64-bit) filename | netboot.xyz.efi | The name of the configuration file for an x64 UEFI machine |
| Set ARM UEFI (32-bit) filename | Netboot does not support Arm32 | |
| Set ARM UEFI (64-bit) filename | The name of the configuration file for an Arm64 UEFI machine | |
| Set iPXE boot filename | Setting this will override all the other configurations with the value here | |
| Set root-path string | Not required by Netboot |
Then tick Enable network booting and then save the config.
This will look something like this:
Testing the setup
This is all the configuration required to get the basic PXE server up and running, sop I just need to test this using virtual machine and Proxmox. In this case, I’m going to show how to create a UEFI machine, as it requires a couple of changes not required by a BIOS in the System setup, though I’ll note the differences.
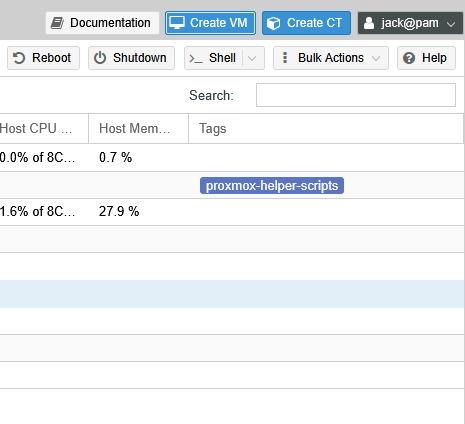
To start with, as in the Docker virtual machine setup guide, select the Create a New VM button at the top right:
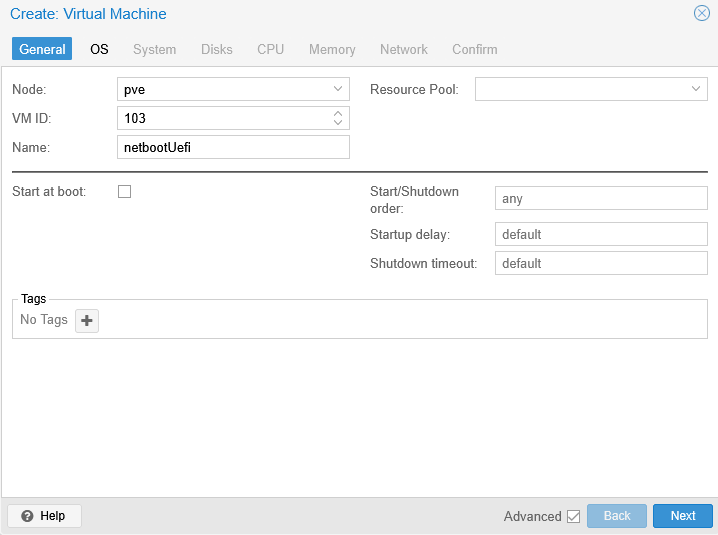
Then set a name for the virtual machine, in this case I chose netbootUEFI and select Next. As this is a test machine, I’m not setting this to start at boot, but in normal setup I would enable this option:
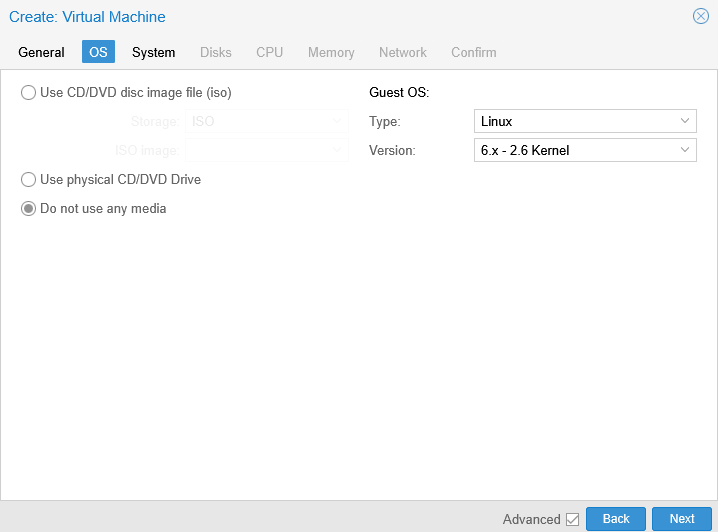
In order to use Netboot, I need to select Do not use any media and select Next. This option allows the VM to start without OS in the drive, meaning it will use the PXE server instead:
Configuring a UEFI virtual machine involves switching the default BIOS setting to OVMF (UEFI) and importantly, deselecting the Pre-enroll keys option. Pre-enrolled keys are a component of Microsoft’s Secure Boot architecture and are essential for running their operating systems. However, these keys are not necessary for Linux virtual machines. In fact, leaving them enabled will interfere with the boot process, specifically preventing the VM from booting to the PXE server. Lastly, for the EFI Storage location, VM-Drives has been selected due to its larger capacity.
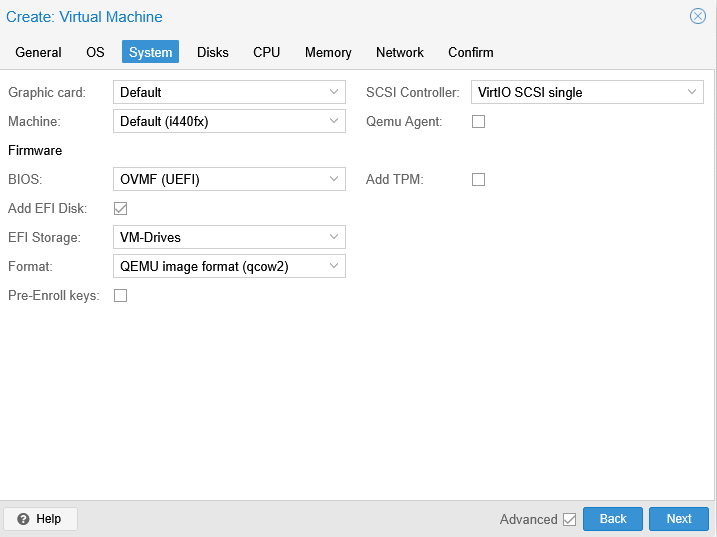
NOTE: for BIOS, leave this as the default SeaBIOS
At this point, I leave everything as there default settings, but the settings for disks, CPU and memory should be modified to fit the needs of the machine.
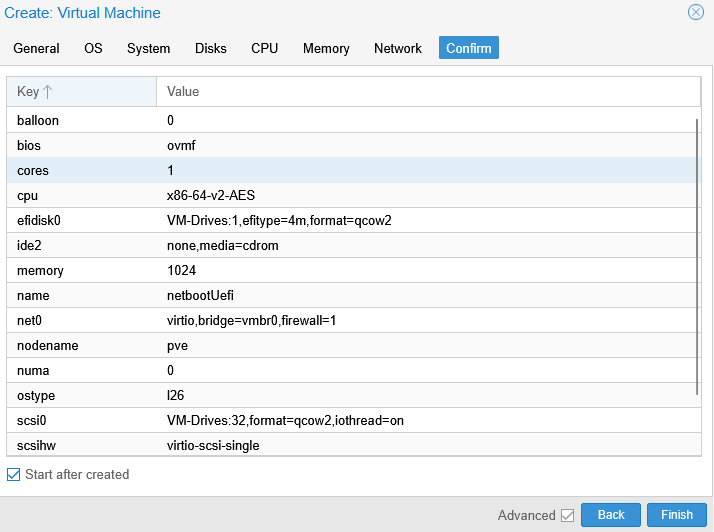
For reference, here is the final summary of the machine, with Start after created enabled to automatically start the VM.
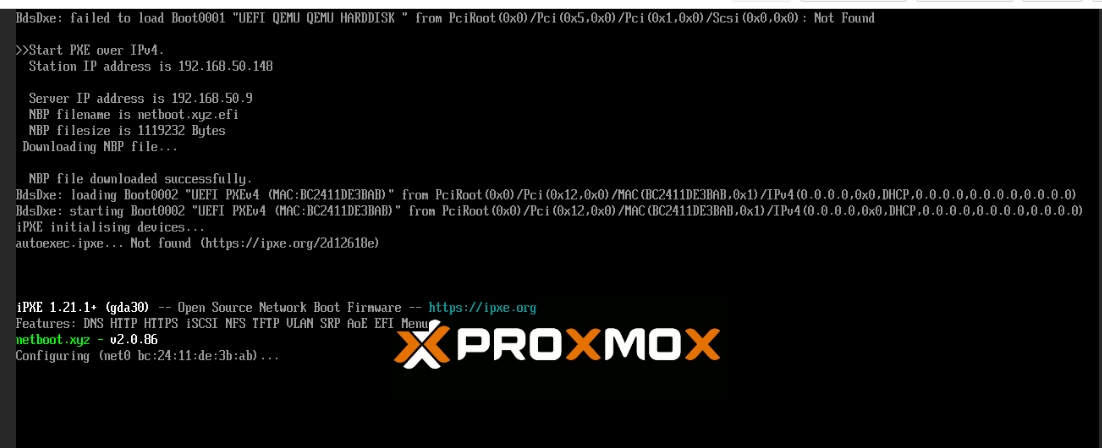
As the machine starts up, a clear sign the PXE server is working is that the start-up process contains details of the PXE server:
Shortly after this, the start page should appear showing (among other things) Distrbutions for Linux installs, and utilities for various helpers. This screen is navigable with a keyboard, using the Esc key to go back:
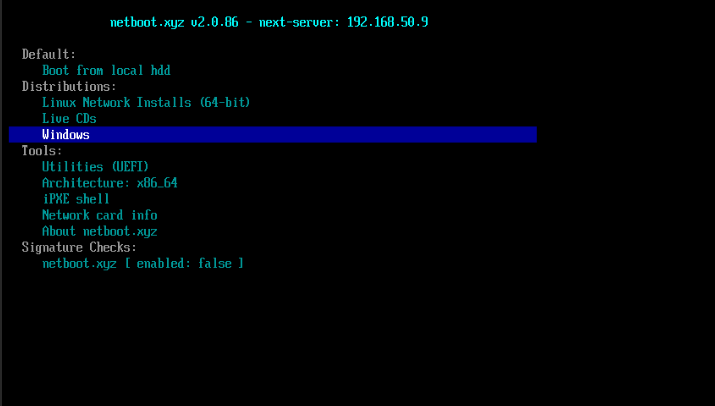
NOTE: these options can differ between BIOS and UEFI, for example the BIOS version of Netboot contains a copy of Memtest86 by default, which would have been very helpful in diagnosing the issues with RAM I came across during first install.
At this point, Netboot is fully installed and configured. There are more things that can be done, such as creating ipxe files and local assets, but these are out of scope of this guide.
Semaphore setup
I did have some issues getting Semaphore working due requiring some setup in a config.json file that’s generated during creation for setting the OAuth credentials properly. Additionally, the “default” setup of Semaphore uses an in-built bolt database, but given I have more experience with Postgres, I’ve decided to use that instead despite the added complexity.
Semaphore folder setup
Semaphore requires some folders to be setup in data, meaning that the full set of folders looks like this:
text
Semaphore environment
Semaphore has quite a few environment variables in my setup:
bash
NOTE: Details of how to get the Discord webhook URL can be found in the Authentication documentation, or in the Watchtower documentation earlier on in this guide.
NOTE: Discord using slack requires that the webhook URL be appended with /slack
Semaphore docker
yaml
Now that the Compose is set, running sudo docker compose up -d will pull and start the containers. After waiting a few minutes for Caddy to pull in the correct certificates, the web app should be available at semaphore.pve.<host>:

Initial login can be completed using the SEMAPHORE_ADMIN environment variable for username and SEMAPHORE_ADMIN_PASSWORD for the password, which should cause the following screen to display:

Enabling SSO in Semaphore
Semaphore has the ability to use SSO, but it’s not enabled by default. Instead it needs to be a enabled from a config.json file generated in the <homelab folder>\data\semaphore\base folder that should have been created in the install process. This file then needs the following config block added to enable SSO:
json
Note: Slug in the provider_url is oauth if following the documentation in the Authentik guide
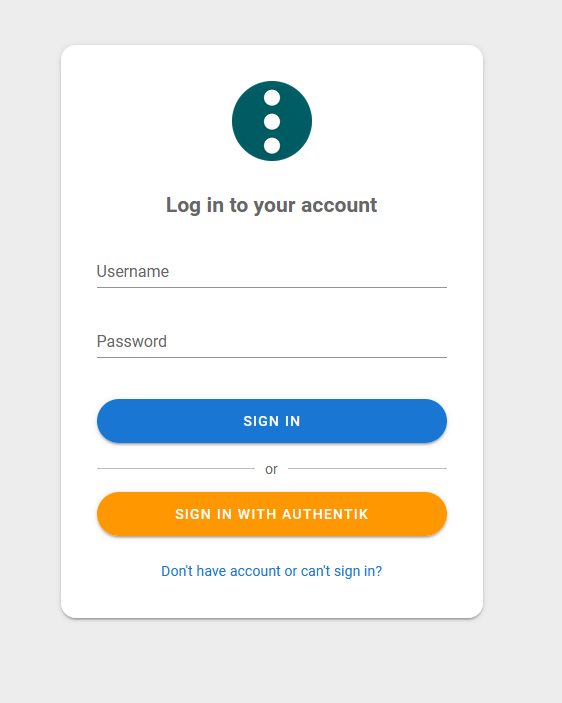
Once this is added and saved, the restart the container with sudo docker restart semaphore, and there should now be an option to login to the web UI with Authentik:
At this point it’s possible to login with the Authentik user, but given this is the main user, it needs to be converted into an admin account using the initial admin user.

To do this, login as the admin user, click on the username in the bottom left and select Users:

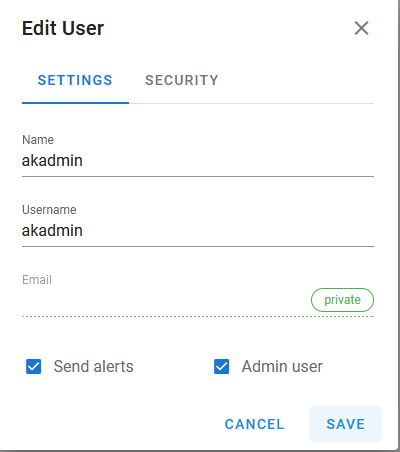
Within this screen, click edit button, then modify the newly created user by enabling Admin user and Send alerts and then clicking SAVE:
Semaphore simple test project
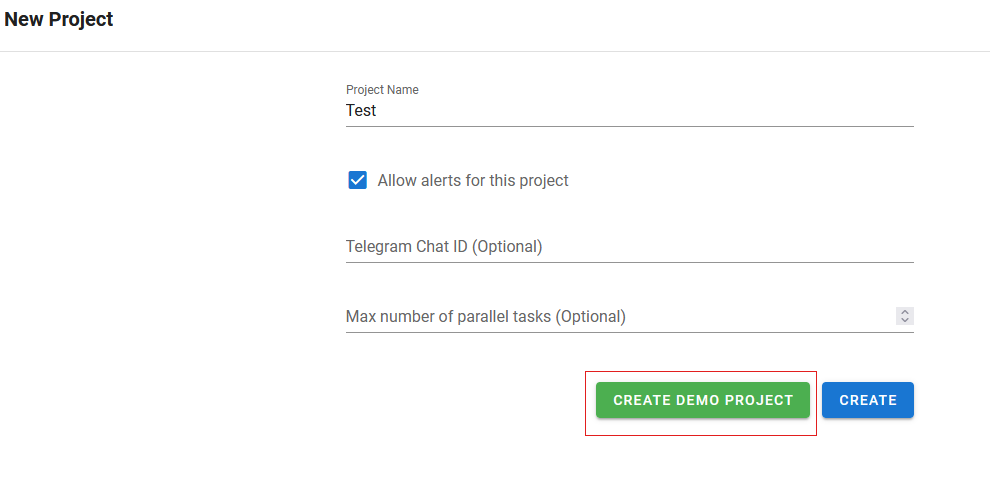
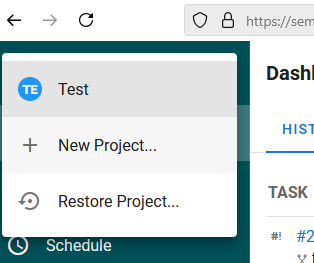
At this point, Semaphore is now installed and running, but testing the setup is still needed. This is pretty straightforward in Semaphore as the install has an option to create a demo project. To do this, just select the CREATE DEMO PROJECT option when creating the first project:
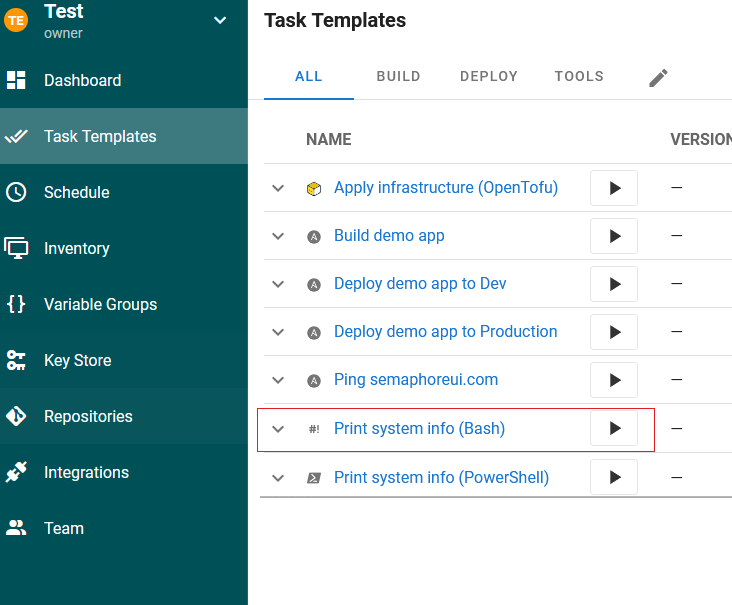
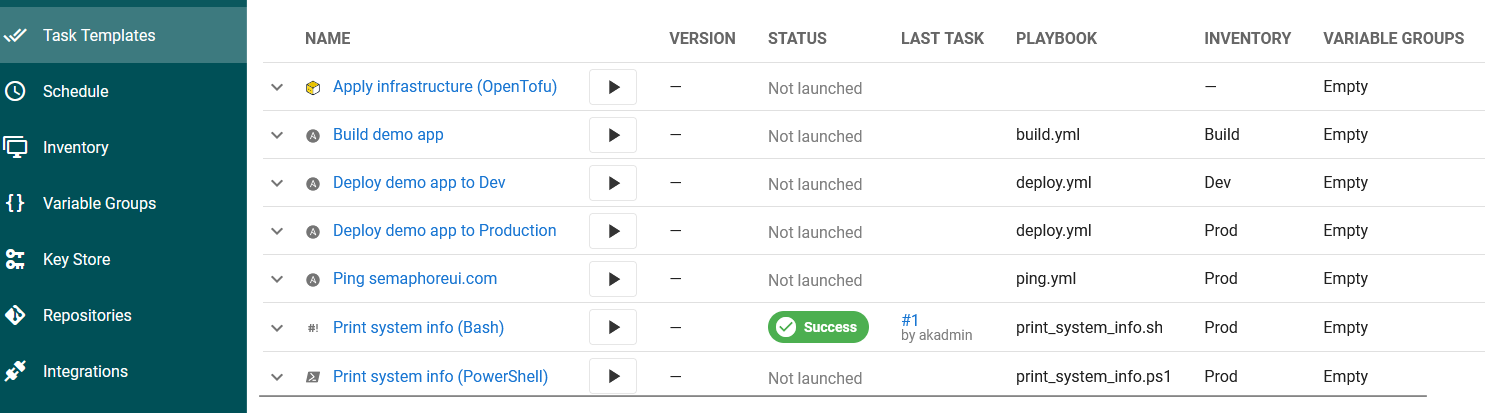
What this does is create a simple project, with a connection to the Semaphore demo Git repository that contains a set of task templates that can be used to show that Semaphore can provide information. In order to test this, just run the Print system info task in Task Templates by clicking the play button:
This then will open a window showing progress and eventually system info of the underlying hardware in a window with something like the following oputput:
text
Once this is done, the run will show up in the Dashboard under history, as well as the Task Templates screen showing successfully run and who ran the task last:
Setting up an actual test environment
While a full explanation of how Ansible works is outside the scope of this guide, I think it’s useful to show exactly how to get Semaphore working with a “real” setup.
Prerequisites
- Ubuntu server (or similar) with OpenSSH (and the Proxmox QEMU agent if using Proxmox) installed
- Netboot can be used to set this up quickly
- private Git repository
- Holds Ansible playlists
- I use Github
Additionally, a new project should be created in Semaphore:
Ansible git repository
Repository Contents
Semaphore uses a git repository to hold Ansible playbooks, so to demonstrate the end to end, I created a simple playbook designed to ping the hosts with a ping command. This command basically connects to a machine and then runs a python script that echo’s PONG back to the console.
This repository has a single file at the root called ping.yml with the below contents:
yaml
Github access to SSH
As this is a private repository, credentials are required to access Github, and the easiest type to use is SSH. There are more detailed instructions on how to do this here, but the steps are as follows:
From a shell, run the following command to generate a certificate:
shell
Then save the file without entering a password and taking a note of the saved file location (by default it should be C:\Users\<username>/.ssh/id_ed25519 in Windows). This should provide a key (which is the private key) and key.pub (which is the public key).
Then in Github, click on your picture in the top right, then go to Settings -> SSH and GPG keys -> New SSH key and paste the public key into the Key box and then press Add SSH Key:
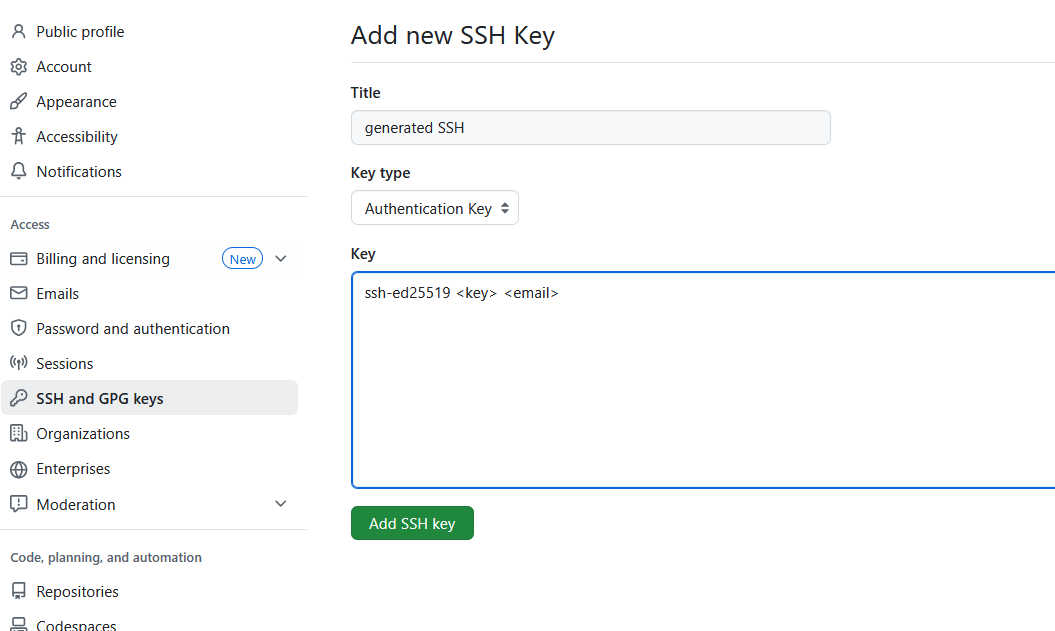
At this point, the Github account should be ready to accept an SSH connection.
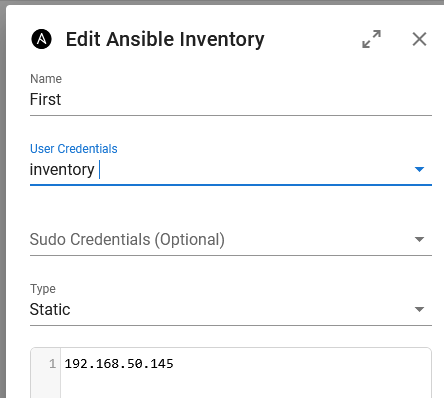
Creating an inventory
An inventory is where the IP addresses or hostnames of machines that will be deployed to using Ansible. In order to dop this, go to Inventory -> NEW INVENTORY -> Ansible Inventory:
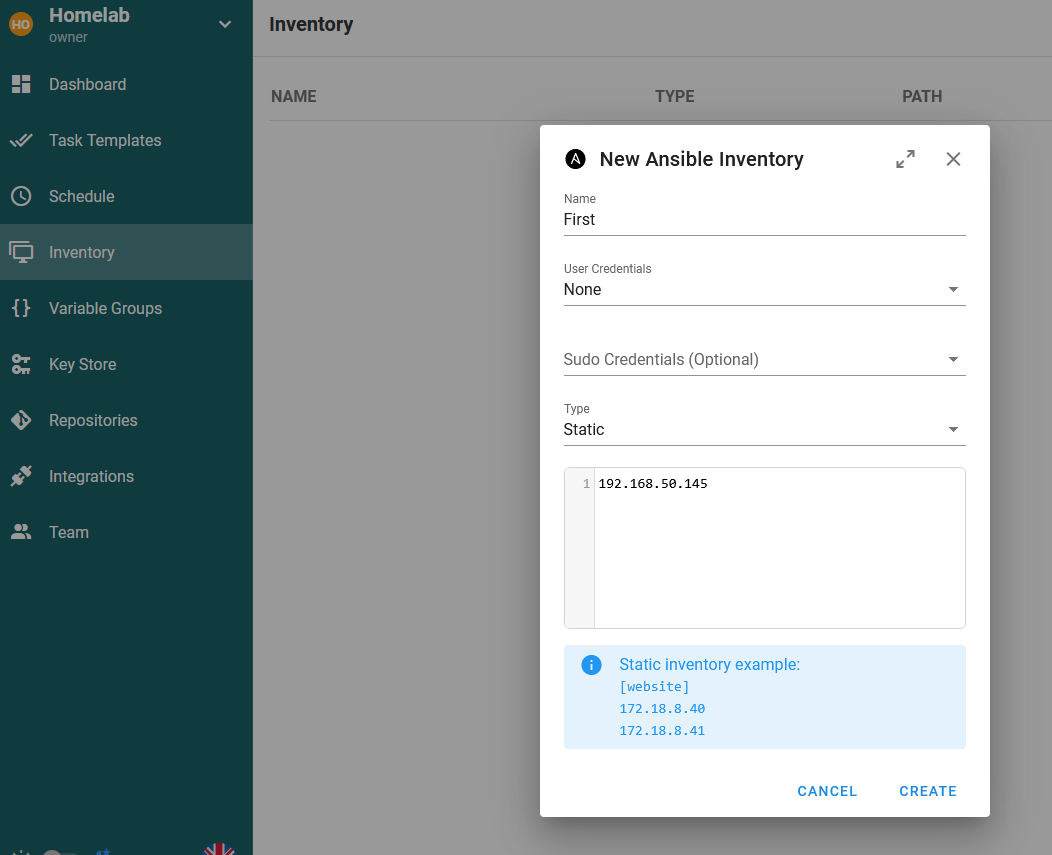
The following values are set:
Namecan be anything, as long as it’s rememberedUser CredentialsofNone- Type of
Staticas the most simple inventory to setup
NOTE: the credentials of None should be the default credentials created when the new project is. These currently won’t work as they aren’t real credentials, but can be used to help show that the connection to Github is working. If this isn’t there, they can be created in the Key Store with a Type of None.
Accessing Github in Semaphore
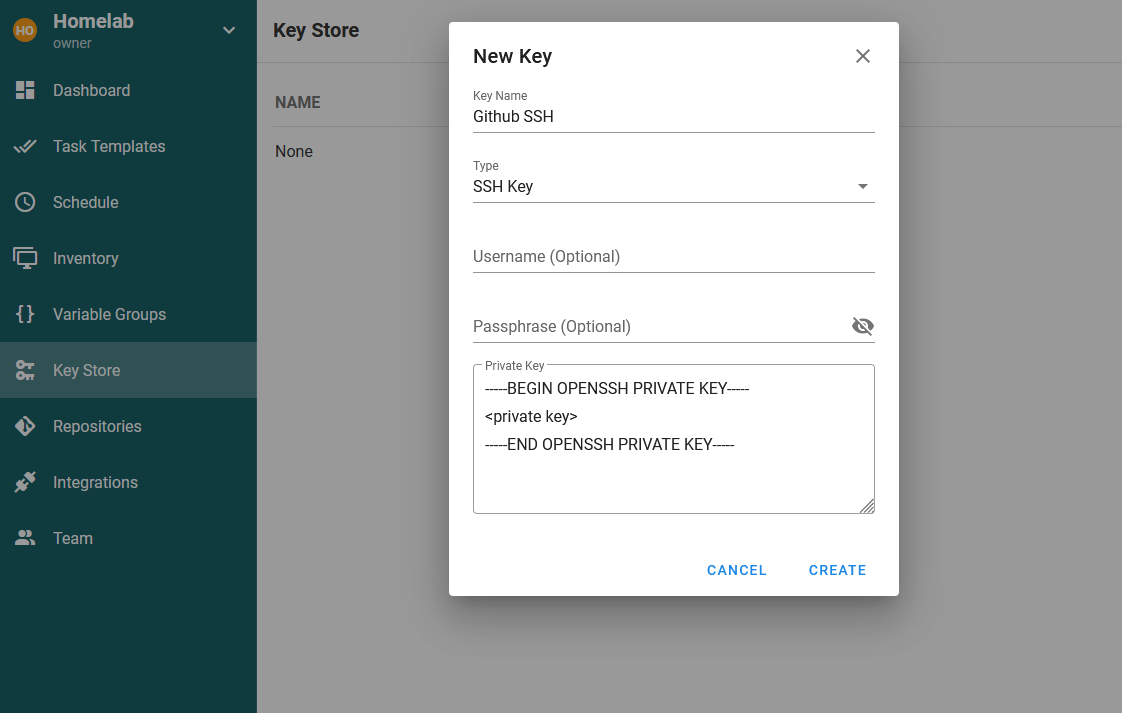
Within Semaphore, the SSH key needs to be added first, and this can be done by going to Key Store -> NEW KEY, setting a memorable name, selecting the Type to be SSH Key and then pasting in the generated private key:
Once this is done, grab the SSH Clone URL from Github, then in Semaphore go to Repositories -> NEW REPOSITORY and set it like the below:
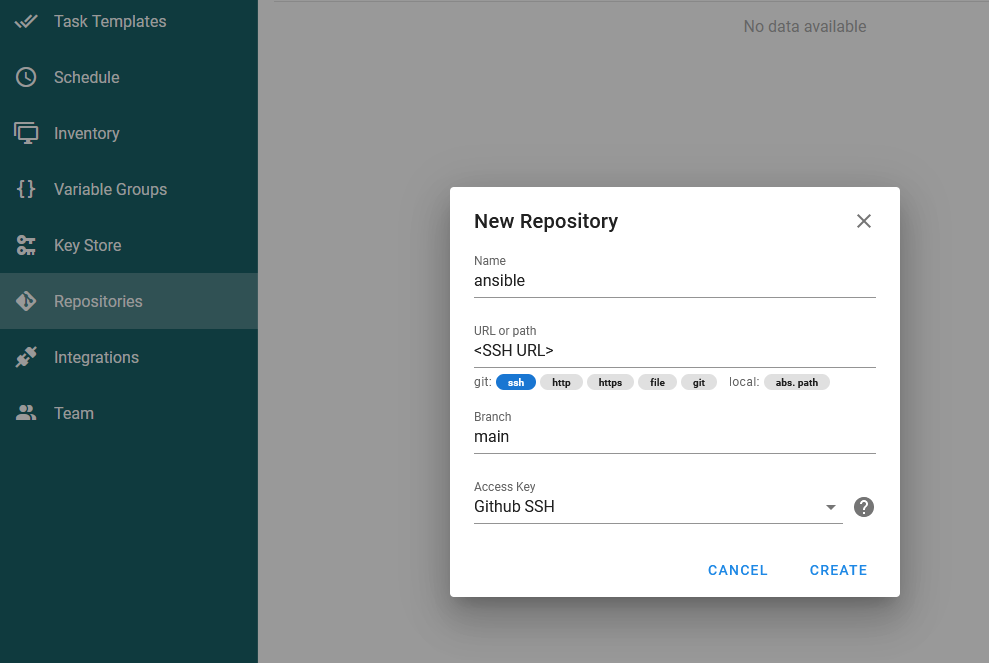
NOTE: the Branch name of main is the name of the default branch created by Github.
Running the Ping playbook
Now that the inventory and Github connections are completed, a Task Template for the Ping playbook can be created to verify that the connection to Github is working. To do this can be done from Task Templates -> NEW TEMPLATE -> Ansible Playbook:
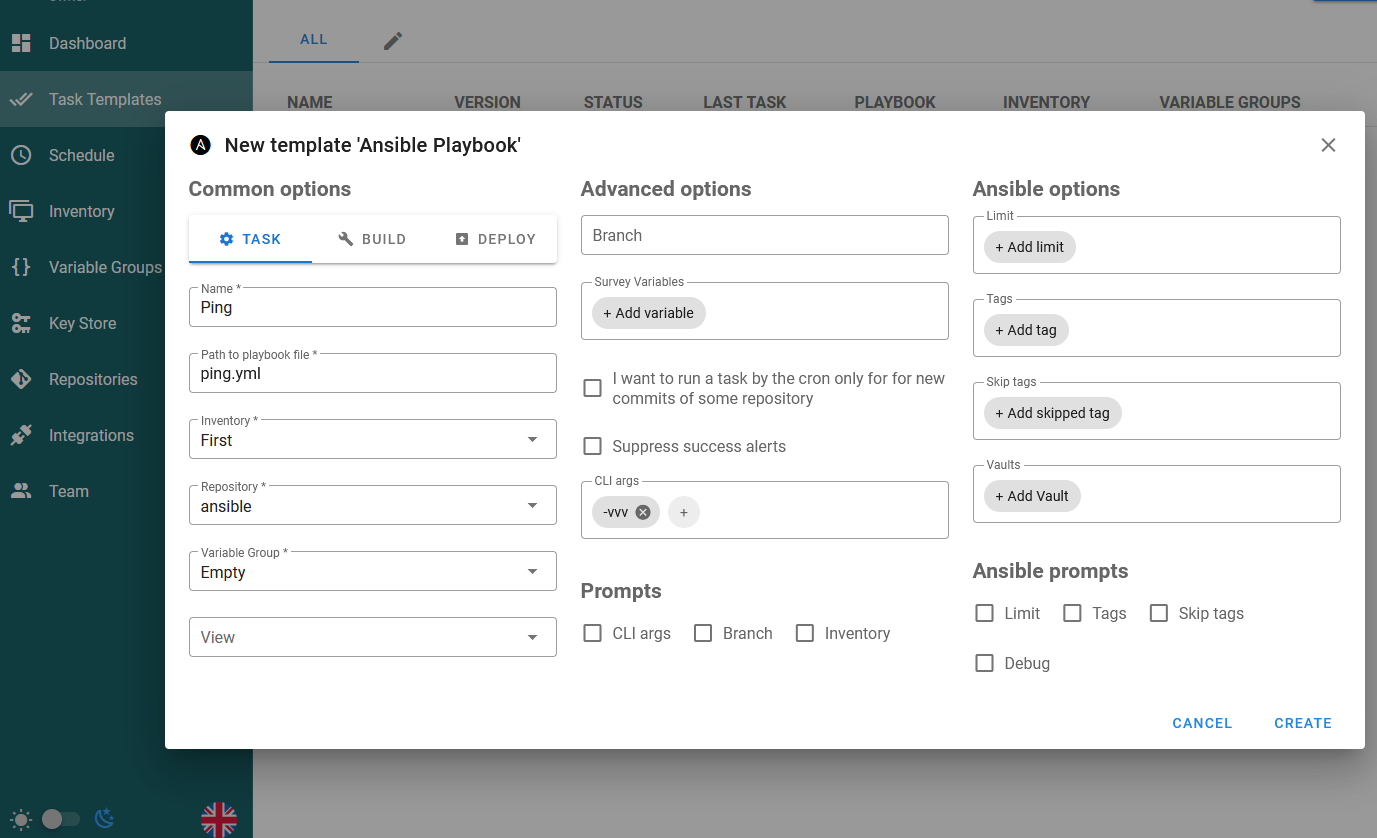
The values set are as follows
Nameset to something memorablePAth to playbook fileis the location ofping.ymlin the Git repositoryInventoryis the inventory created aboveRepositoryis the repository created aboveVariable Groupis the default empty variable group as this simple Playbook doesn’t use any variablesCLI argshas-vvvadded, as this increases the logging toInfolevel as the default logging can be a bit difficult to see what’s going on.
Once CREATE has been clicked, the Playlist can be run to verify that the Task Template is working and able to download the Playbook from Github:
text
However, the Playbook should still fail due to the password being sent to the machine being None, which is incorrect. The next step will show how to fix this.
Configuring those inventory connection
While it’s absolutely possible to use Login with password from the Key Store, it’s a better idea to use SSH where possible, so this guide will show the process for setting up the machine to connect via an SSH key instead of password authentication.
To start with log onto the machine and move to either the .ssh or an empty directory and run sudo ssh-keygen -t ed25519 -f <filename>, this should generate a public and private key named after the filename, for example using -f test, would produce the following:
text
with test being the private key and test.pub being the public key.
In order to allow access via SSH, the server needs to have the key added to the authorized_keys file in the .ssh directory, but there’s fortunately a shortcut to add this using the command sudo ssh-copy-id add <public key location> <username>@<ip address>, which would produce the following results in ~/.ssh/authorized_keys, when using jack@192.168.50.145 as the username and IP address:
text
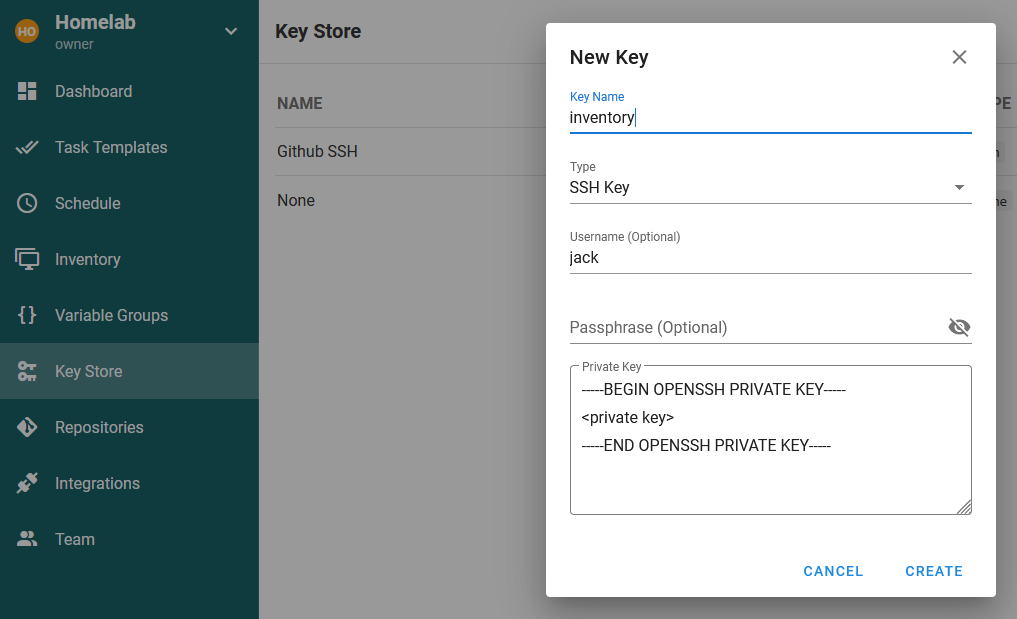
The public key is now setup to be used by the machine, now Semaphore needs to be set to use this public key to authenticate. To do this, go to key Store -> NEW KEY in Semaphore and set the following values:
| Key | value | Explanation |
|---|---|---|
| Key Name | inventory | Something memorable |
| Type | SSH Key | This would be Login with password, if just using a login directly |
| Username | whatever is set | This is whatever was entered when performing ssh-copy-id, which was jack in my case |
| Passphrase | whatever is set | This is whatever was entered when performing ssh-keygen |
| Private Key | <private key> |
Copied from the test file in the example given above |
which looks like this:
Then go to Inventory -> <inventory name> -> Edit and set the User Credentials to be the newly created credential in the Key Store:
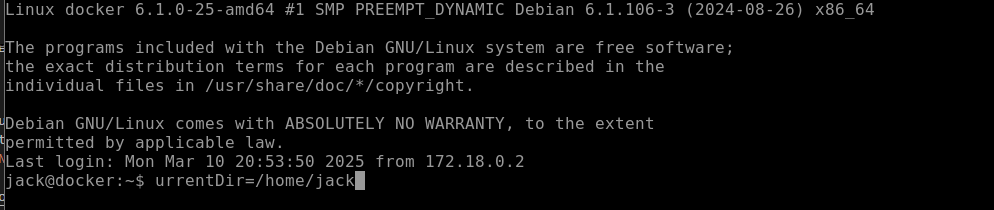
Once saved, go to Task Templates and run the Ping again and the inventory should now be working:
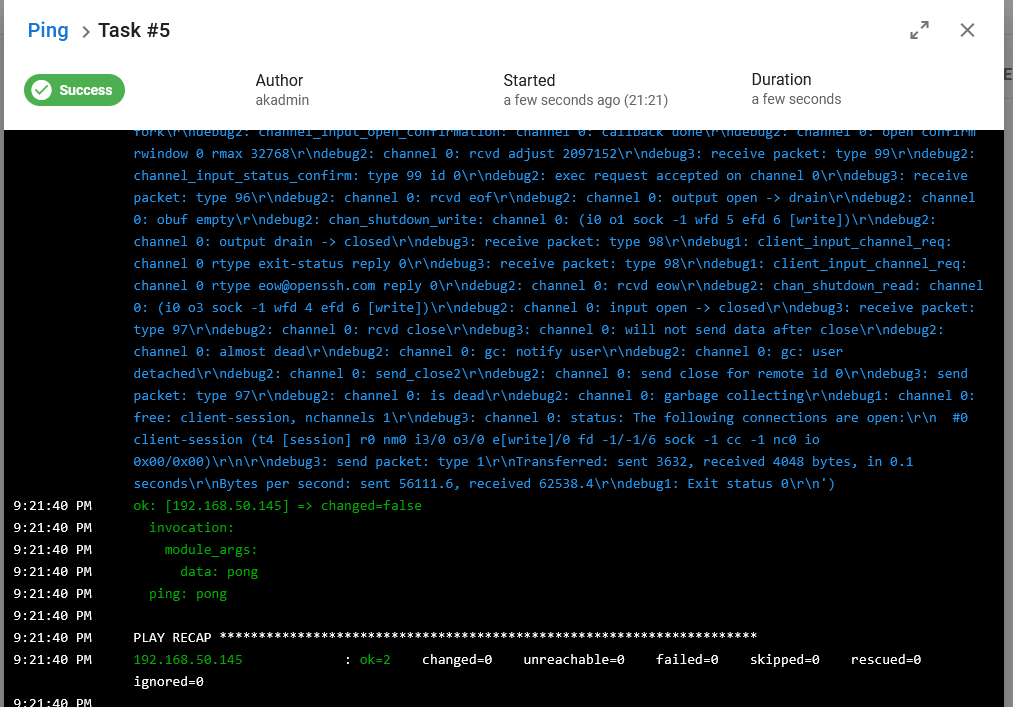
As can be seen above, I get a ping: pong back, showing the Python script executed and at this point, everything is setup and Ansible is now ready to be run.
Closing thoughts
This article was a lot longer than I thought it would be as most of these applications were streamlined in setup. However, actually writing down how I did everything made me realize how much work there is in actually setting these services up! However, now that they are, I’ve found they don’t change very often.
Over the past year or so of use, I’ve found Dozzle to be the most helpful to me personally as I’ve constantly checked this service whenever there’s an issue. However, I do find myself only reaching for Portainer when I can’t be bothered to SSH into my server to restart/stop something. Related to this, I’ve also very rarely found myself in a situation where I didn’t have an SSH client available and a list of server addresses, so just using a terminal has been quicker than using Apache Guacamole. In terms of Netboot and Semaphore, I’ve not had to create another machine recently so these haven’t had much use (outside of writing this guide), but I’m still happy I have these as they definitely address some pain points I’ve historically had when I get the urge to build a new machine. Finally, Watchtower has been brilliant, I’ve not touched it at all and it’s just ran quietly in the background. However, I do feel the need to point out that some of the containers that Watchtower has pulled have been “broken” due to changes in configuration.
In the future, I think the only thing I might change is to look at Komodo or Dockge as replacement to Portainer as these services feel like they would fit my usage a bit better.