
Preface
This article is going to discuss the first set of containers I want my homelab to run, which is going to be containers that provide networking abilities to other containers. Primarily, this is going to include a reverse proxy and a VPN for access outside of my home. This set of containers is pretty easy to get started, but troubleshooting can be complex, especially with a reverse proxy, so I’ll also be spinning up a container that can be used for testing that everything fits together.
Reverse proxy
In simple terms, a reverse proxy sits in front of a web server and forwards requests to it. The main benefit of doing this is to shield servers from direct access and for providing separation between the server and clients. This is useful for multiple reasons for example, being able to replace the server or load balancing without impacting calling clients. Additionally, reverse proxies can be used to decorate requests with additional headers or information that is useful internally, but not required by an external client.
The main reason for me to use a reverse proxy, is that it allows me to talk to my containers using SSL for HTTPS, rather than via an IP address or having to constantly accept warnings from screens like the below:
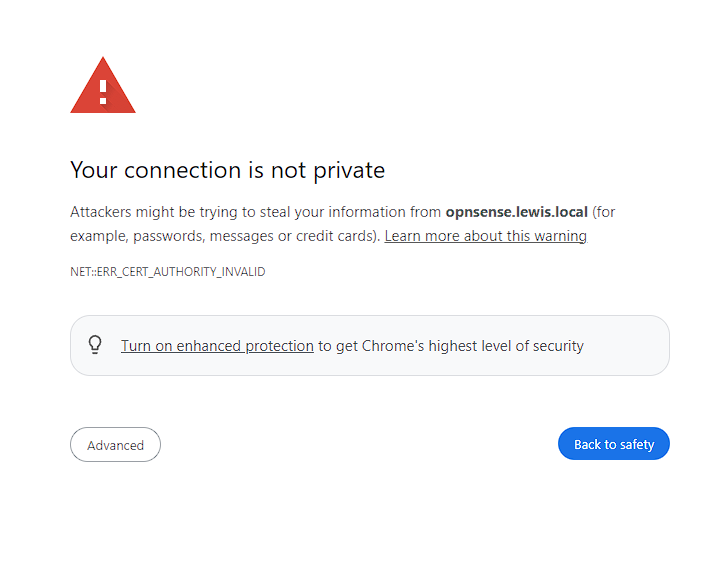
It might seem small, but this is so annoying to constantly deal with. As such, having a way to just set this up and not have to see them again is worth the difficulty of figuring out how to configure a reverse proxy.
Choices
There’s a few programs I considered and while I’m going to go through the pros and cons of each, it’s worth showing off the items I considered.
- Nginx Proxy Manager
- Extremely powerful, but can be somewhat difficult to setup due to needing to configure a lot more than the other options. Additionally, not designed to be setup directly in Docker, however, it does have a web UI to simplify configuration.
- Traefik
- Can be configured straight through Docker using the
labeldirective, but medium setup difficulty. Has a web UI for showing handled routes
- Can be configured straight through Docker using the
- Caddy
- Felt like the easiest to setup, but no direct integration with Docker and no web UI
Considerations
In order to pick which solution I wanted, the following criteria are what I was considering when trying to pick out the solution that would work for me:
- Simple setup
- Configuration via Docker
- Automatic SSL renewal
- Easy integration with my chosen domain provider
- Well supported by the community
My choice
After some evaluation and testing, I decided to go with Caddy. The automated SSL renewal was extremely simple to implement and the Caddyfile notation was simpler to understand than the other options. The main downside to Caddy is the inability to configure by Docker labels. However, I’m able to work around this using the Caddy docker proxy which enables me to write Caddyfile directives as labels in a similar way to Traefik. Additionally, I’m still able to use a Caddyfile for managing services that sit outside of the Docker ecosystem, like the Proxmox server itself.
The Caddy docker proxy is essentially converting labels into the Caddyfile language. However, it’s perfectly possible to continue to use a Caddyfile as well as the labels. What happens is that at runtime, these different options are merged together to make a single Caddyfile.
In order to generate SSL certificates, Caddy uses the ACME protocol to talk to Let’s encrypt (to make sure I won the domain etc), then updates Cloudflare with records of these certificates.
Setup
Domain
As mentioned in one of the first articles in the series, I need a domain in order to provide SSL certificates. While it’s technically possible to work around this by self-signing certificates and trusting myself as a certificate authority, it’s far more straightforward to just use a real domain.
Finding a domain
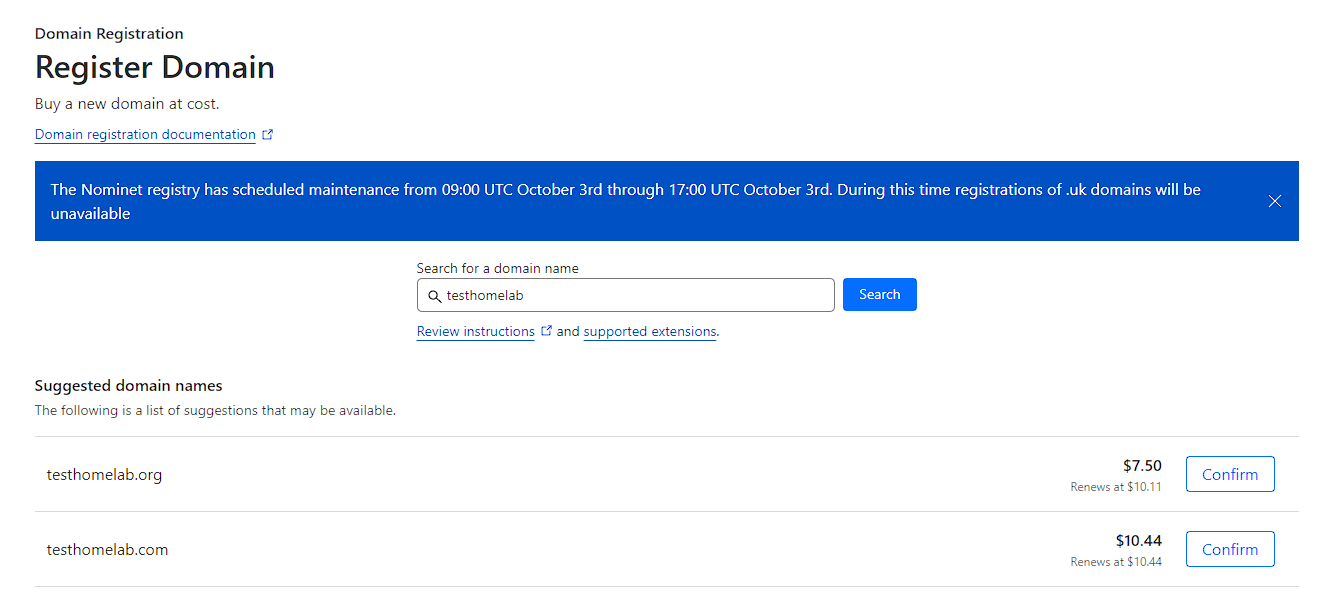
I used a combination of tools to find my domain. To start with I used instant domain search to find a domain that worked for me, and pretty much instantly found that testhomelab.com was free:
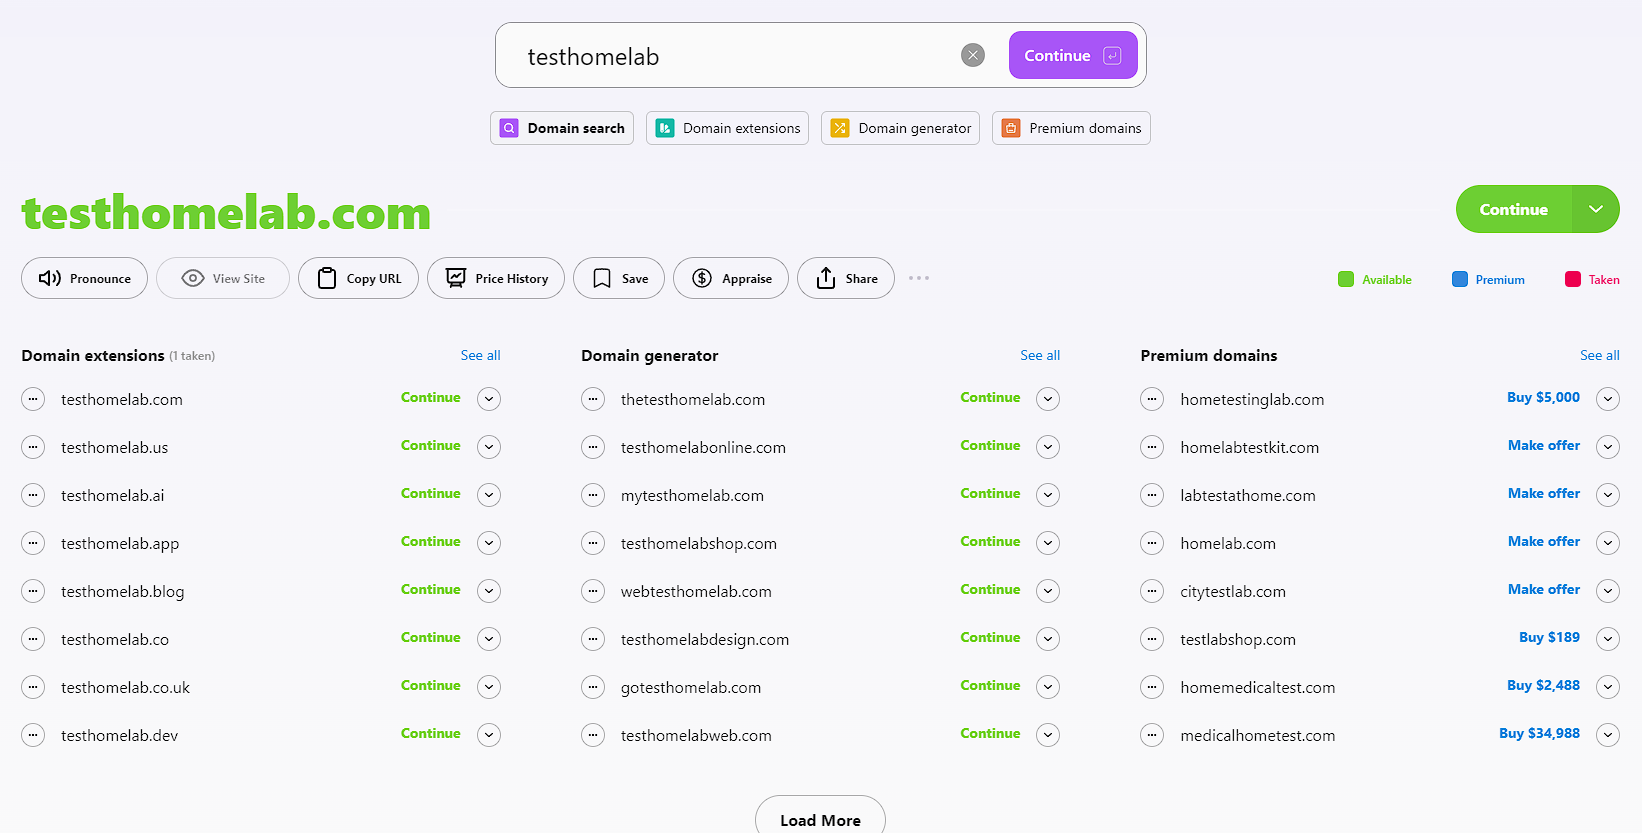
As I’m using Cloudflare to manage the domains I have, I decided to buy it through Cloudflare as well. To do this, I just login, and go to Domain Registration -> Register Domains and searched for testhomelab.com. I could see the price was decent, so I bought it through there:
Cloudflare setup
In order for the Cloudflare connection to work, there’s some setup that needs to be done
Creating a Cloudflare API token
This is required in order to get Caddy to talk to Cloudflare to manage the domain and create the required domain records for SSL.
There’s a guide by Cloudflare here. There’s also a similar guide here for the steps specifically for Caddy, but for reference here are the steps:
To do this, I logged into Cloudflare and I clicked on the domain I wanted to manage (testhomelab.com). This then takes me into an overview page for the domain and I can find the link by scrolling down and looking to the right, under the API section:
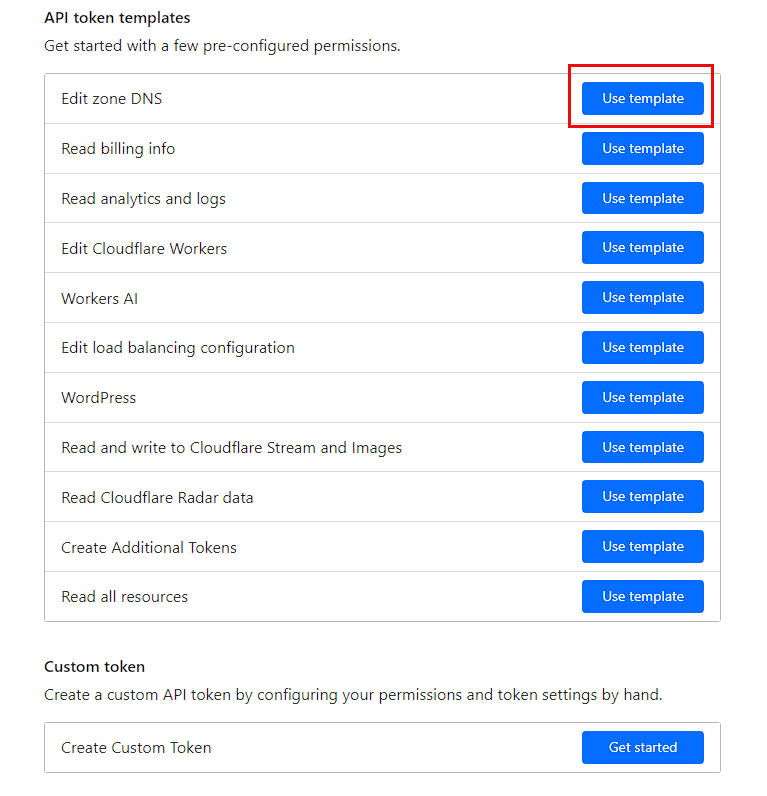
I can now Create a token from this page (NOT a global API key):

In the next page, I could either press Create Custom or preferably Edit DNS to get some default permissions setup:
I require 2 permissions to be set Zone -> DNS -> edit (this should have been set by default) and Zone -> Zone -> Read. I then use the Zone Resources section to make sure this API key will only apply to the testhomelab.com domain.
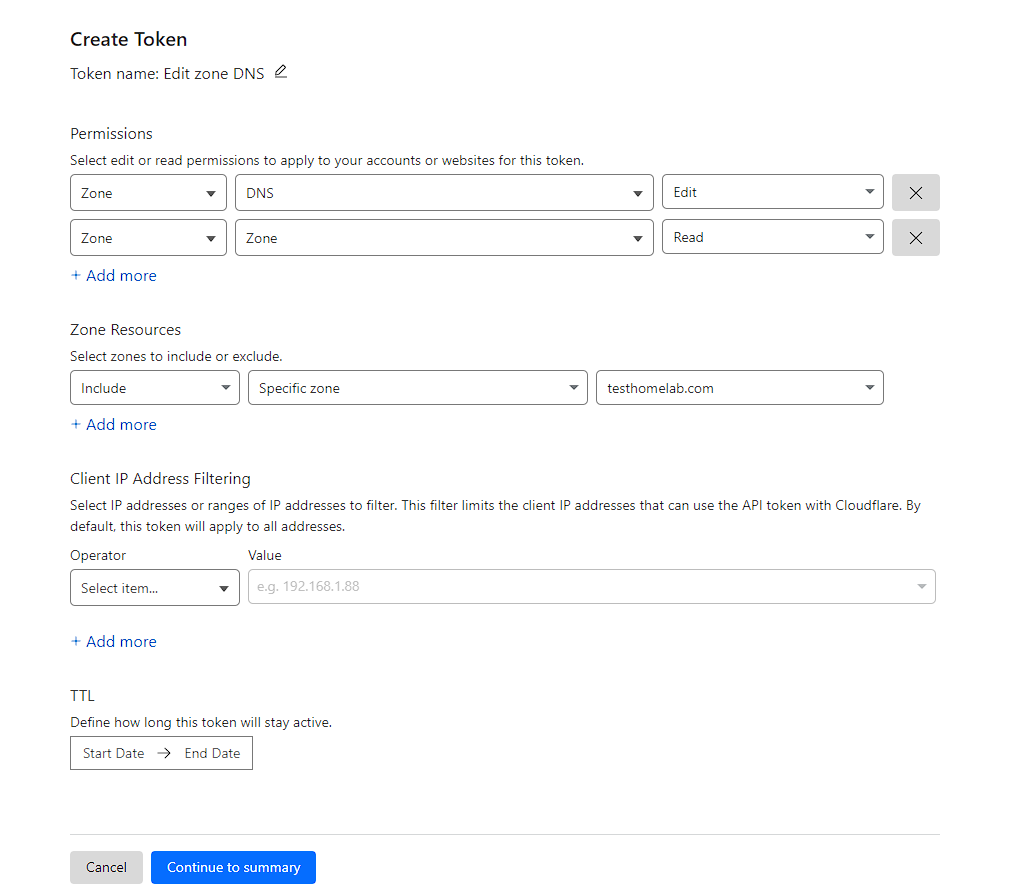
I can then click Continue to summary and then Create Token and I now have an API key I can use.
NOTE: make sure to copy this someplace safe. Typically, I throw these sorts of things into a KeepassXC vault.
Creating a subdomain
There’s a lot of research on whether to use a subdomain or a subdirectory for the URL’s and I’ve found that a lot of selfhosted will cope better with a subdomain over a subdirectory. Though there are trade-offs, such as password managers using a subdirectory match pattern by default.
Additionally, it’s not good practice to use the second-level domain of the URL, in case services need to be hosted over the internet. So instead, I’ll be using a subdomain of pve.testhomelab.com with pve to represent that this is all running on my proxmox host and I can add more later if this changes. This would then mean that if caddy had a Web UI, the full URL to access this service would be something like https://caddy.pve.testhomelab.com.
In order to actually view the URL, as the Caddy TLS process only creates TXT records, I need to create A records for Cloudflare to be able to resolve my URL correctly. In order to do this, I need to click on the domain I want to manage from the overview page, and then go to DNS -> Records:
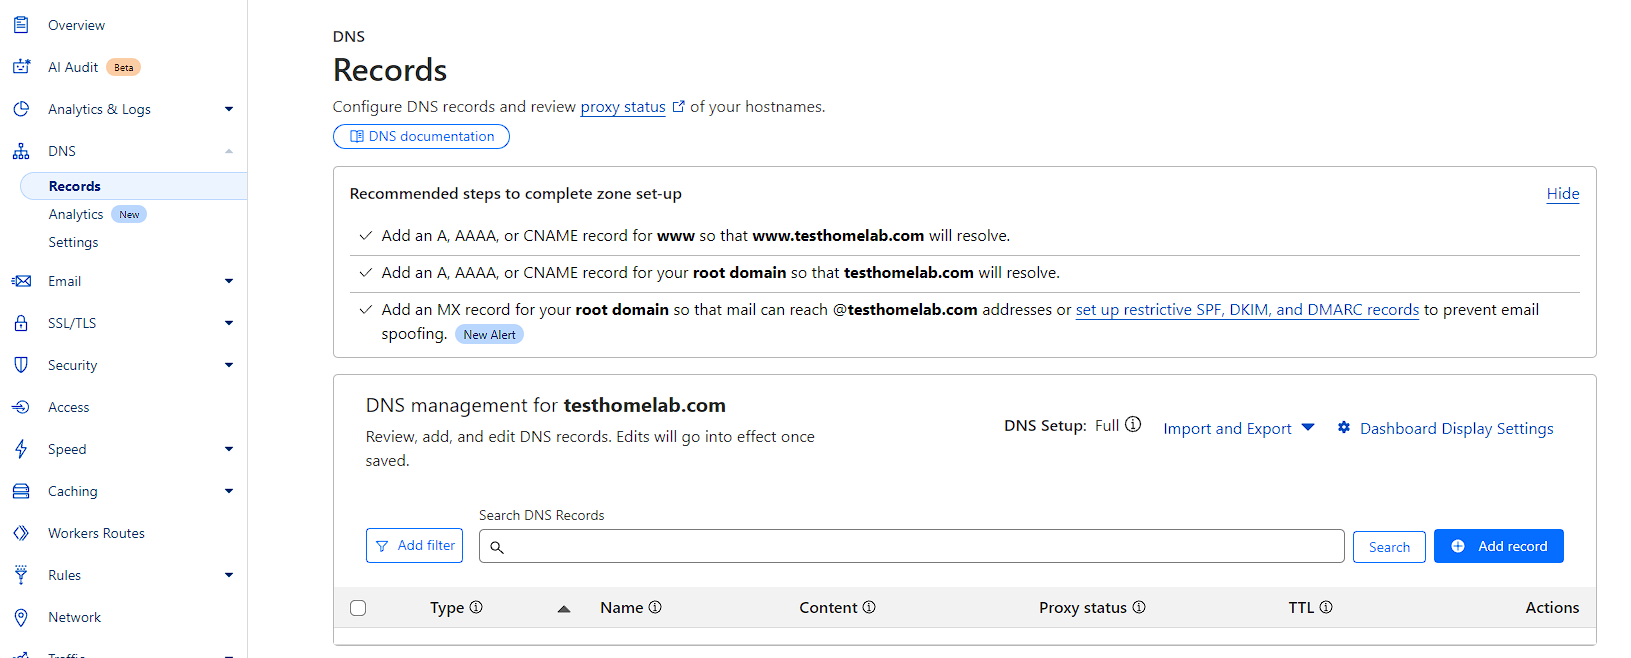
I can now create records here that can be used by Caddy via the Cloudflare API.
There are 2 main ways to setup the records in this screen. The first requires a record to be added every time a new subdomain is needed and the second does not, but is slightly less secure as it will automatically allow new subdomains to be resolve.
Creating records - method 1
First an A record needs to be created that resolves to the IP address of the Docker server, which would be 192.168.50.9 for me. Additionally, the proxy needs to be disabled:

Then a CNAME record would be created that points toward the A record and disabling proxy. This would look something like this for the caddy service:
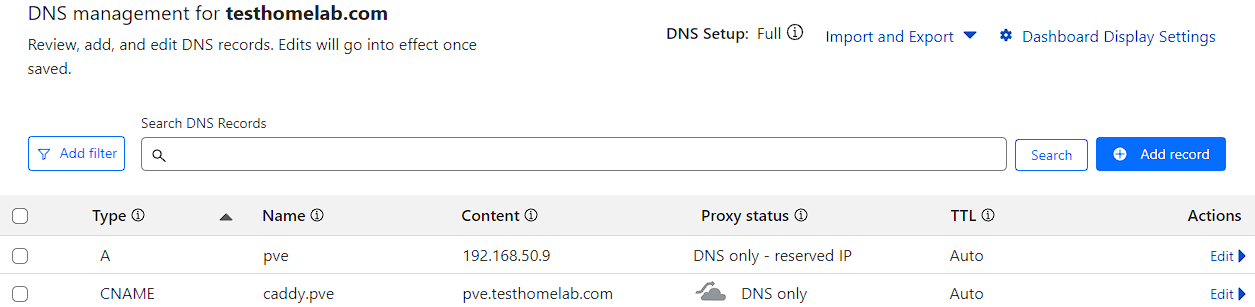
Creating records - method 2
The record creation for this is an A record pointing at *.pve with the IP address of the Docker server, which would be 192.168.50.9 for me and the proxy disabled:

As mentioned, this will now resolve any pve.testhomelab.com subdomain.
Additional Unbound configuration
My network setup is a little atypical, in that I run a DNS Resolver with Opnsense (you can read about this here). I’m writing this for posterity, but normally this step shouldn’t be needed unless you’re running Unbound.
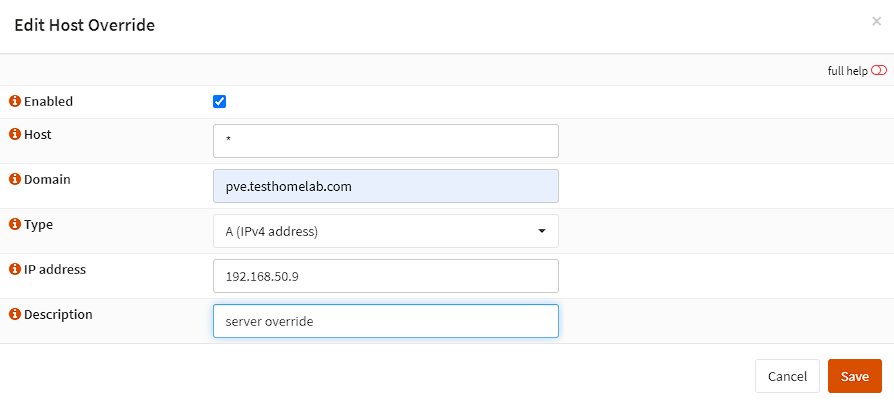
This additional setup is straightforward, I go to Services -> Unbound -> Overrides, then add an A record override for *.pve.testhomelab.com that points to 192.168.50.9:
Caddy network
Before I can begin writing any code, I need to create a docker network for Caddy to use across all my future Docker compose files. As this is not isolated to a single Docker compose, it means the network has to be created externally to the Docker compose file. To do this SSH into the host, and run the following command to create a Docker network called Caddy:
bash
The output for this command will be a random string, which is the internal ID of this docker network.
File structure
There’s essentially 2 folders I’m using data, which holds volumes for occasional access, and networking, which holds the actual Docker compose and files I do need access to often.
networking/
┣ caddy/
┃ ┣ Caddyfile
┃ ┗ Dockerfile
┣ .env
┗ docker-compose.yml

data/
┗ networking/
  ┗ caddy/
As I’m using the Docker caddy proxy and Cloudflare, I need to build the image with Cloudflare support built in. Additionally, the Caddyfile is something used to configure anything not built out with the Docker compose. Finally, there’s the actual docker-compose.yml and a .env for secrets.
Caddyfile
As mentioned earlier, the Caddyfile is where Caddy is normally configured. However, as I’m using the Caddy docker proxy, this file is not as large as it would normally be. As such, all I’m configuring currently are global options. The formatting of this file is a little strange as it mixes braces and no braces, but this is essentially what it looks like:
{
	email <email address>
	log default {
                output stdout
                format console {
                        time_format iso8601
                        time_local
                }
        }
}

:2000 {
	respond /health-check 200
}
The email address is useful for Cloudflare to know who I’m configuring for, and log settings are saying log to standard out using the ISO 8601 date format, finally, time_local means it will log with my current datetime, as opposed to UTC, which is the default.
Finally, the :2000 directive is an endpoint I’ll use as a health check for Caddy in the Docker compose. What this means, is that Caddy will respond with 200 on the URL http:localhost:2000/health-check
Dockerfile
The Dockerfile utilizes a multistage build to build an image with the plugins, and then attach them to the caddy image.
# pin the version - this is the latest at the time of writing
ARG CADDY_VERSION=2.8.4
# grab the caddy builder image to build from source
FROM caddy:${CADDY_VERSION}-builder AS builder

# run xcaddy and add the caddy docker proxy and cloudflare plugins
RUN xcaddy build     --with github.com/lucaslorentz/caddy-docker-proxy/v2     --with github.com/caddy-dns/cloudflare

# use the caddy alpine image as the base image
FROM caddy:${CADDY_VERSION}-alpine

# copy the files built in the first stage into the caddy image
COPY --from=builder /usr/bin/caddy /usr/bin/caddy

# set caddy to run with the caddy docker proxy
CMD ["caddy", "docker-proxy"]
This Dockerfile will then be referenced in the Docker compose to build this Dockerfile when running.
Docker compose
The compose is probably the most complex file in this setup, but it looks like the following:
NOTE: I’ve left the labels in for AutoKuma, but currently these won’t do anything until I set that program up.
some information on the below compose:
- Caddy runs as single container without sidecars, though it is technically a sidecar to every other container running a web service
${SOMETHING}are all environment variables that will be picked up from the .env file, so it’s important to make sure all of these variables match up- The Caddy install requires a single volume to maintain certificates obtained by the SSL process. Without this would cause new certificates to need to be obtained far more regularly than the 3 months that Let’s encrypt provides.
yaml
Environment file
shell
Testing the setup
As mentioned earlier, Caddy has no Web UI I can use to make sure my configuration is valid, HTTPS certificates are generated and I can access the site, so I need to use a simple container that I can use to do this for me. I settled on using the Traefik whoami container to act as a sidecar, as it’s a tiny container that displays various OS and networking output via a webpage. This is a fairly traditional container to use for testing networking as it’s not difficult to get running.
This needs to be added to the services section of the docker compose:
yaml
Additionally, I have an environment variable for CADDY_HOST which is the short form of the domain I want to use. In this case it’s pve.testhomelab.com
Caddy docker proxy config labels
While there’s a much more detailed overview of how the configuration works on the Caddy Docker Proxy GitHub page, what this will convert into is a Caddyfile directive like this:
text
Running caddy
Running is really simple, just cd into the networking folder and run sudo docker compose up -d and wait for the containers to be pulled down.
NOTE: this might take some time when first run, as Docker needs to build the caddy container before running.
Alternatively, DNS checker can be used to see what servers can see my records.
Troubleshooting
I can take a look at the logs to see what’s happening by using the command sudo docker logs caddy.
Additionally, I can see if my server can see the TXT record generated by Caddy using dig:
bash
The generated Caddyfile lives in /config/caddy/Caddyfile.autosave and can be viewed with the following command:
bash
Setup specific troubles
I’ve found that the DNS propagation check can take a long time, with multiple errors shown like the below:
24-10-06T19:01:40.649Z ERROR tls.obtain will retry {"error": "[whoami.pve.testhomelab.com] Obtain: [whoami.pve.testhomelab.com] solving challenges: waiting for solver certmagic.solverWrapper to be ready: timed out waiting for record to fully propagate; verify DNS provider configuration is correct - last error: <nil> (order=https://acme-staging-v02.api.letsencrypt.org/acme/order/) (ca=https://acme-staging-v02.api.letsencrypt.org/directory)", "attempt": 1, "retrying_in": 60, "elapsed": 121.264993198, "max_duration": 2592000}
I believe this is due to actually using Unbound as my DNS server via Opnsense. I’ve found it will eventually work and propagate, but can take a long time and involve several up/down commands plus disabling the override in Unbound. A way around this, is to turn off the propagation check (though doing this isn’t really reccomended). I got this to happen by adding the following to the labels section of the whoami container (and any future container):
yaml
so that the new caddy directives look like this:
yaml
Additional Caddyfile directives
There are 3 additional servers that I’ve built into Proxmox, and we can provide access to them over SSL by using Caddy with the following directives:
I’m going to be using proxmox for the Proxmox host, `smb for the Turnkey File Server and home for Home Assistant.
NOTE: The creation of these servers can be found here for Proxmox, with links at the bottom of the page for the others.
proxmox.pve.testhomelab.com {
	reverse_proxy 192.168.50.6:8006 {
    transport http {
         tls_insecure_skip_verify
      }
    }
	tls {
		  dns cloudflare {env.CLOUDFLARE_API_TOKEN}
      resolvers 1.1.1.1
	}
}

smb.pve.testhomelab.com {
    reverse_proxy  192.168.50.7:12321 {
    transport http {
         tls_insecure_skip_verify
      }
    }
	tls {
		  dns cloudflare {env.CLOUDFLARE_API_TOKEN}
      resolvers 1.1.1.1
	}
}

home.pve.testhomelab.com {
  reverse_proxy  192.168.50.8:8123
	tls {
		  dns cloudflare {env.CLOUDFLARE_API_TOKEN}
      resolvers 1.1.1.1
	}
}
From this, proxmox and smb require tls_insecure_skip_verify as they expect http by default and do not like running as https without additional setup. This allows Caddy to “trick” these servers into thinking they’re still running over http, which is what allows caddy to manage them.
Home Assistant requires some additional configuration to work, mainly allowing the Docker host to proxy home assistant.
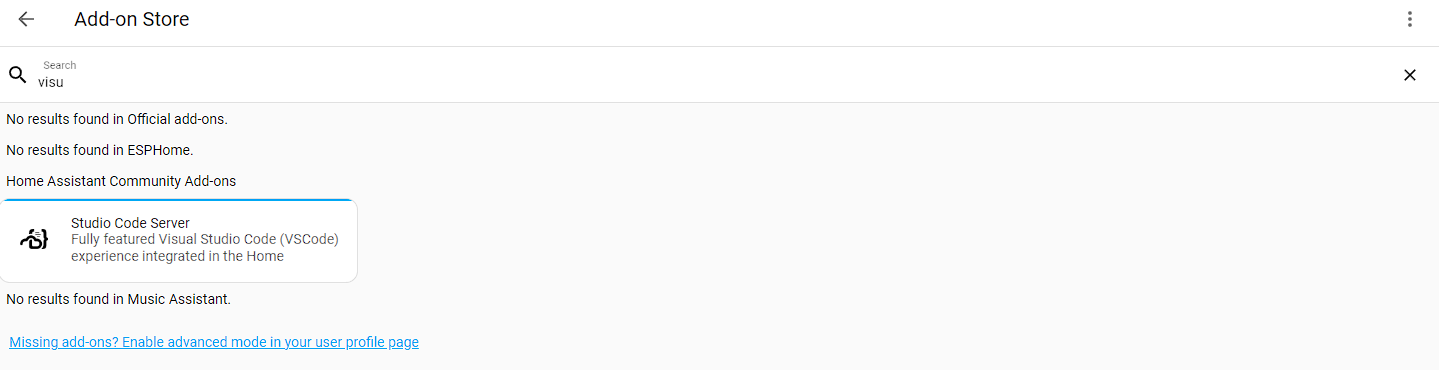
To do this we first need to install a file editor to make changes to the configuration files. Log in to Home Assistant, then go to Settingas -> Add Ons -> Add On store and search for a file editor, like Visual Studio Code (Or Studio Code Server)
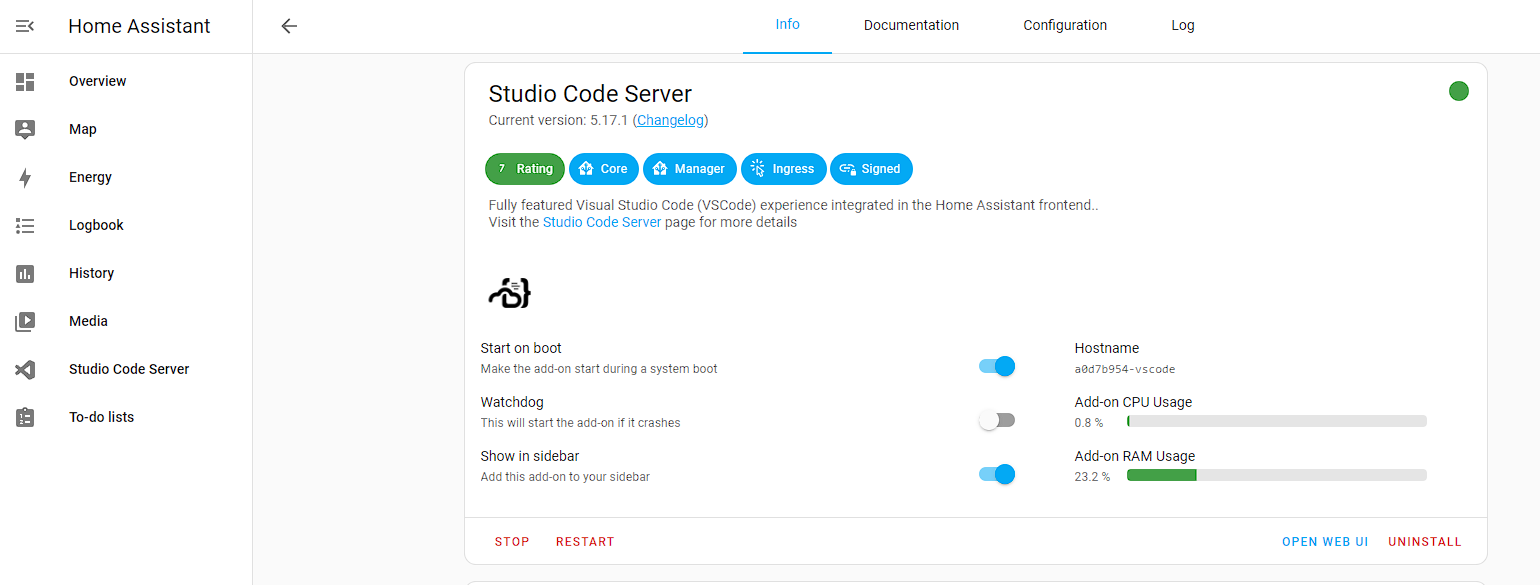
Once the extension is installed, I select it from the Add Ons menu, and toggle Show in Sidebar and start the add on:
The application takes some time to start, but once ready I open Studio Code Server from the Sidebar, open configuration.yaml and add the following to the bottom of the file:
yaml
The file should now look like this:
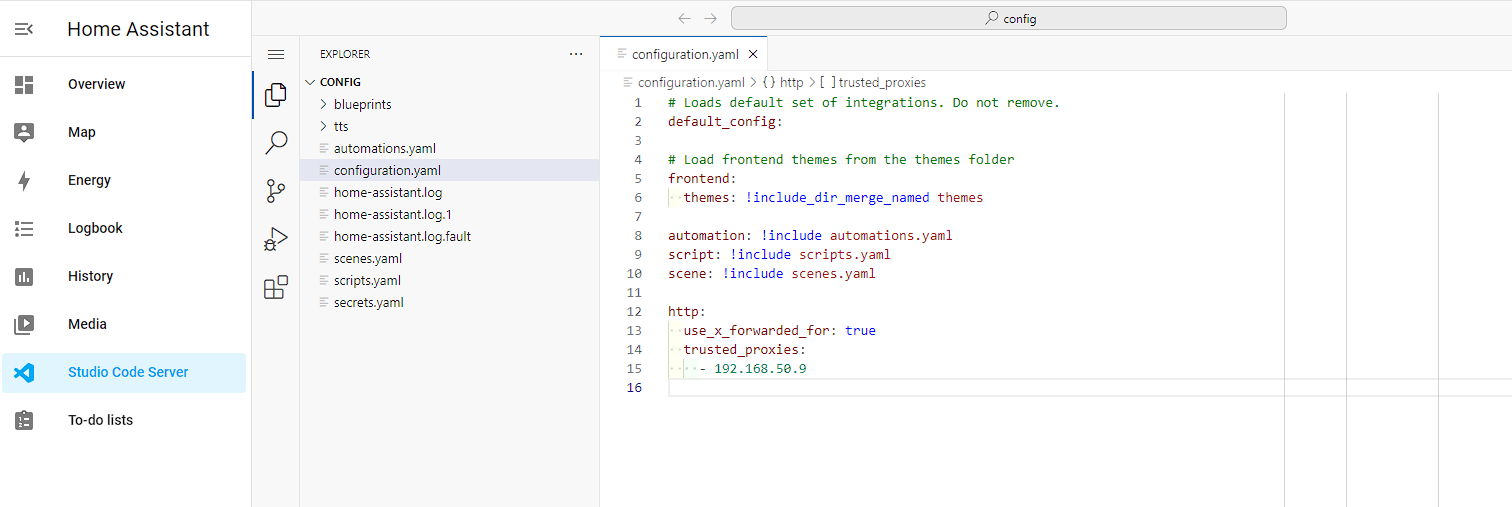
I then restart Home Assistant, and I can now use the URL home.pve.testhomelab.com to access the service.
VPN
As I’ve mentioned, I don’t want to port forward, which means I’m limited to using a VPN or tunnelling to access services outside of my home. After some digging, I decided to use Tailscale as it massively simplifies setup and has a generous free plan of 3 users and 100 devices. This service isn’t open source, but is well supported. Additionally, if I do outgrow the free plan, I can move to using Headscale with a cheap VPS from a company like Hostinger (though I haven’t tested doing this yet).
Tailscale setup
Pre-install steps
For Tailscale to work, an account needs to be created on the Tailscale website. Once this is done, I now need to generate an API key for my device to access Tailscale. To do this, I go to Machines -> Add device -> Linux server:
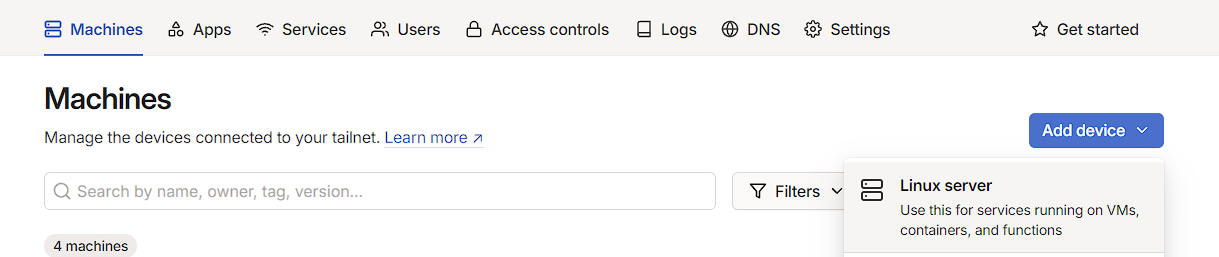
There’s several things that can be configured here, like Tags, but the only truly necessary thing is to scroll to the bottom and press the Generate install script button.
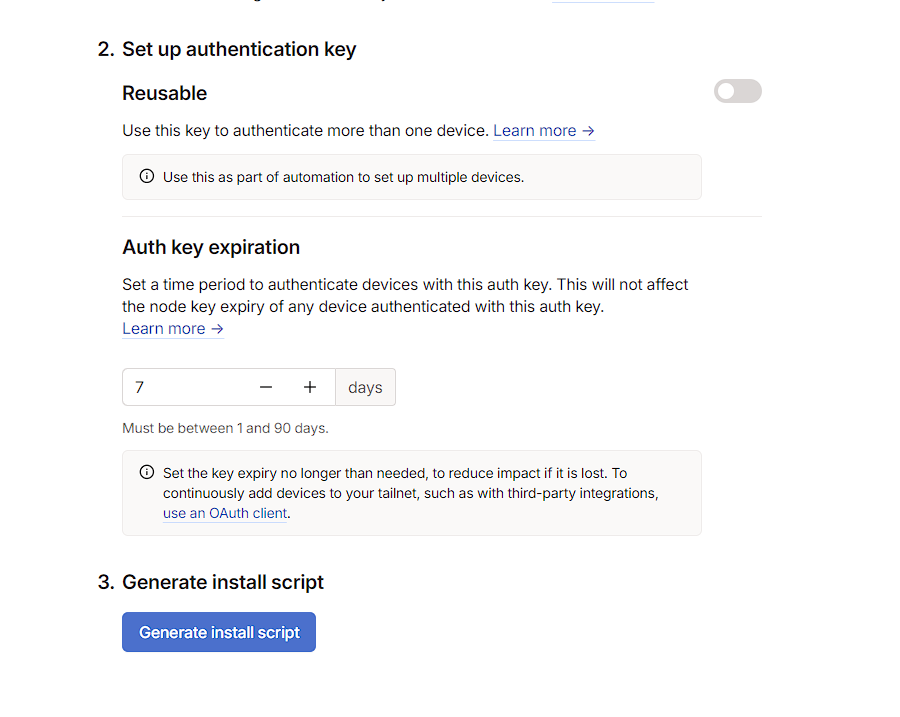
This will generate a script like the following:
bash
If I was planning to install Tailscale directly, this would work, but I’m using the Docker image instead, so the only thing that I really need from this command is the auth-key parameter, which is what allows the Docker container to authenticate with the Tailscale control node.
As this will be required later, I keep a note of this somewhere safe, like KeepassXC.
Tailscale docker steps
The Tailscale Docker container is pretty simple to do as it just requires a single container and some .env variables, with no webserver requiring Caddy and just a single named volume.
Tailscale docker compose
Under the services and volumes directive add the below to the Docker compose file:
yaml
The advertise-exit-node parameter allows this Tailscale instance to act as an exit node which is where all traffic is routed through this interface, rather than just the advertised routes. The benefit of just using advertised routes, is that I’m only proxying requests through my server for the homelab services, rather than everything, which can be quite slow.
While I don’t use the exit node by default, having it available has been useful for certain troubleshooting. it can be removed if not required.
Tailscale environment variables
Add the below to the .env file:
bash
NOTE: adding the Proxmox host to LOCAL_ROUTES might be useful, as in the current setup, if Caddy goes down, direct access to Proxmox would be lost
Running Tailscale
run the below command and wait for Tailscale to come up:
bash
Post install
Provided the container has started correctly, there should now be an entry for proxmox-server in the Tailscale admin console, under Machines:

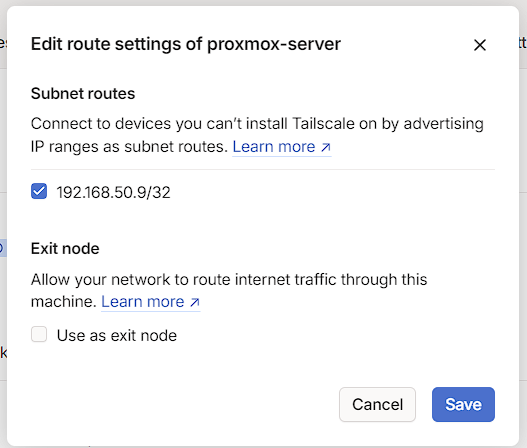
I can see that it’s advertising subnets and an Exit node, but these do have to be approved before I can use them. To do this, I click on the proxmox-server node and I can see that I can approve these:
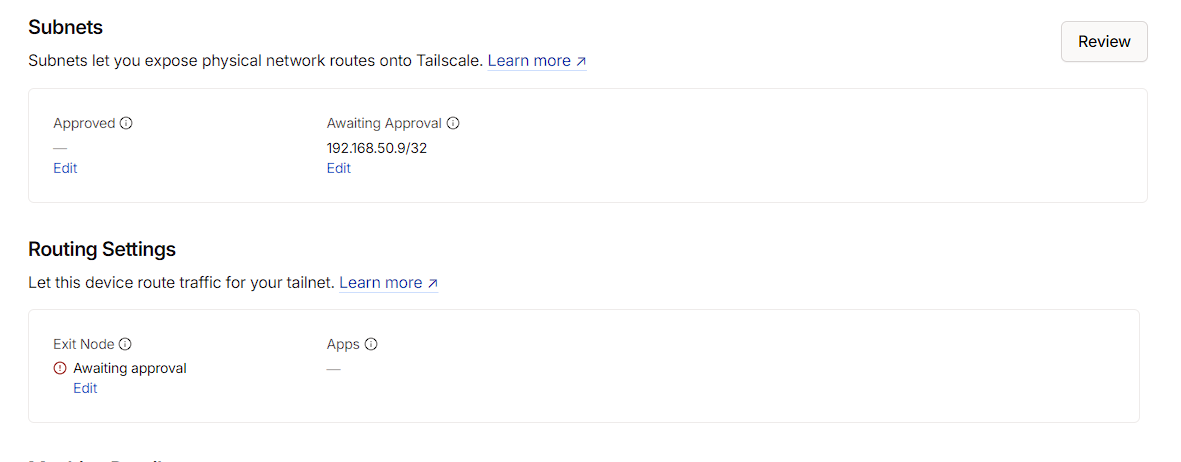
At this time, I just want the ability to use the route I’ve created, so under Subnets, I press the Edit button and approve the route, then save it:
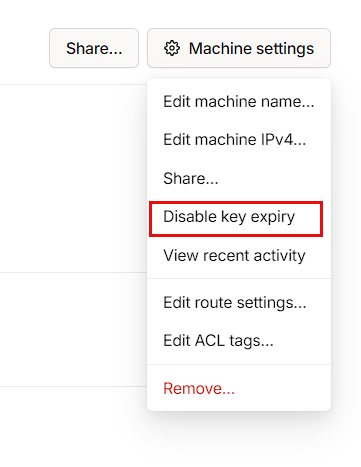
Finally, I can disable the key expiry from the Machine settings menu, if I don’t want to generate a new key in 6 months:
Notifications
Tailscale has notifications built in for a homelab, and it’s quick to get setup.
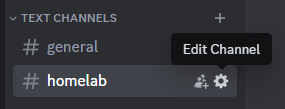
To start with I need to grab the discord webhook integration by going to the channel I want use for notifications, and click the settings button:
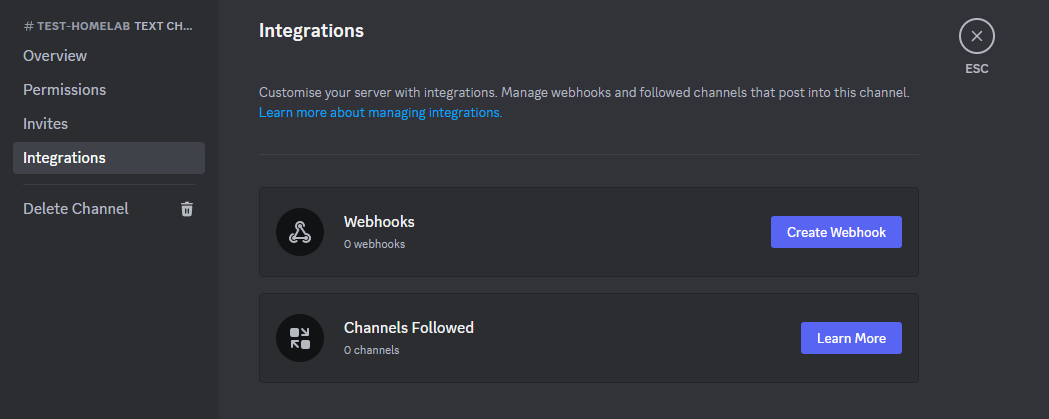
Then go to I go to integrations, and click on Create Webhooks:
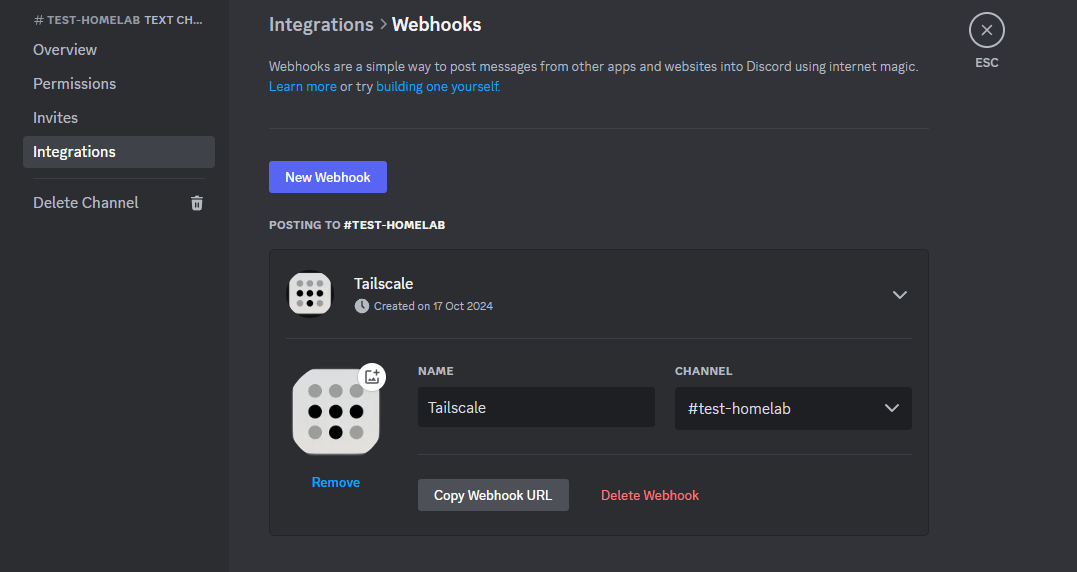
Then I’m just setting the name to Tailscale, adding a picture and clicking Copy Webhook URL to copy the link to my clipboard.
Next, I head to Tailscale, then go to Settings -> Webhooks and click on Add endpoint:
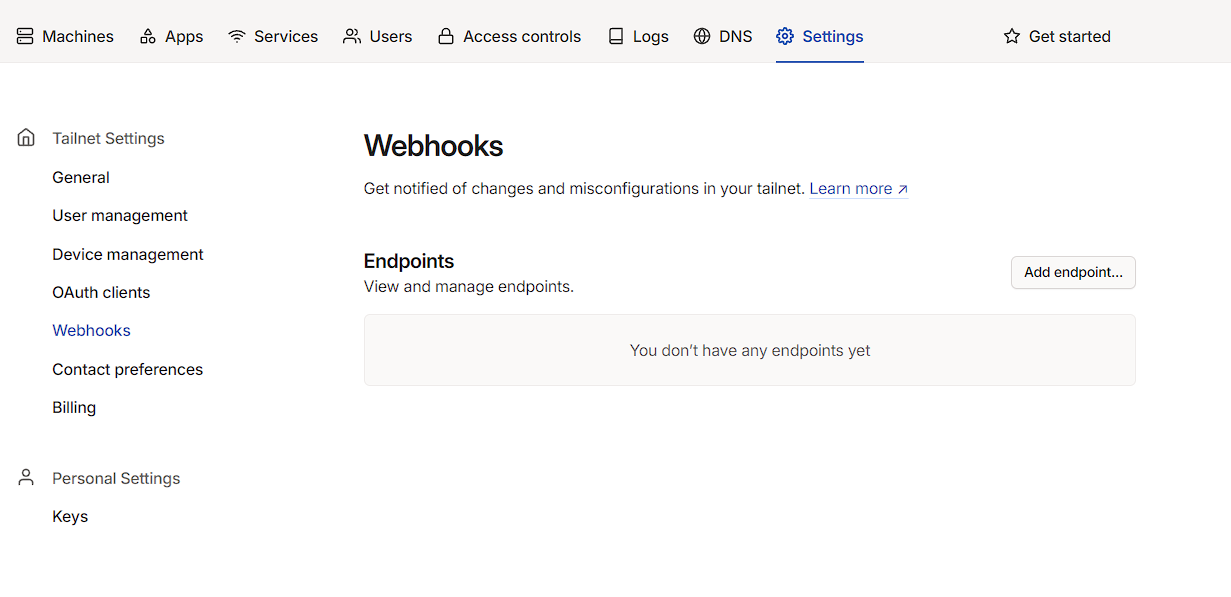
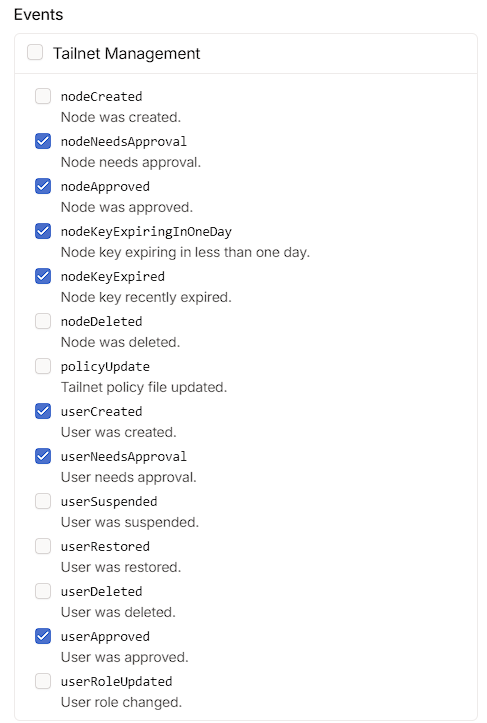
I can then paste the Discord URL into the URL field and choose the events I want to be notified about. Of which, I wanted to know when anything needed approval or was expiring:
NOTE: Tailscale will give you a key to verify the signature, which is worth storing somewhere just in case.
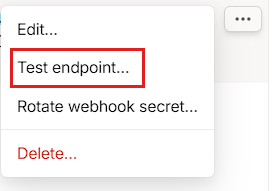
The final step is to test the endpoint, which can be done by expanding out the newly created Webhook, clicking the 3 dots on the top left and then pressing Test endpoint:
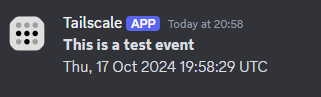
Once confirming sending the event, I can then check Discord for the notification:
Testing
To test the setup, I installed the Tailscale android app, logged in, enabled Tailscale and then disabled the WIFI. I then used a web browser to go to whoami.pve.testhomelab.com, followed by proxmox.pve.testhomelab.com and could see both websites in my browser. Disabling Tailscale caused them both to timeout, proving everything is working.
Closing thoughts
This setup took a long time to refine, but I’m now pretty happy with it, and should put me in good stead for the future. There was a lot of things I didn’t get right when initially setting these containers up and honestly, writing it all down helped me refine everything to work better and strip out the various half-implemented things I tried that didn’t work.
Now this process is done., the next article should be around building out an auth provider for single sign on.