
Preface
After choosing my hardware and setting up my Proxmox server, it’s now time to setup what I want to run on this server. Given proxmox is a hypervisor first and foremost, the bare metal server should have as little running on it directly as possible. Instead, everything I want to run is going to be access via virtual machines or similar. This includes the large amount of docker containers I want to run, as running docker directly on Proxmox is considered a bad idea.
Virtual machines and linux containers
Proxmox provides 2 main was to run services on Proxmox. These are virtual machines and linux containers, commonly known as LXC. While virtual machines are not exactly rare, for completeness, these are essentially computers that run within your computer that provides isolation from the base OS. Virtual machines package the entire OS including hardware emulation and the idea of this is that if anything goes wrong with the virtual machine, your computer would not need to be entirely rebuilt.
LXC is a bit more specialized and the best way to think of them is somewhere between a docker container and a virtual machine. They provide separation from the base OS but crucially, shares the same kernel as the base OS. What this means, is that LXC containers can use the bare metal hardware without the overhead of the emulation layer that virtual machines require. Similarly, the advantage over docker is greater flexibility in configuration of resources, and integration with Proxmox. Ultimately, what this means is that you have access to a virtualized OS running on the bare metal. There are some disadvantages to this though, such as setting up permissions on an LXC container without using a privileged container. Additionally, due to how the advantages work, LXC has a lower isolation level than a traditional VM.
What I’m running
I’ve decided to run 3 separate virtual machines/LXC as a base, with the possibility of adding more down the line for testing or running specialized services.
NAS
The first service I want to run is a fileserver/NAS that will essentially hold all of my files for use by other systems. I’m keeping this separate as I want this service to be as stable and simple as possible, as it’s going to be responsible for hosting all of the files I keep on my homelab, as well as a NAS drive for use by other devices in my house.
I did go backwards and forwards on whether this should be a virtual machine or LXC and I ultimately decided to go with LXC. The reason for this is that I can pass a mountpoint directly to the LXC, rather than having to get hold of a SATA controller to pass through to the VM. Downsides are the increased complexity in setting up permissions between the host and guest in an unprivileged container. I’ll walk through the steps later, but there’s a more in-depth guide, with other options found here.
In terms of software, I’m going to use a Turnkey file server image, as it contains everything I need to run a file server including Samba, and a Web UI for easy maintenance and access. I wanted to use Samba, as I’m planning to use this as a file share on my Windows desktop as well as for storage used by my containers. This will slightly complicate setup on said containers, but overall I though the trade off was worth it. This does contain a some additional software that I’m not using, such as a webserver and mailserver, but even with the added complexity I felt the simplicity of setup was worth it. I do feel it’s worth noting that Samba is an extremely mature technology that can be used for print servers and acting as a domain controller for active directory, but I’m not going to be using this. I might decide to try and implement all of this at some point though.
Docker host
This is going to be my most resource intensive guest as it’s designated to run the vast majority of my services. Due to this, I wanted to only run docker containers on this machine so that they can talk to each other easily and so I can setup the machine to be best used for docker.
in this instance, I’m going to run this as a VM as I have the overhead and there’s some additional setup required to get it working, compared to just running on a virtual machine. Additionally, as I’m planning to run a lot of “critical” services, the increased isolation appealed to me (not that I really trhink this would ever be an issue).
In terms of OS, I decided to go with Debian 12, as I’ve worked with Ubuntu in the past, which is based on Debian. However, the main reason for running Debian was that Proxmox runs on it, so I thought it was a good idea to gain experience in Debian, in an environment which was slightly less fraught than my hypervisor.
Home assistant
It’s absolutely possible to run home assistant in a docker container however, home assistant also distributes an operating system designed to run home assistant, that provides additional benefits over running a docker container. These include one-click updates, better support for the application and reduced maintenance of the underlying OS.
I decided to also use a virtual machine for this instance as I had a preference for not dealing with permission issues around passthrough in an unprivileged container, and I was happy that any hardware I needed to add (such as a Zigbee bridge), would only be needed by the VM. Additionally, this virtual machine is more of a “in the future” type of thing, as I’m not looking to build out a smart home just yet
While I’ll be going through more detailed instructions on how I set this all up, I also found a really useful set of scripts that I used to setup home assistant on Proxmox.
Setup
This section will be based around how I setup each machine to be ready for running the services in my homelab.
LXC NAS
LXC container setup
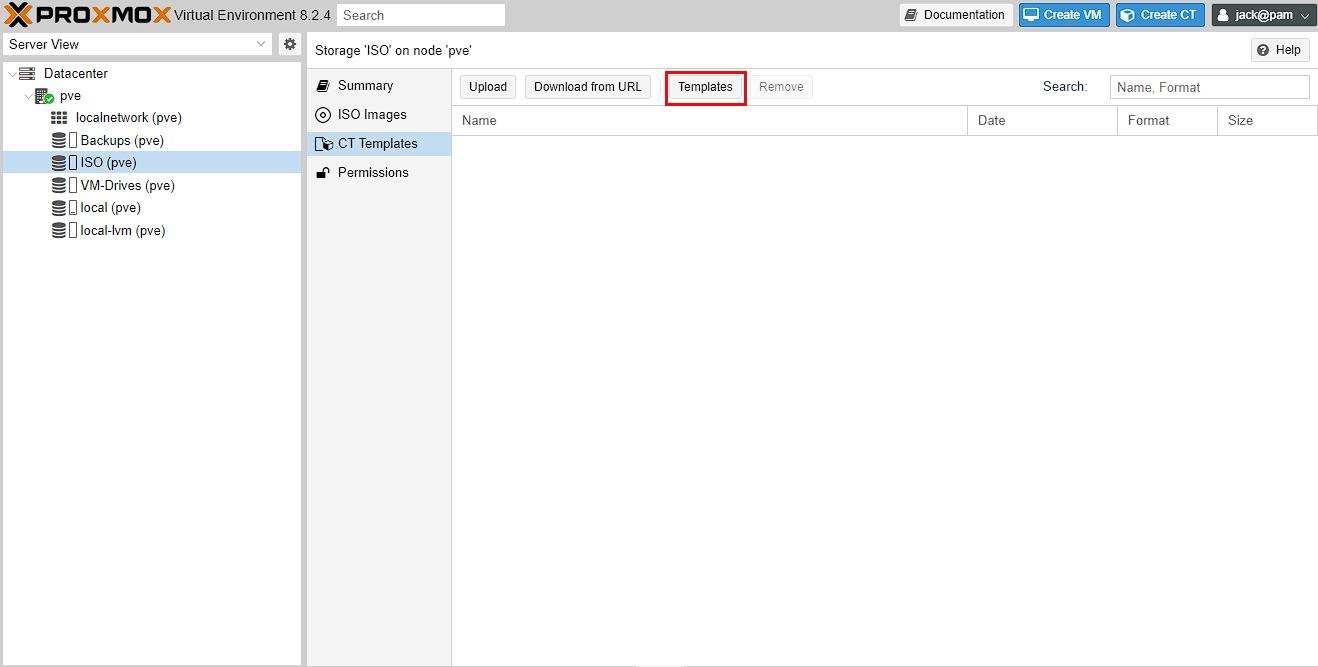
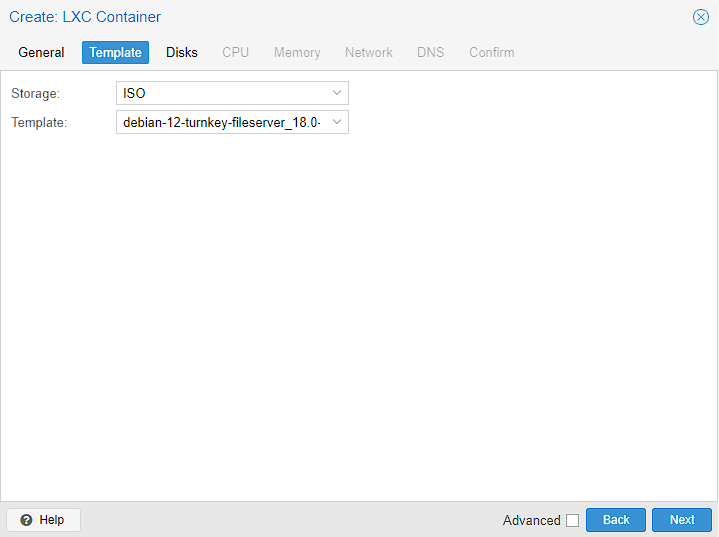
As I mentioned earlier, I’m going to be using a TurnKey linux fileserver using LXC. To start with I need to get hold of a template that I can use for this. Templates are the equivalent of ISO images for virtual machines and fortunately, Proxmox simplifies the process of retrieving these templates. To start with, go to Datacenter -> pve -> ISO (pve) -> CT Templates and click the Templates button
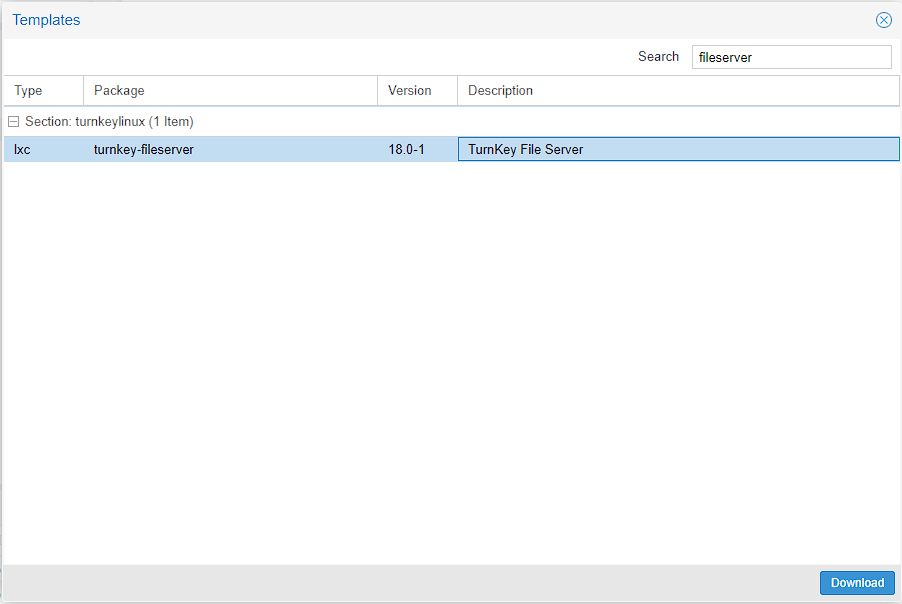
Search for fileserver and you should get the TurnKey Linux fileserver image, and then download it
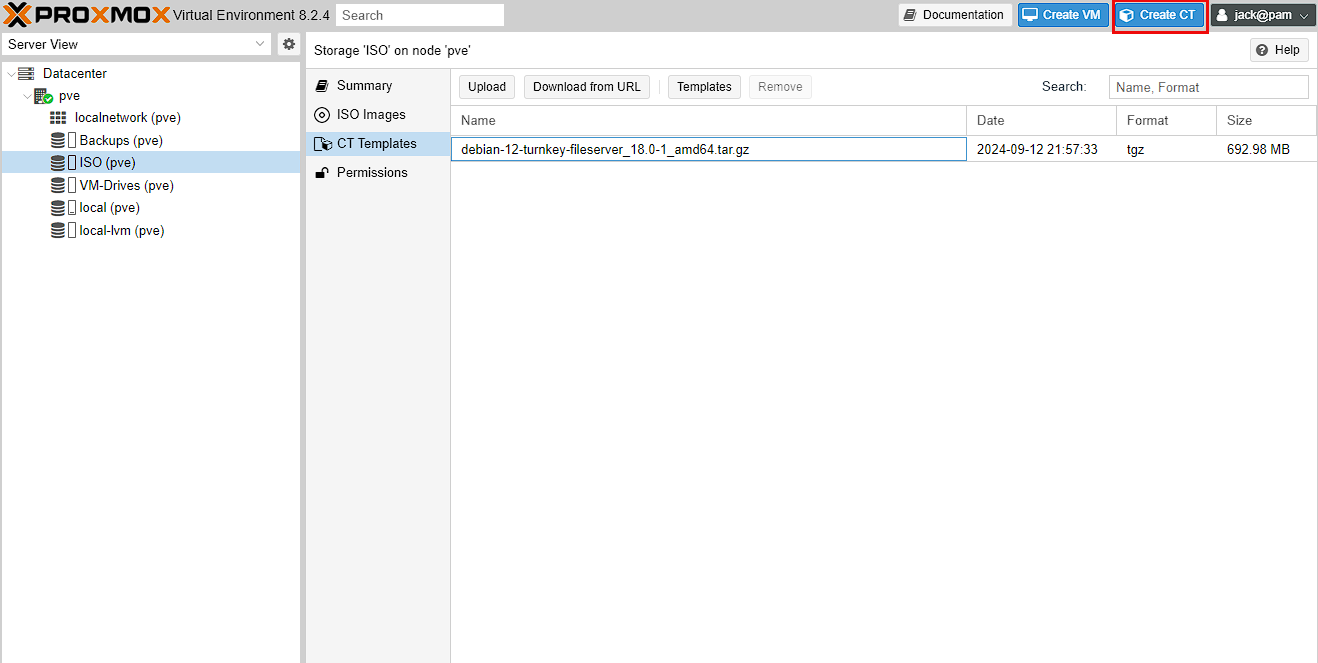
Wait for the template to download and you should now see the template available for use. The next step is to create the LXC, and in order to do that, I press the Create CT button at the top right of the screen
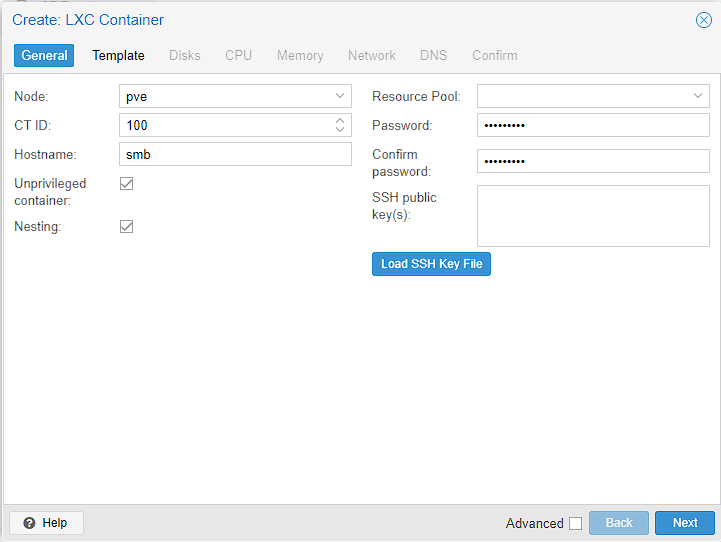
This takes me to a setup process for the LXC. I’ll set a hostname of smb as it’s short for samba, and easy for me to remember. I’ll also set a password and if you want to use SSH keys this is where you can add them. I’ll also leave “unprivileged container” ticked and as I’ve mentioned previously, this means that the user Id’s inside the guest don’t map directly to the root on the host. Finally, I’m going to leave nesting enabled even if I’m unlikely to use it here. This allows me to run containers inside the LXC. Just hit “Next” to move on, or the “Template” button at the top.
The next screen is easy, I just select the TurnKey Linux image I downloaded earlier and move on
For disks, I don’t need a massive disk sized as I’m going to pull in most of the storage as a mount, but I do have 2TB to play with on this machine, so I upped the default of 8GiB to 20GiB
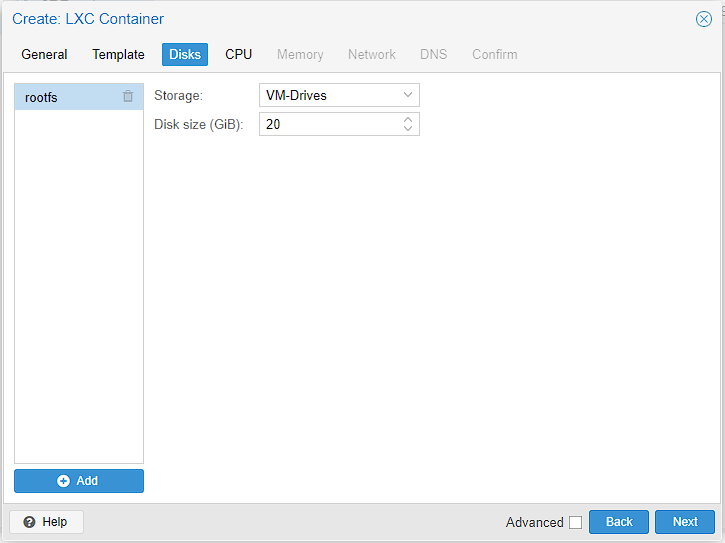
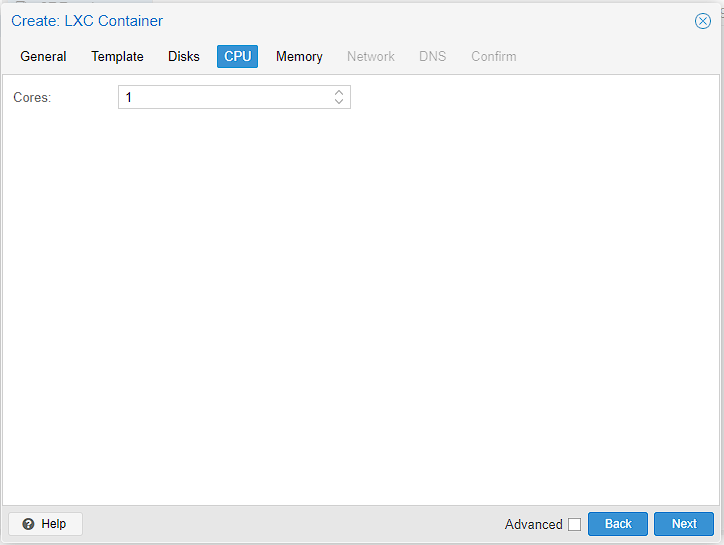
This machine is heavily limited on cores to just 8, so on this machine I set the cores to 1 as I don’t much room to spare and this container is pretty light weight anyway. By contrast,m my main server uses 2 as that has 24 CPU cores to spare. Finally, I’m making sure that the “Storage” value is VM-Drives, to use the newly created disk location
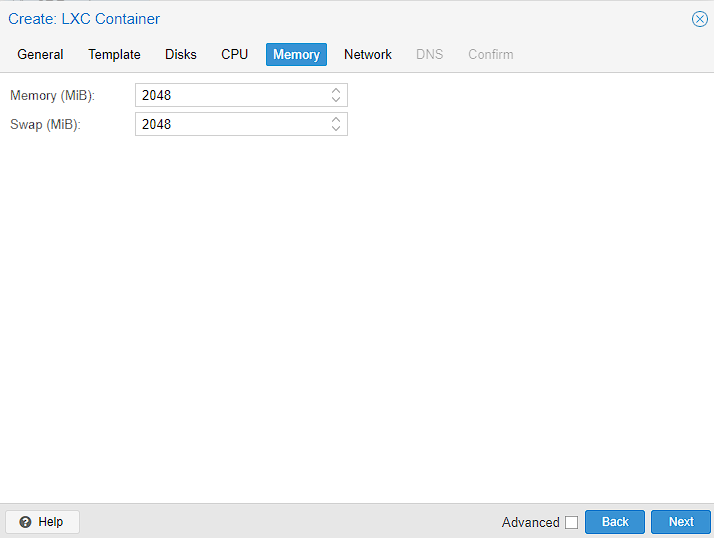
Memory was a slightly tough one. Technically this server will container will run on 512MiB of Ram however, I found that giving less than 2GiB occasionally caused the CPU to ping to max and essentially kill the server until I rebooted. Since I upped the RAM, I’ve never come across the problem again
Networking is an extremely involved topic so I’ll try and keep this brief, but for myself, the networking was informed by my home networking setup. However, a static IP address is required for consistent access to web UI, and the gateway is pointing towards my router. Just to be context, my configuration splits the DHCP lease so that the first 100 IP addresses are static. I’m also not using IPv6 in my home network, so I’m just leaving the settings blank.
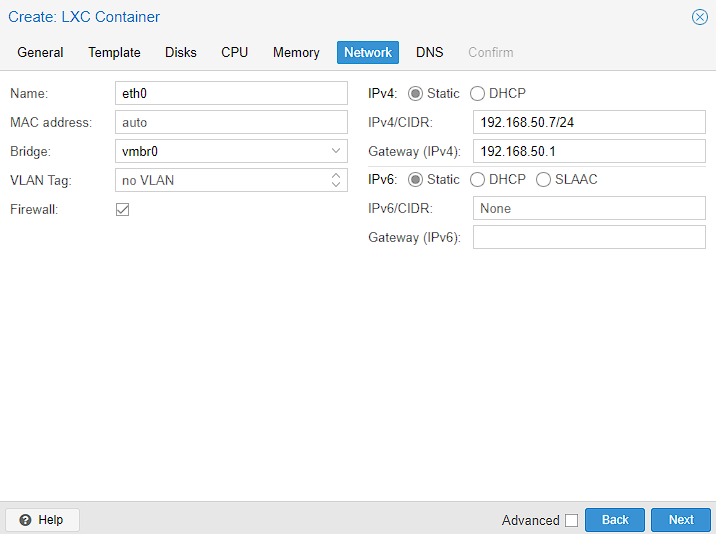
For the DNS, I’m just leaving it as “use host settings” as I know this works
At this point, the setup is done and I’m just looking to make sure there aren’t any obvious errors. You can select “Start after created” tick box, to immediately start the container, other wise you will start it after creation.

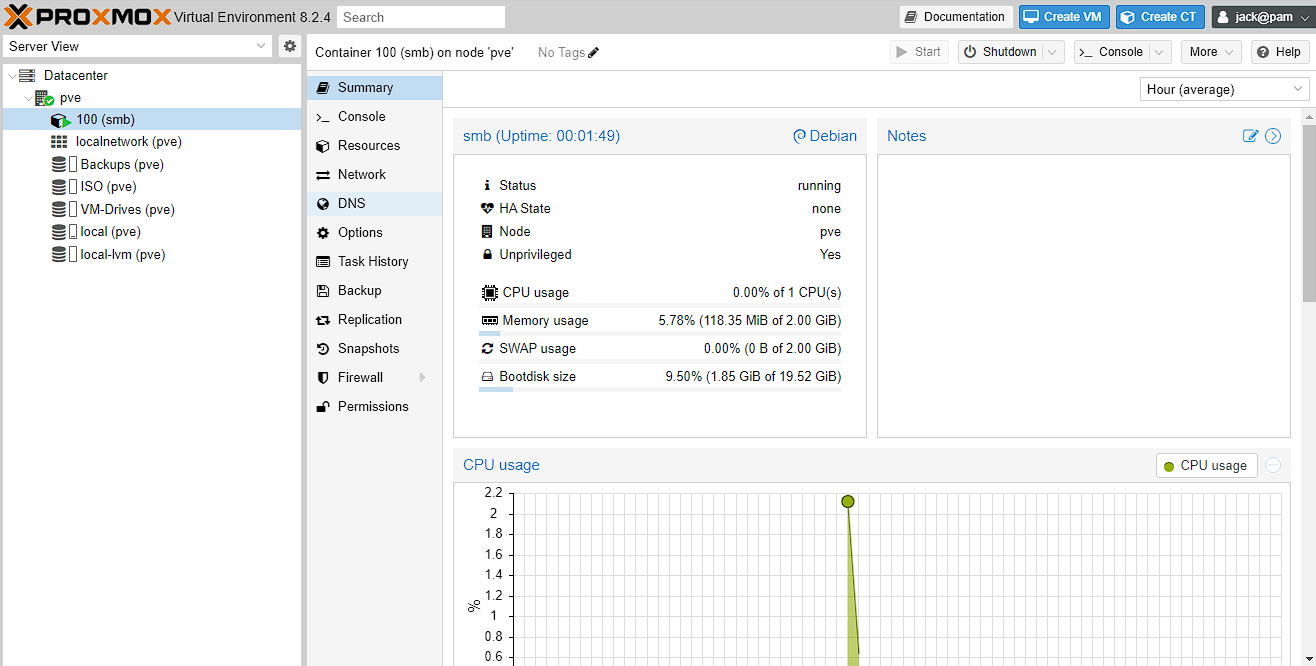
Now just wait for the LXC to finish installing, which is indicated by a “TASK OK” as the last line in the output and you can navigate to the newly created 100 (smb) machine and view some stats. if you didn’t set the container to Start from the confirmation screen, you can hit the (currently greyed out)
Start button
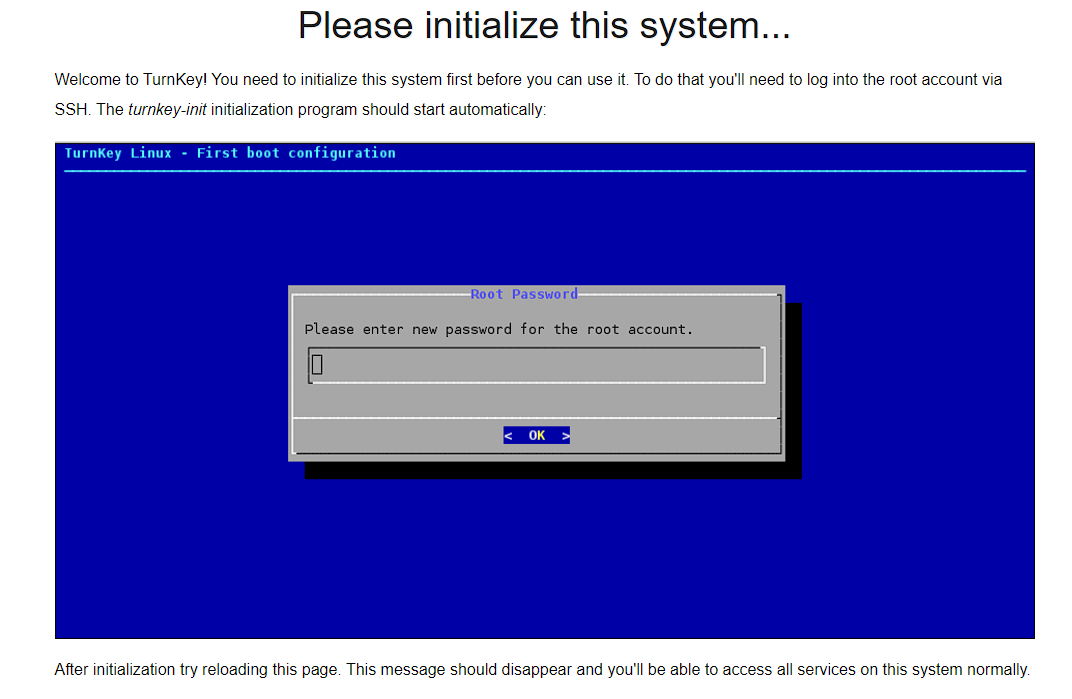
At this point, you can quickly check everything is running correctly by navigating to the IP address set during creation and there will be a web browser asking for the container to be initialized:
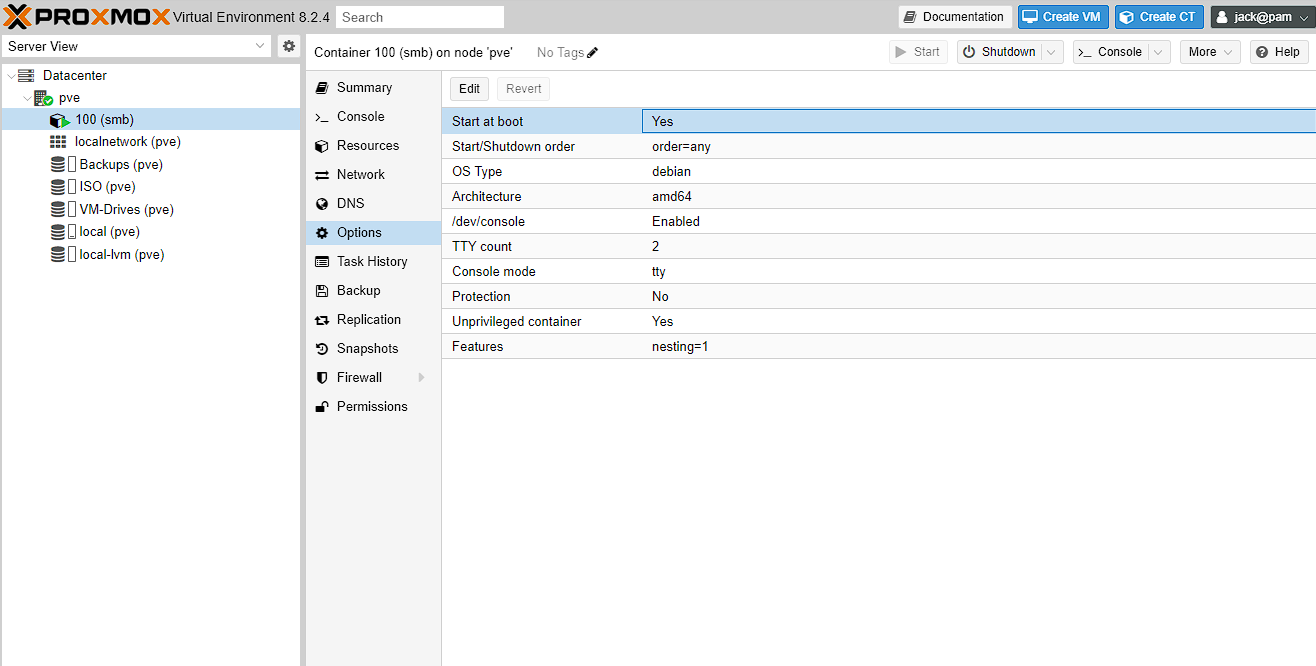
Now the final bit of setup before the LXC creation of this guide is done, is to navigate to Datacenter -> pve -> 100 (smb) -> Options and set “Start at boot” to yes, as I want to have the container start automatically when I reboot the server.
TurnKey fileserver initial setup
As it mentioned in the web browser, I need to initialize the system before it will work. To get access to do this you need to SSH into the server, or alternatively, just use the “Console” tab in Proxmox. At this point, it will ask you to log in and the username will be “root” and the password, whatever was set in creation of the container:
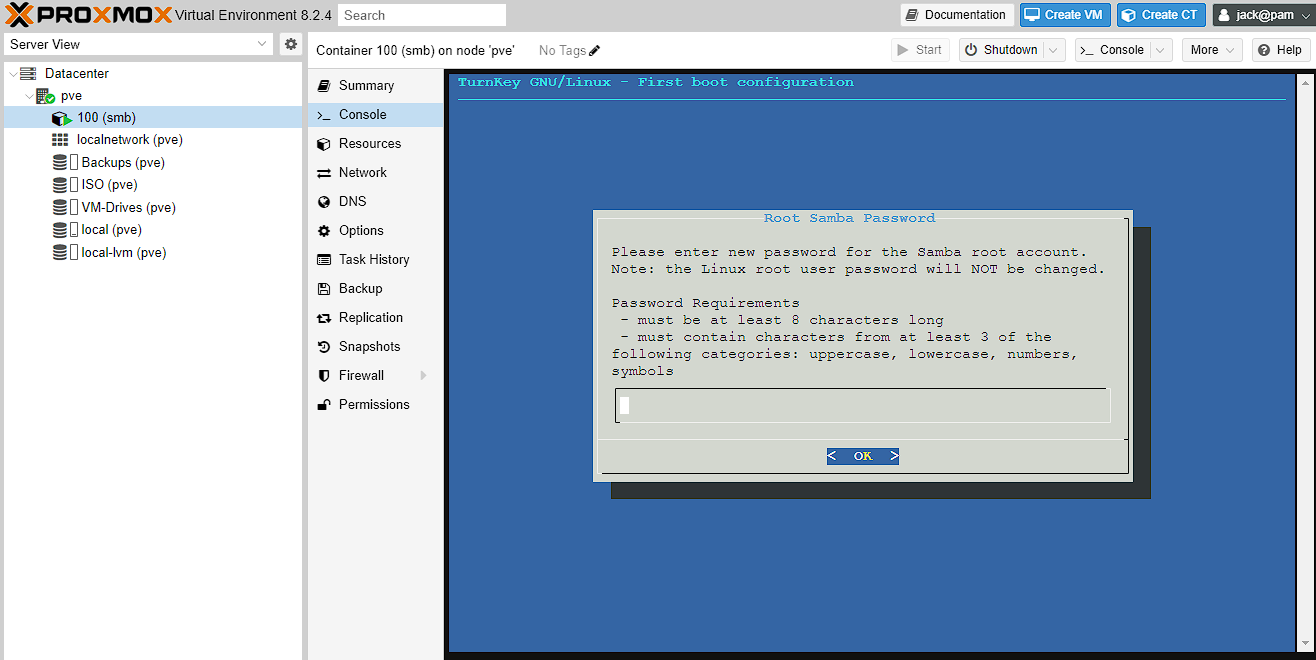
To start with just enter a password for the Samba root account, and then confirm it. Next it will ask for an API key, and I just press tab until the cursor moves to the SKIP option and press enter
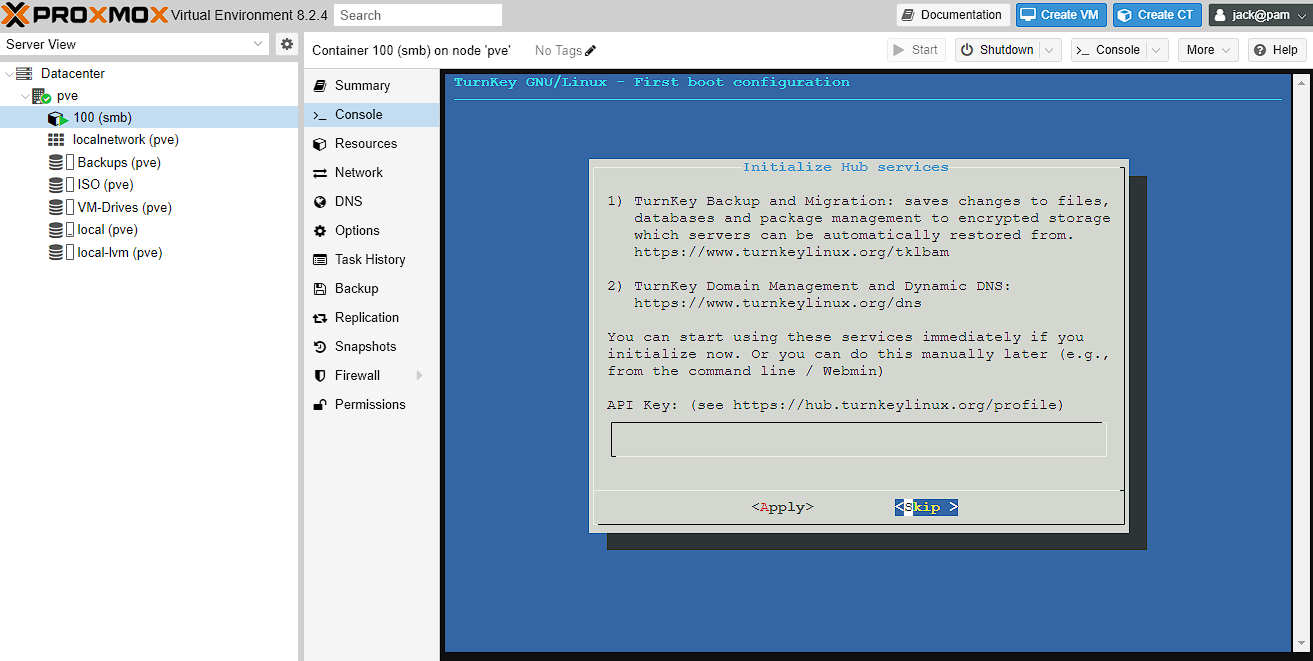
Next we get asked to setup an email address for sending important communications. It’s probably a good idea to set this up here, but if not it can be done later, but there are additional things configured then. After this, just confirm your email and it will take you to a screen asking you to install updates, which is usually a good idea when installing a fresh system.
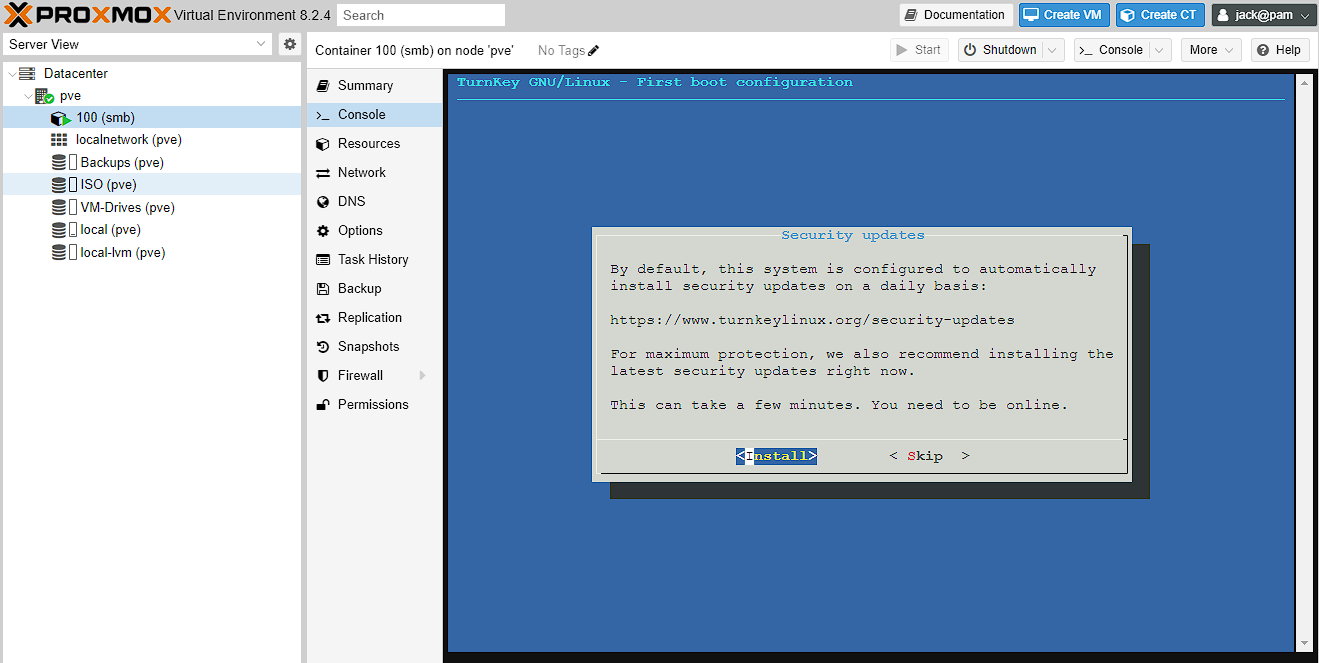
This should take some time to complete, and then you’ll be asked to reboot, which is also a good idea. Given this is an LXC, this process should be pretty quick. Once it’s back up, you can check everything is installed by heading to the IP in a web browser, and you should see the web UI.
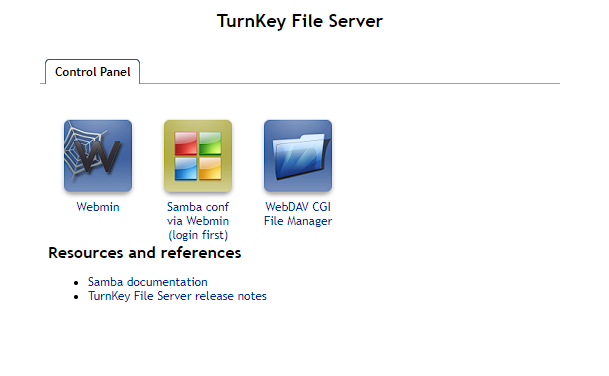
You can check out the web UI using the “Webmin” button which will redirect you to <IP address>:12321 and you can login using root and the password set during creation of the container.
Mounting the shared drive
Creating the mountpoint in the host
To start with, I’m going to create a new file system with ZFS to use as a mountpoint for the underlying storage on my server, which I will then mount in the Samba container. There’s a few reasons to do it this way, but the main one is it provides a level of separation between the folders I’m using for file storage and everything else, while retaining access to the large storage pool. The process for this is the same as the one for creating the previous filesystems where I SSH’d into the host machine (not the NAS container) and then ran the following command:
bash
To verify this is all setup, I then use zfs list and get the following:
text
NOTE: The additional file systems are explained in my article on bare metal
Assigning permissions to the unprivileged container
Host settings
There’s a more in depth discussion of what I’m doing found here, but essentially what I’m doing is changing the folder permissions to match a user and group found within the unprivileged LXC. In order to do this, a small understanding of how these permissions are mapped between Proxmox and the LXC. Essentially, the LXC user is mapped to Proxmox with an offset of 100000. What this means is root (with an id of 0) in the LXC maps to the user of 100000 in Proxmox. We can then extend this, so that a non-root user with an id of 10, is equivalent to the id of 100010 in Proxmox.
As explained in the article above, there are 2 ways to do this, but I’m going for the “quick and easy” route as I’m not planning to have many of these running, but ifI was I’d absolutely look to use the more permanent option. There’s more information about this method here
As such, I need to change the user permissions of the file system created above to match a user in the NAS LXC. Given that running as root is generally a bad idea and to keep this similar to the article above, I’m going to choose a group id of 1000 to give access as arbitrary user identifiers that I’m going to use as permissions to the folder. These map to the group id of 101000 in my Proxmox host. This means I’m going to use the following commands on the host machine:
bash
I then test that the user I’ve just created can access and create files, without needing sudo etc.
First up I check the permissions of the folder are correctly set with ls -ld /tank/smb and it gives the following output:
bash
bash
Container settings
Now I’m going to move across to the NAS server and match settings to the host. This can be done via the terminal, but given the web UI has the ability to set all of this up, I’m going to use that.
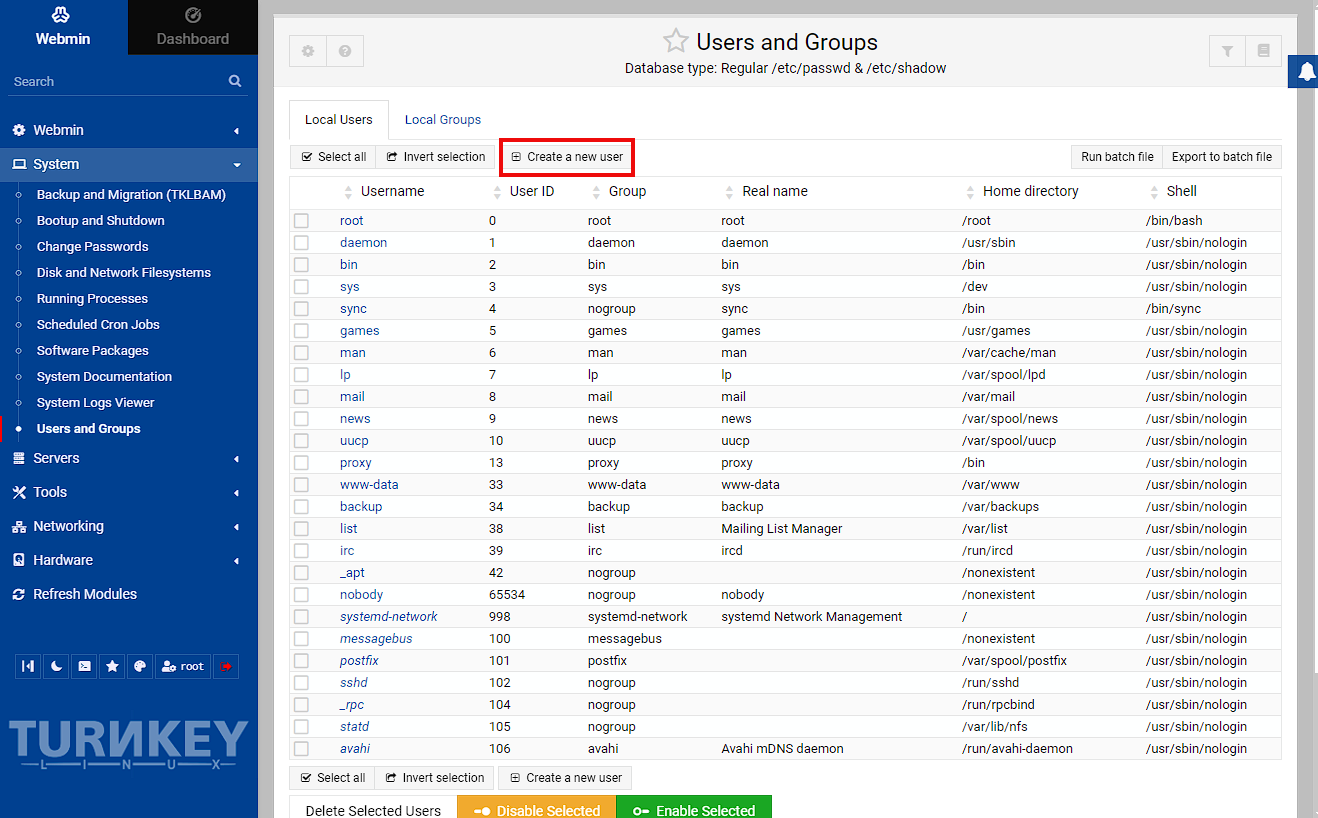
To start with, in the webmin go to System -> Users and Groups and click “Create a new user”:
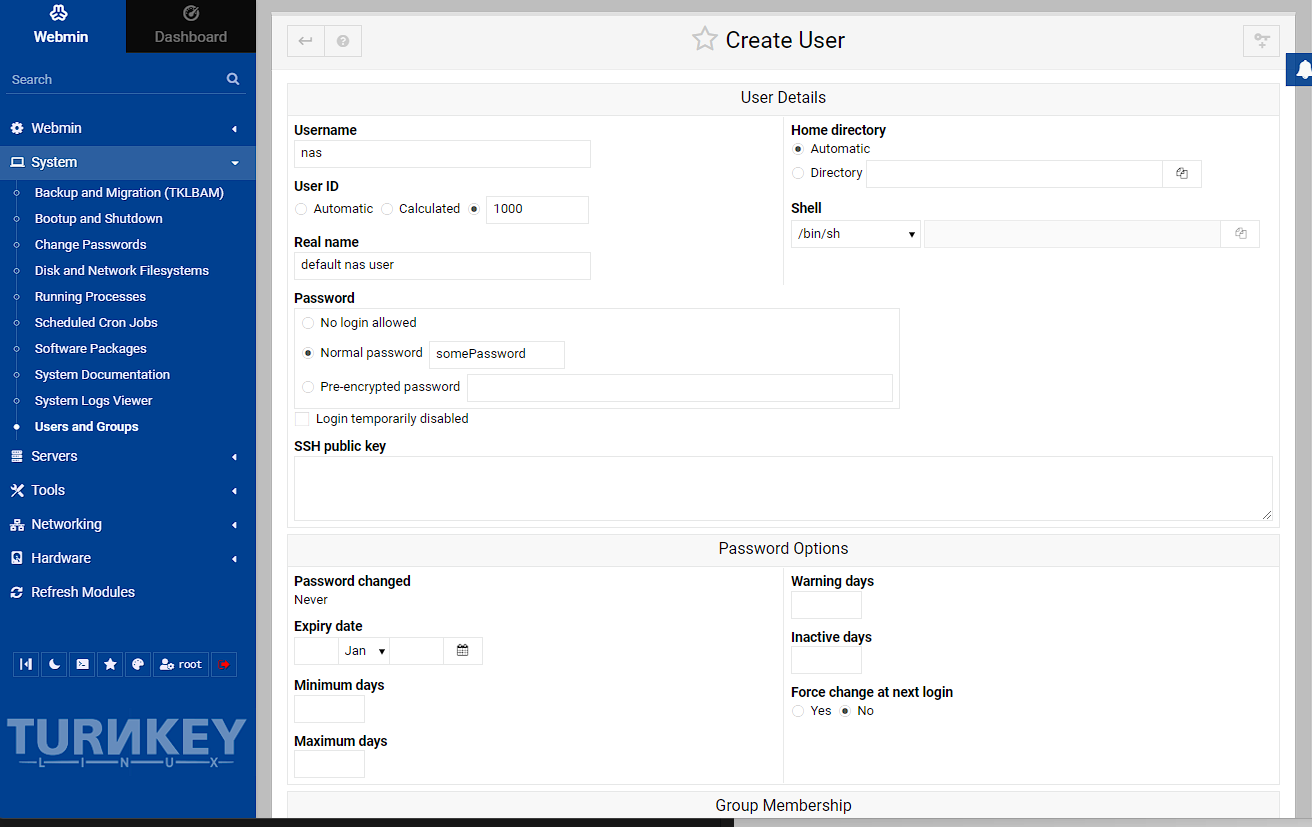
I’m just setting a user id to match the one I created on the host, but this isn’t really necessary. Next I want to set the user id to a specific id to map with the host (even if I’m not using it to access the folder) and I’m going to give it a password to log into the share from. This should be a fairly secure password, but I’m just using a placeholder.
NOTE: you can also create a pre-encrypted password with OpenSSL using the following command: echo "somePassword" | openssl passwd -1 -stdin. While this is possible it’s not that useful as the password is encrypted once saved.
I’m not enabling password rotation or setting the group here (though you can if you want), so I’m just leaving everything else as defaults and just scrolling to the bottom and pressing Create.
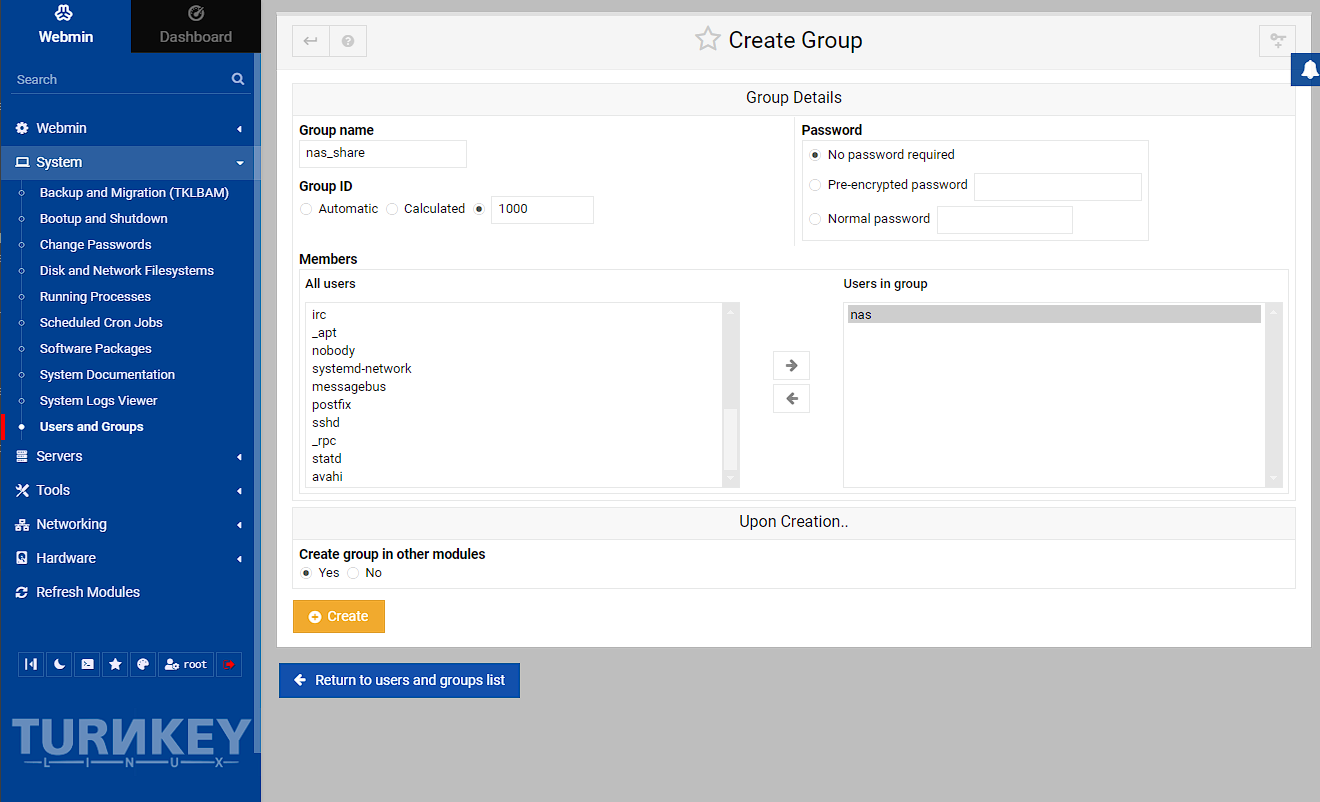
I now need to create a group for this user to use, so I’m pressing the tab near the top to go to Local Groups, and then create new group:
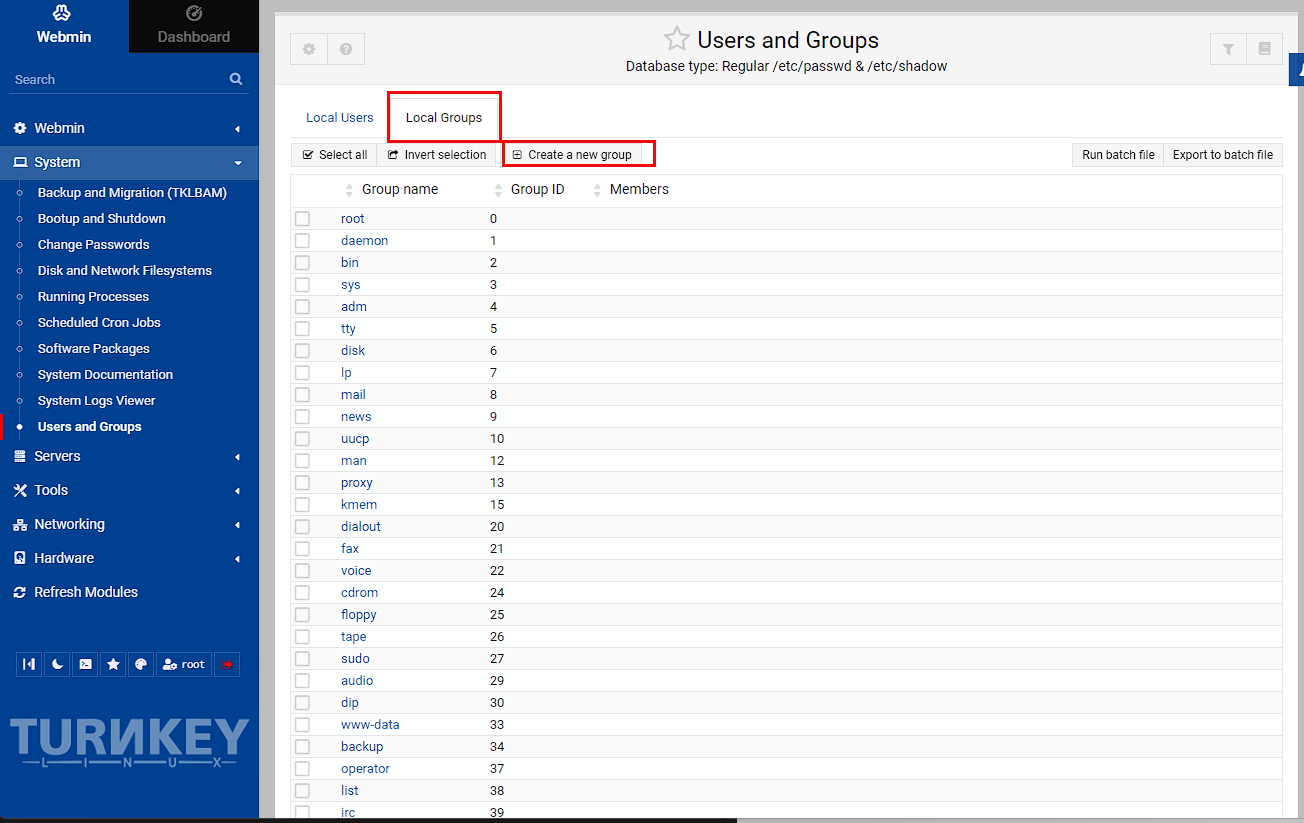
At this point, I need to set the group id to match the one created in the host, which is 1000 and also add the user I just created to this group:
NOTE: This user will not be able to login to the webmin panel, which is good, but if you do want to create a new webmin user, you can go to Webmin -> Webmin Users, and then convert or create new Webmin user.
Adding the mountpoint
Now I need to go back to the host machine and setup the container to see the /tank/smb folder as a mountpoint. I can do this using the conf.yml, which can be found in /etc/pve/lxc plus the id of the id of the container and edit the file:
bash
and then I add the following line to the file, which will add the mountpoint to the container under the path /mnt/data:
text
In order for this to take effect, I need to reboot the NAS LXC:

I can then test this is all now fitting together by using SSH to access the NAS container as the nas user I created and running the following commands to see that this user has access to create and delete files:
bash
Setting up the Samba share
The last thing I need to do before I’m finished configuring my NAS, is to setup a Samba share I can use it for storage across my network.
Head to Servers -> Samba Windows File Sharing. This screen should contain a few default shares setup on create, as well as all the options to configure Samba. Click on Convert Users:
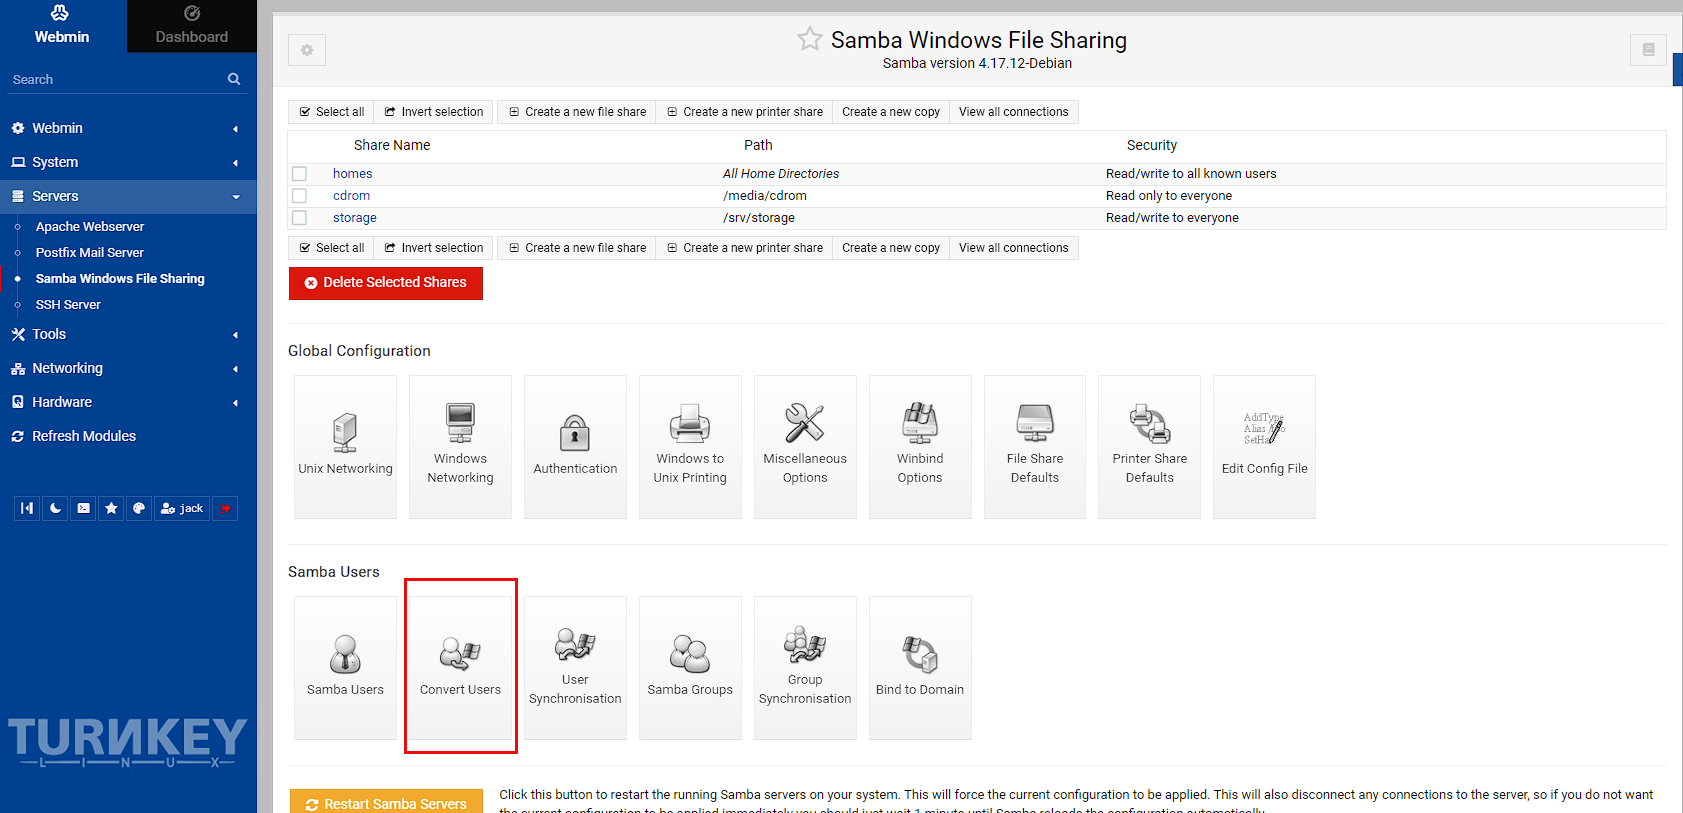
Now I’m going to convert the user I created that has access to the mountpoint, which is nas and then convert the user. I’m also selecting to only convert listed users as I don’t want to convert everything. You can also press the person icon to the left of the user box to select from a list of users to make sure you’ve got it right as well:

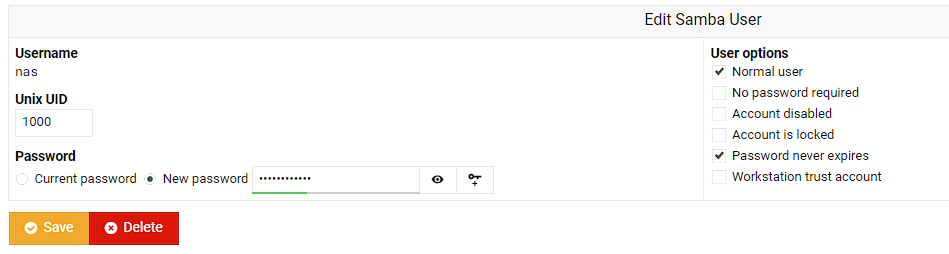
After waiting for the conversion to complete, I then need to set a password for the new samba user. To do this, I go to Samba Users:
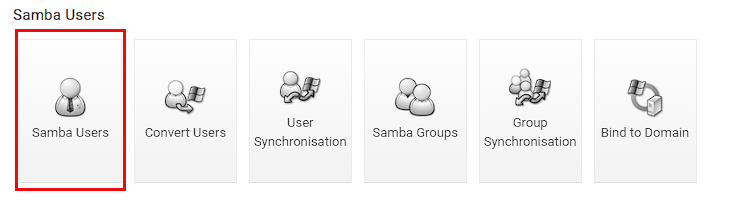
Then select the user I just converted:

I can see the convert worked as I can see the correct Unix UID of 1000, so I’m now setting a new password, and not allowing the password to expire:
I’m heading back to the Samba setup page, and clicking “Create a new file share” at the top of the screen:
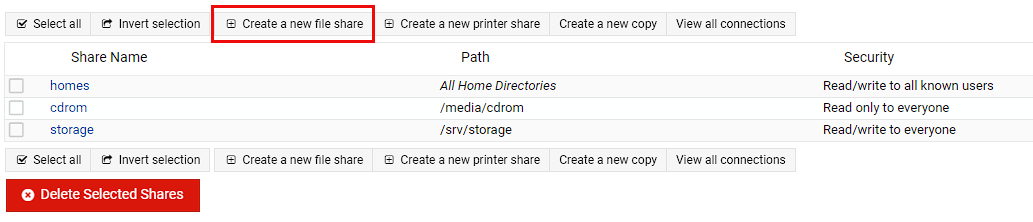
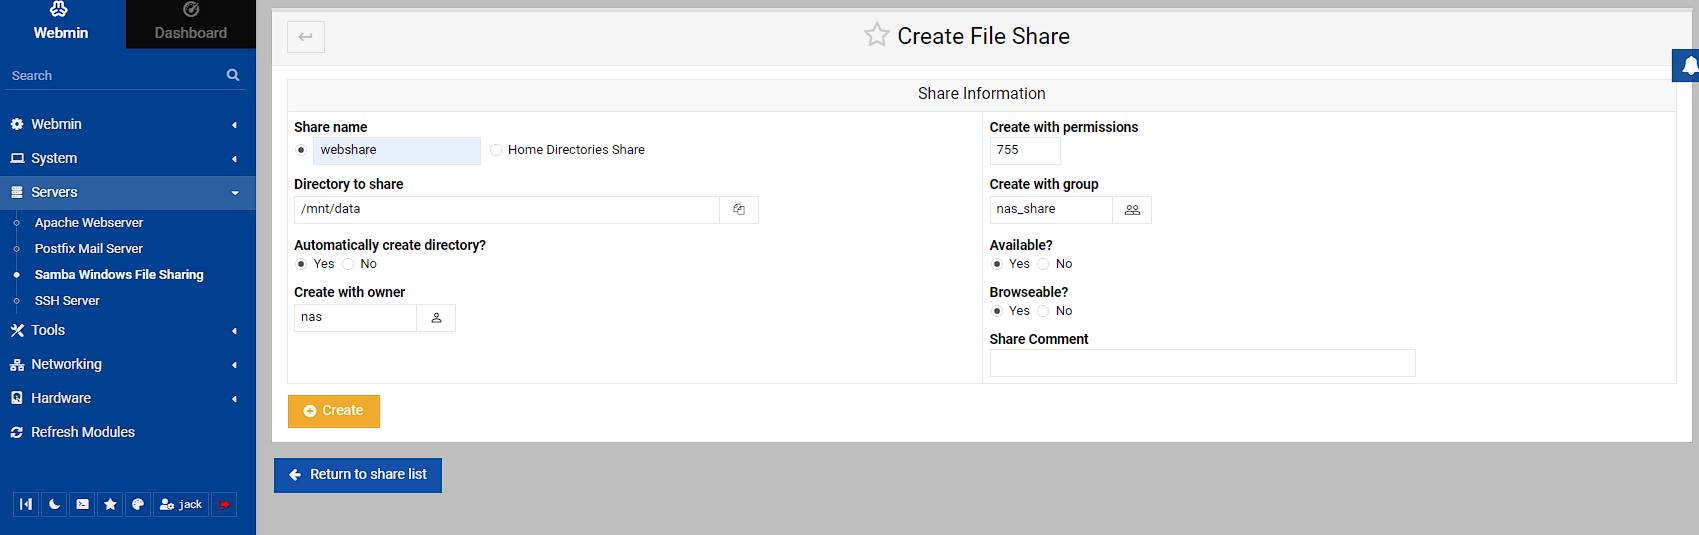
In this screen I’m going to create the share by setting a share name I can remember (I chose webshare), choosing the mountpoint as the directory to share (you can use the folder icon to the left to get up a file explorer if you’re not 100% sure), setting the owner to the nas user, the group to nas_share and leaving everything else as is.
Once I clicked Create, I was passed back to the config screen and could see the new share I created. If you can see on the right hand side, there’s a notification that this share is read only to all users. I don’t want this, so I need to do some configuration by clicking on the share:

In the base screen of management of this share, I’m going to click “Security and Access Control”
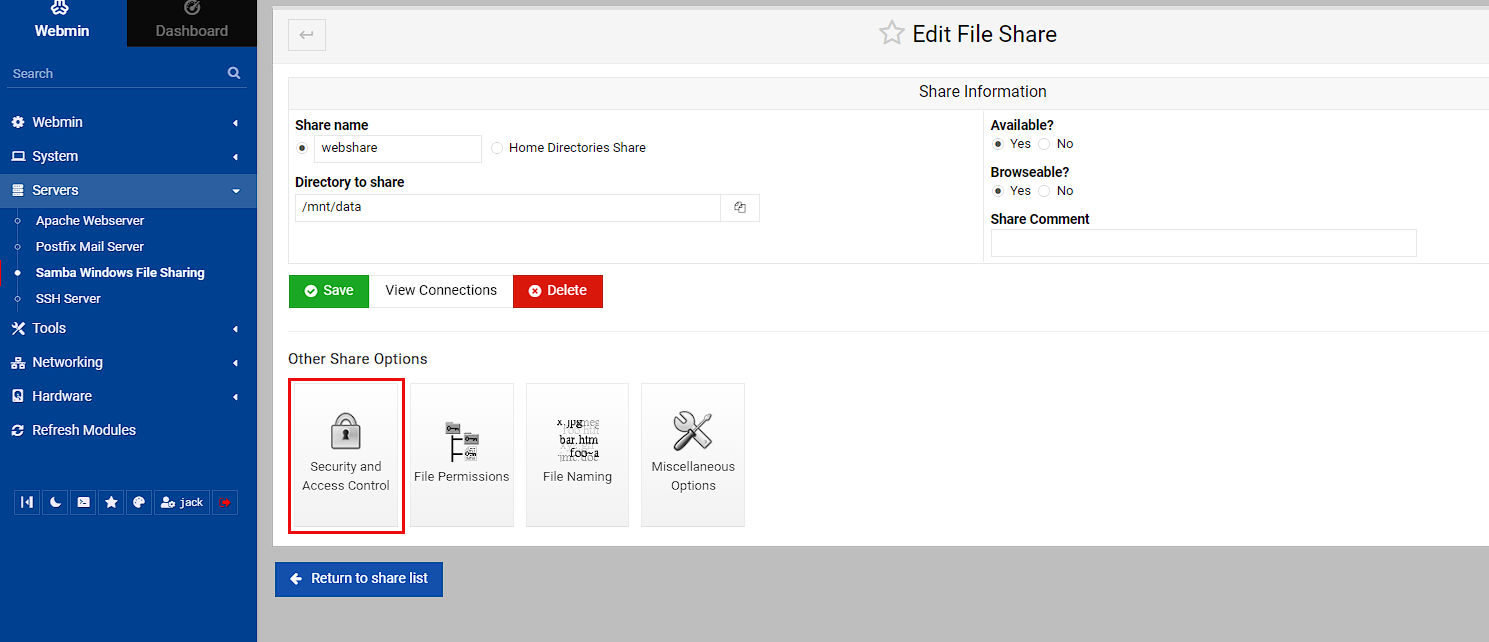
Within this screen, I’m making 2 changes, setting the Writable to true (as it’s read-only without this) and setting valid groups to nas_share, then clicking save.

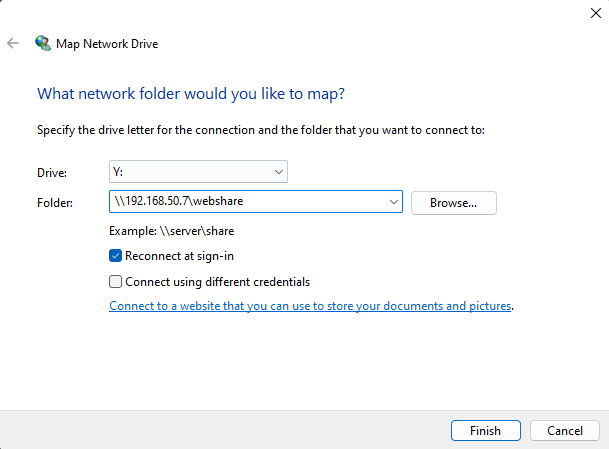
Now this should be everythingIn needed to do to get this running, there’s just testing that everything fits together now. To do this, I’m opening File Explorer on my desktop, right clicking on “This PC” and selecting “Map a network drive”
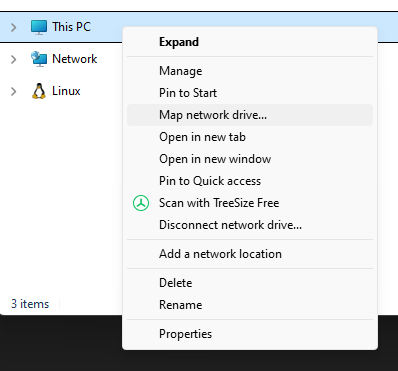
This should opened dialogue that I’m going to set the location of the shared folder. The network address format for Samba is pretty straightforward, but I have to admit when I was first figuring this out, it took a while to get it right. However, the format for this is \\{ip of the turnkey server}\{name of the samba share} in my case this is \\192.168.50.7\webshare
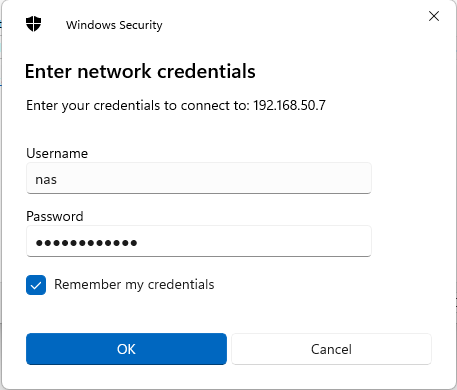
After clicking Finish, it opens a window for me to enter my credentials to access the share, and the correct user for this is the nas user I setup earlier. I also want it to remember my credentials for when I log in to be able to see the share:
At this point, a file explorer window should open and I can check that I can create, edit and delete a file, which works.
Home assistant virtual machine
Home assistant OS setup
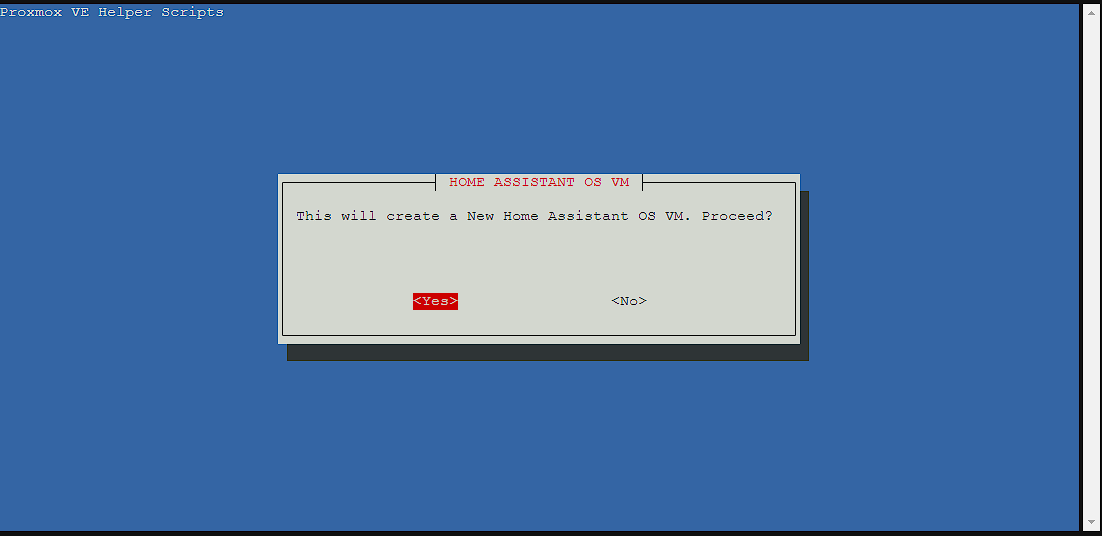
As mentioned earlier, I’m using a helper script to setup the virtual machine as it creates an installer to simplify getting setup. To be clear, all of this can be done directly using similar instructions to how I’m going to setup the Docker virtual machine, the main thing it’s doing, is simplifying finding and running commands.
To start with, I’m heading to the tteck GitHub pages site here and grabbing the install script, which is as follows:
bash
what this is doing, is grabbing the script found at https://github.com/tteck/Proxmox/raw/main/vm/haos-vm.sh and running it, so it’s a good idea to check the script and the repository for anything that could be malicious. For myself, after doing a cursory check and that the repository has at least 13000 stars means I felt it was trustworthy enough to run, though there is a warning about copycat repositories.
The next step is to open up the shell in the web UI as using SSH can cause issues. Then run the bash -c "$(wget -qLO - https://github.com/tteck/Proxmox/raw/main/vm/haos-vm.sh)" command and a install GUI should open prompting for install, and select yes:
NOTE: use the tab key to cycle between menus
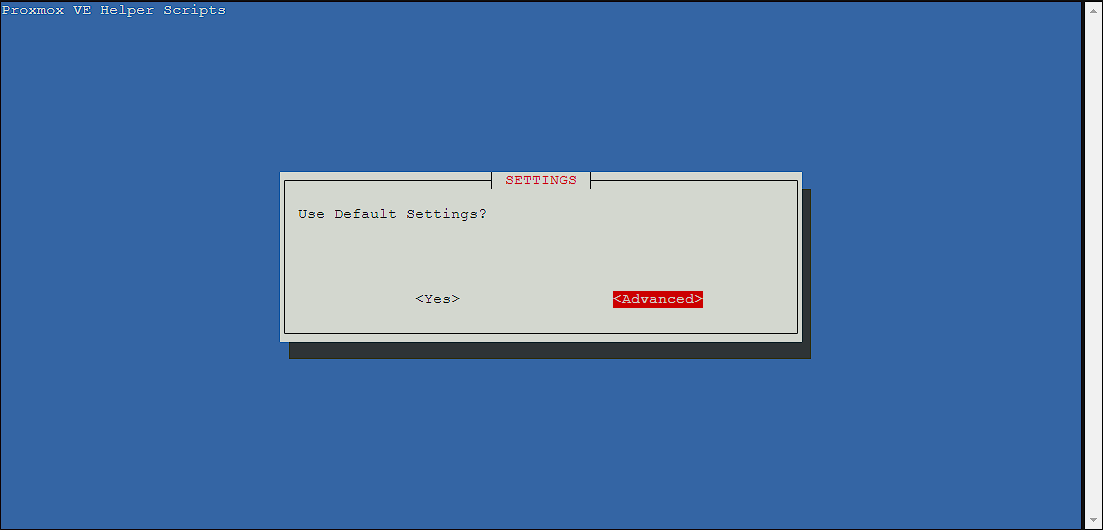
I’m going to go through the advance install, but this isn’t necessary for most users. If you don’t want to do the advance install, skip ahead to the Standard install section.
Advanced install
NOTE: This section is only required if the Advanced installation route has been chosen, skip ahead to the Standard install section if not.
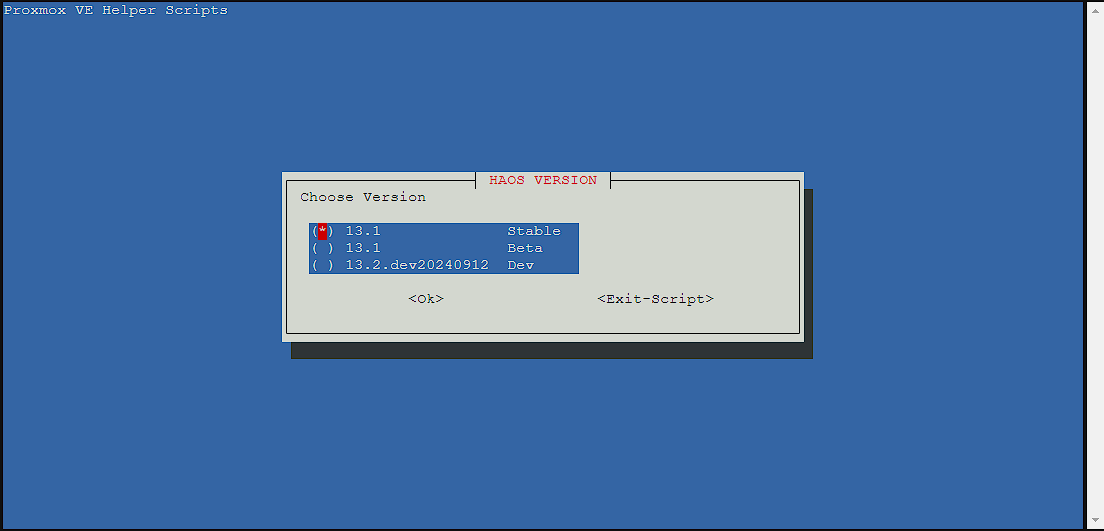
I’m going to go with the Stable as this is going to be running the programs on my homelab, so I don’t want to deal with the possible errors that occur on less stable branches:
The next screen lets me set an identifier for the virtual machine, but I’m just going to leave it as the id it’s picked out:

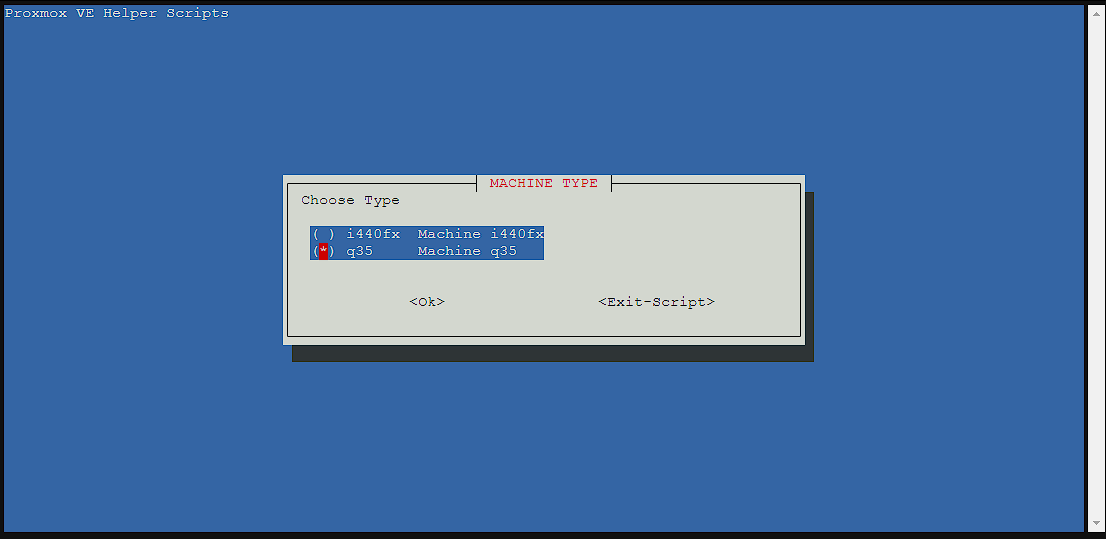
This screen is fairly important, and is asking which chipset I want to run the virtual machine under. There’s a lot of information about the differences but essentially, q35 is newer and has support for PcIe devices (which means better support for GPU passthrough), but reduced legacy device compatibility. While i440fx is the default, I decided to go with q35 to leave the door open for hardware acceleration.
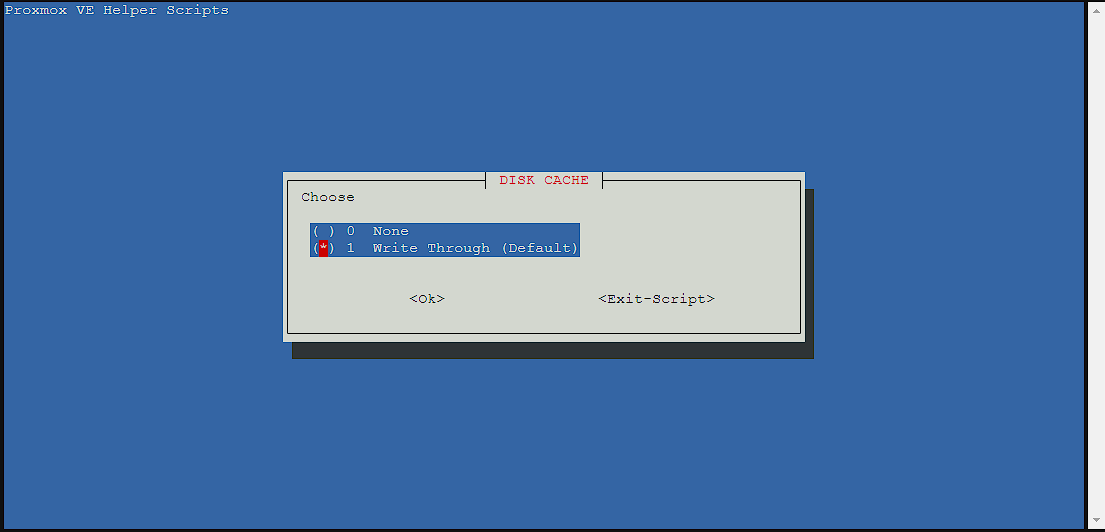
For the disk cache, I left it as the default, you can read more about the differences here, but essentially Write Through is optimized for read performance:
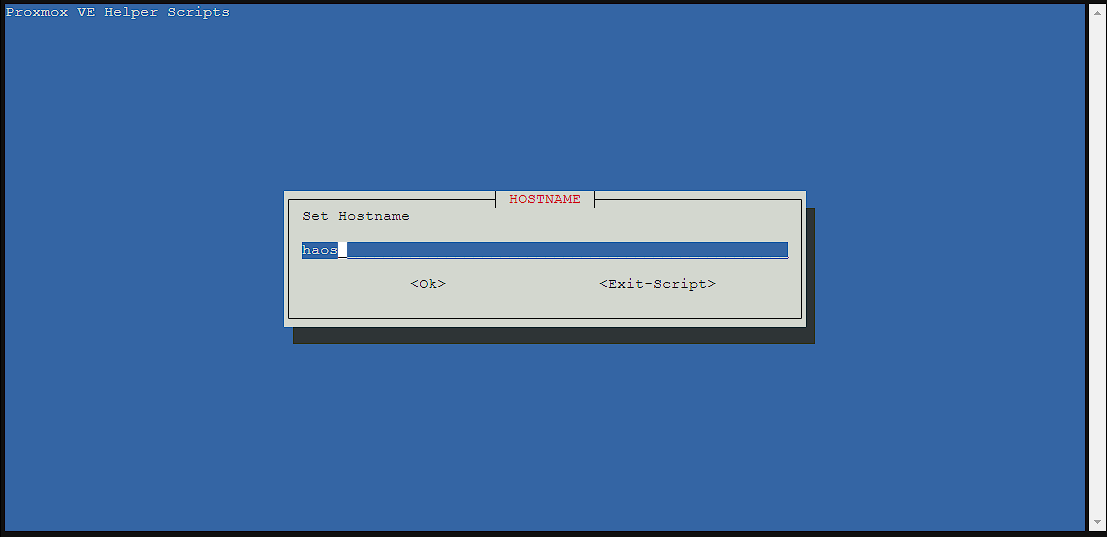
Normally, the hostname includes the version of home assistant I’m installing, but given this can change with updates, and I’m only installing 1 version of home assistant currently, I changed the hostname to just be haos:
The next screen asks me to pick a CPUI model. I’m leaving it as Host as KVM64 is reduced instruction set:

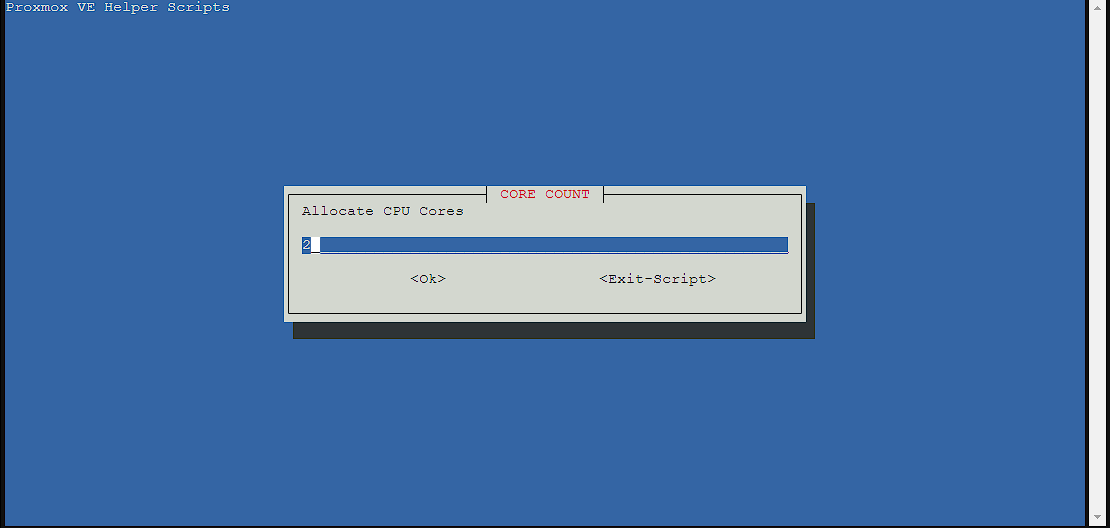
I’m leaving it as the default for CPU cores, as I have some to spare, I can always reduce this later if I need to:
Leaving the default of 4GiB of RAM is the best option (and shown in the picture plus what I did in my main server), but I did reduce this down to 2GiB on this demo machine:
The next set of screens are virtual machine bridge config, MAC address, MCU Size and VLAN which I just left as the default as these work for me.
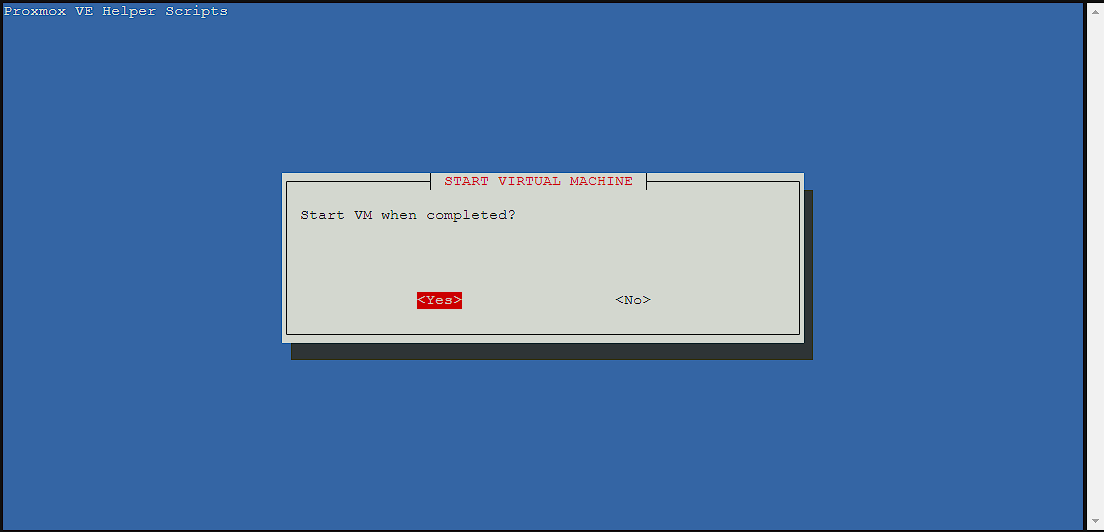
I do want the virtual machine to start when I create it, so I’m selecting yes:
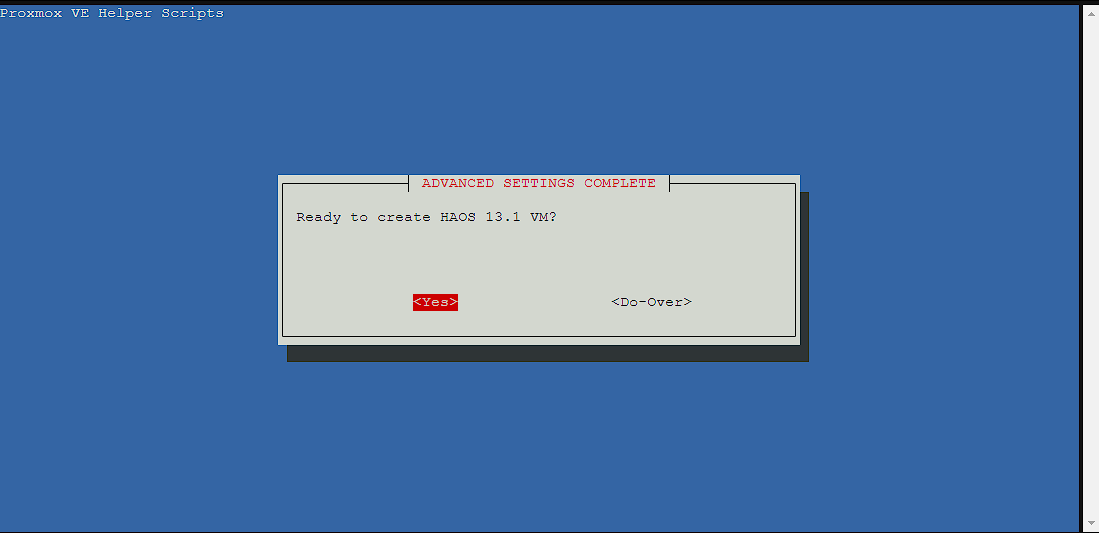
Now I’m finally ready to go ahead with the install, and get a chance to make a change if I got something wrong here, but this time I’m selecting yes as I’m ready to go:
Standard install
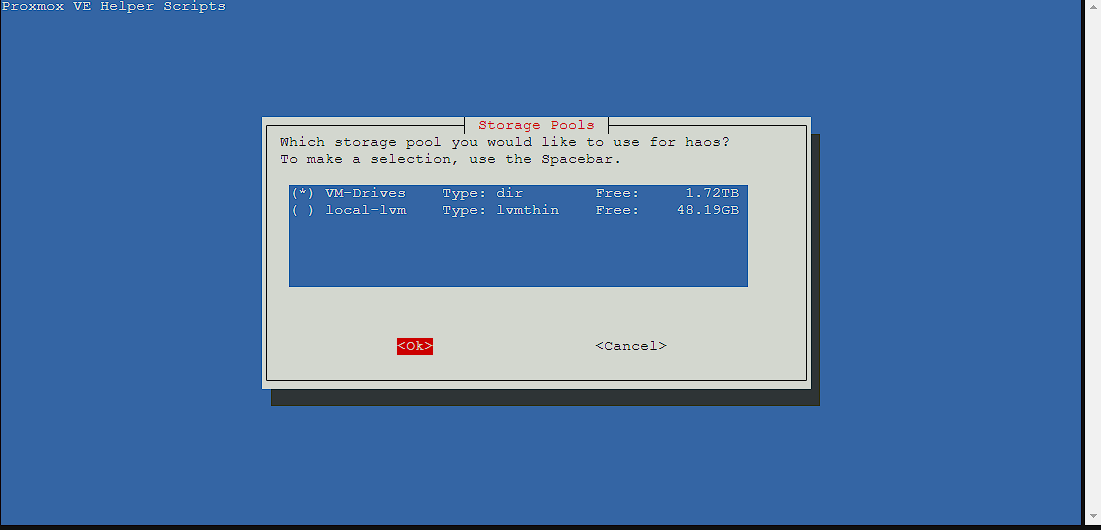
The first screen for the standard install is asking me where I want this virtual machine to live, and I’m selecting the storage pool I created in the previous article
At this point, the install should start and can take several minutes to get everything setup.
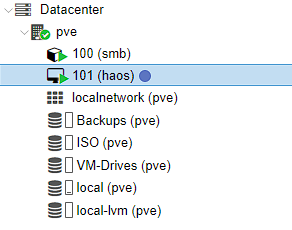
Once the script completes the install, there should now be a node available under pve for the new haos virtual machine:
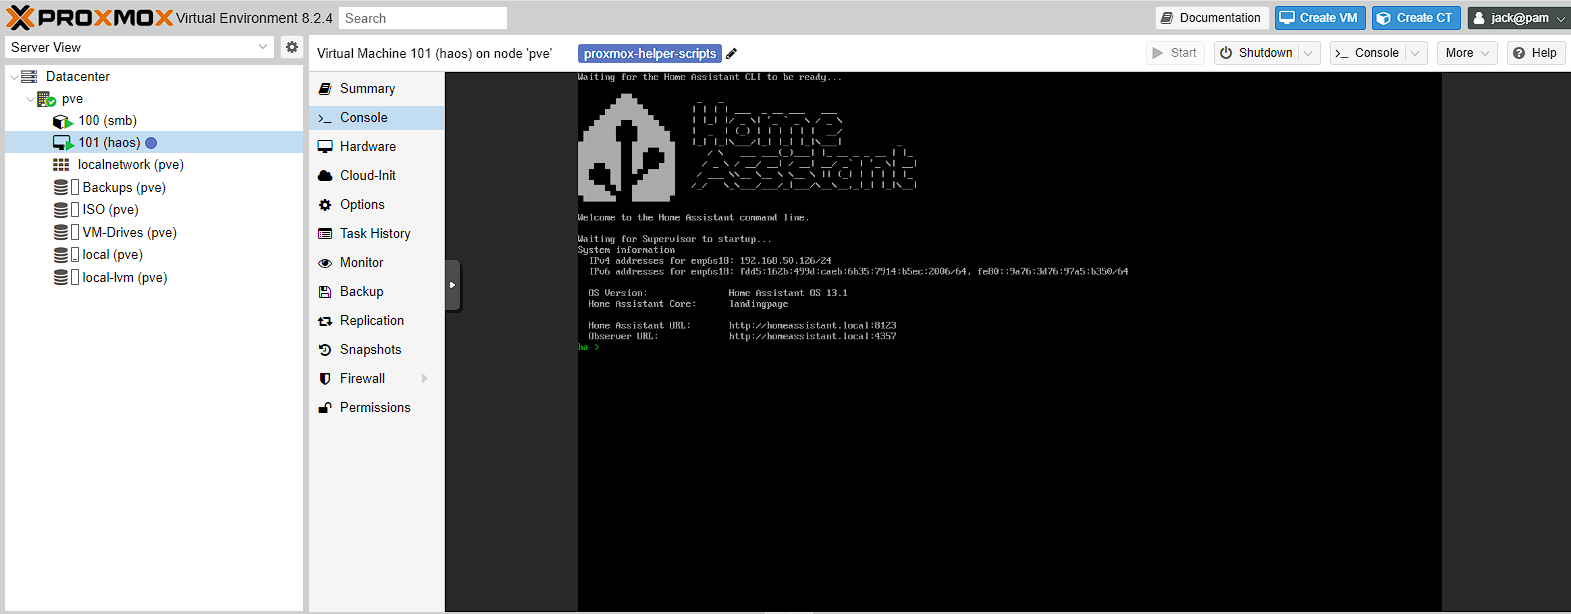
Next I’m going to head into the shell and wait for the machine to boot up. Once it’s booted, I get a screen telling me that home assistant has an ipv4 address and a local address that has been setup for me. This obviously isn’t correct as this lives in the DHCP lease that I have, which I don’t want as this means it can change. However, for initial setup I can use the ipv4 address to access the web UI.
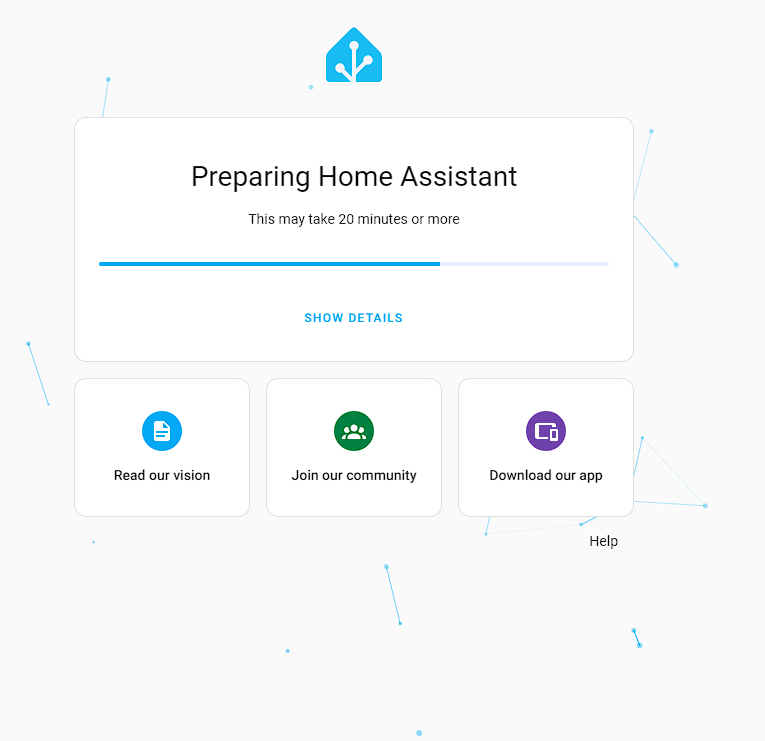
To access the web UI I’m going to use the ipv4 address with a port of 8123 based on the home assistant URL> So for me, this is 192.168.50.126:8123, and when I use this URL in a browser, I get a screen telling me everything is being setup, and this process can take more than 20 minutes:
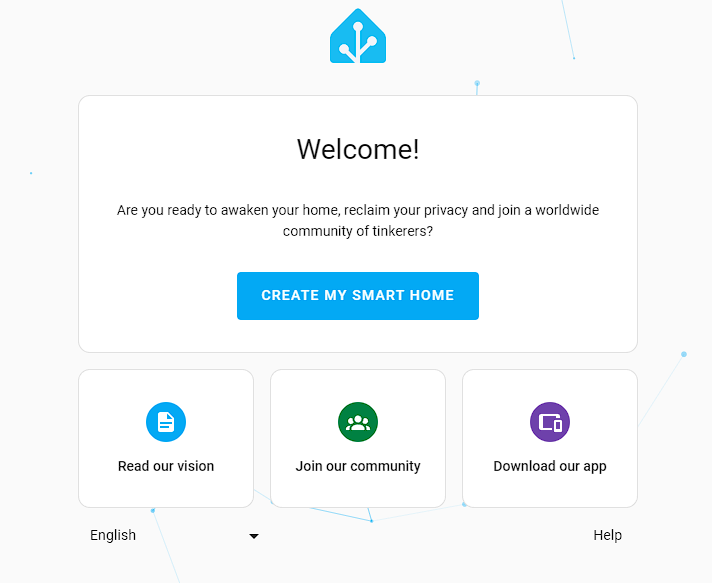
After I wait for home assistant to finish being prepared, I get a screen asking me to create my smart home:
Now I need to create the user for me to log in to the web UI in the future:

I can search for my address, or drag the pin to where I am to set my location, which is useful in the future for doing things like geofencing
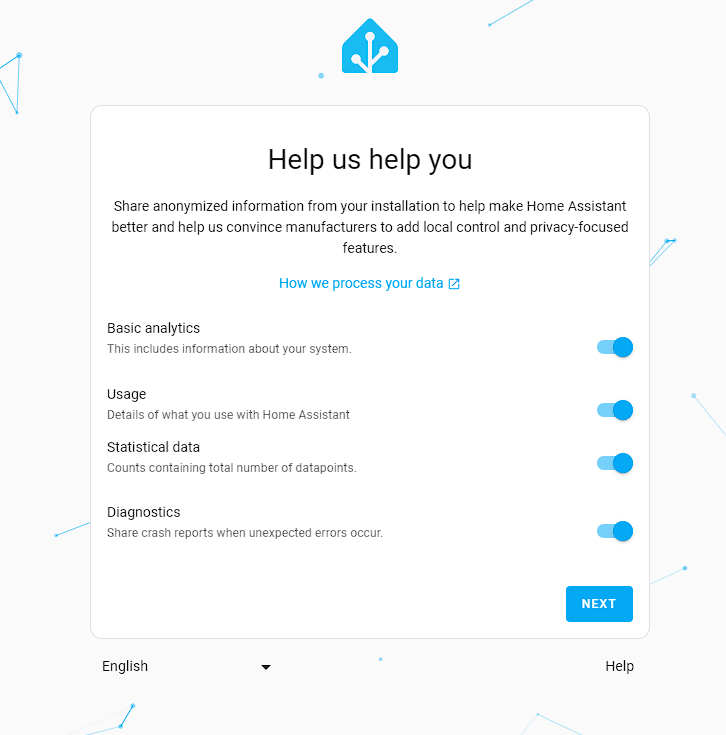
I need to set whether home assistant can get data on me. I turned everything on s it’s a small price to pay for getting access to a great piece of software for free.
Home assistant is smart enough to figure out if it can see anything on the network that can be configured to be pulled into home assistant. For myself, that was thread, but you might see something different here:

Everything should now be working and there is now access to the dashboard!
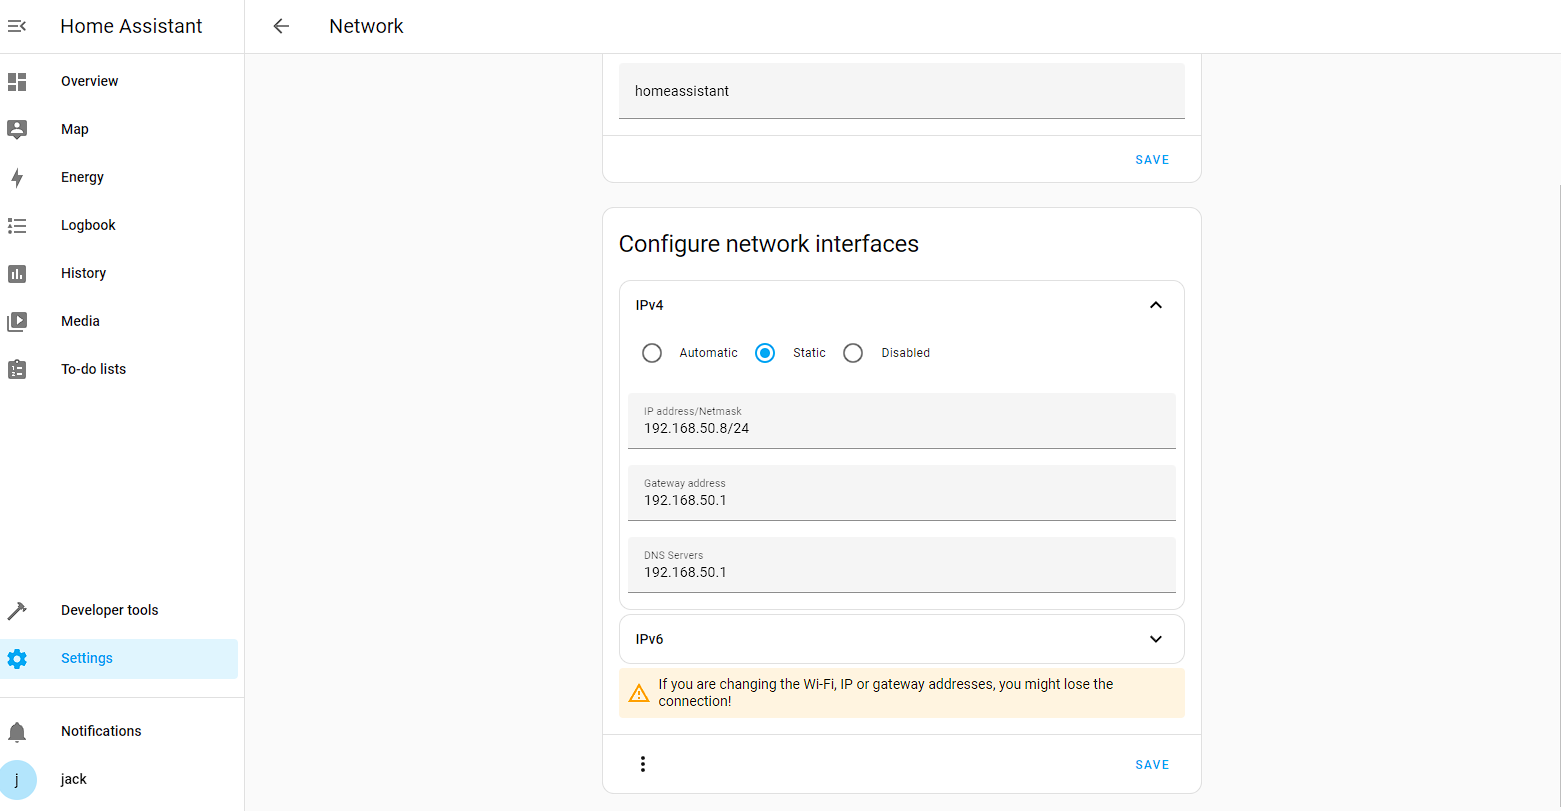
Now it’s installed, I’m going to change the IP address this server uses to something static by going to Settings -> System -> Network -> IPv4 and changing the IP to something in my static lease, which for me is 192.168.50.8/24:
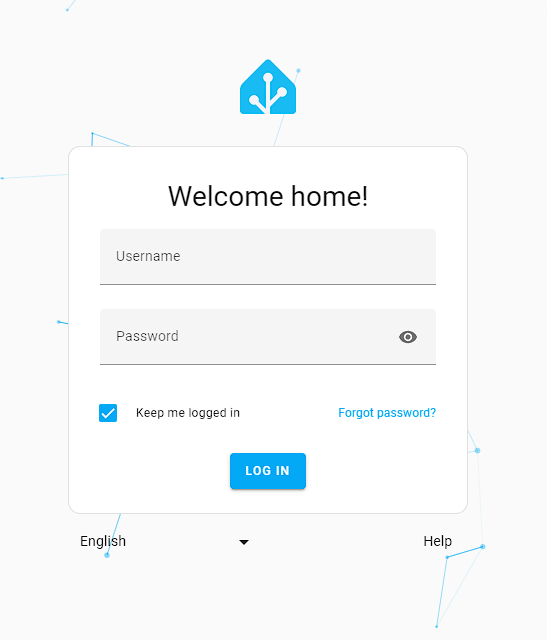
I then navigate to 192.168.50.8:8123 in my browser and I get the login screen:
At this point, the initial setup is done and all I do is check that the virtual machine can correctly call out to the internet by going to Media -> “Radio Browser” and picking a random channel as these are internet radios.
Docker virtual machine
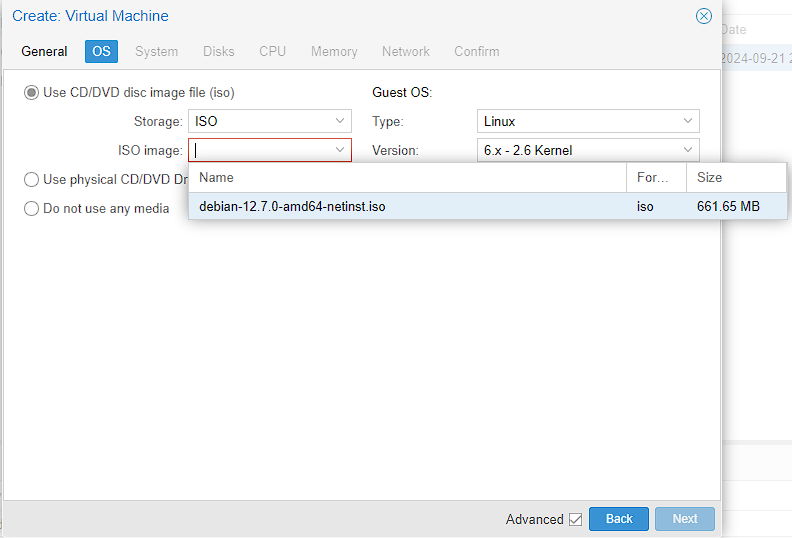
Debian ISO download
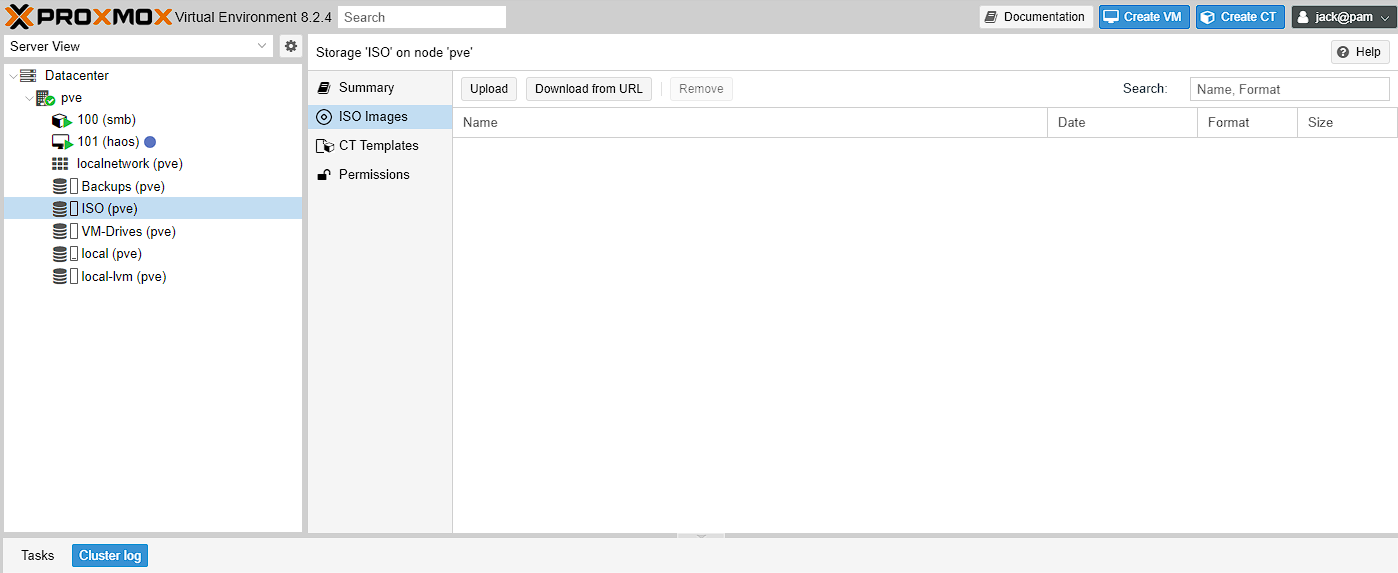
Before I can start the virtual machine, I need to add the Debian ISO to Proxmox so I can use it to launch the virtual machine. To start with I go to Datacenter -> pve -> ISO (pve) -> ISo images:
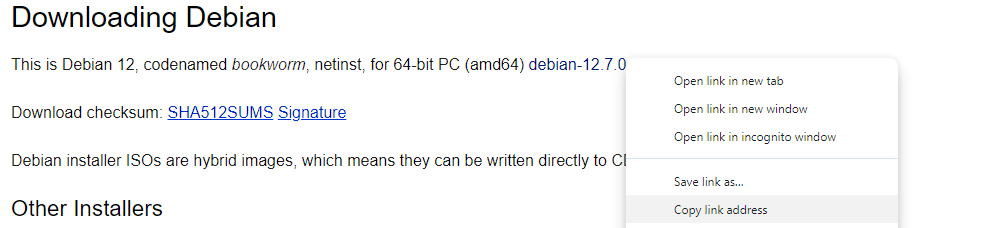
I have 2 options, I can either upload an ISO I’ve downloaded previously, or download directly from a URL. As the Download from URL option means I don’t need to have the ISO in 2 locations, I’m going to download directly from a URL.
To do this I head to the Debian download form here. As I’m using a 64-bit PC I can just got the link where it tells me the distribution, and right click on the link, followed by copy link address:
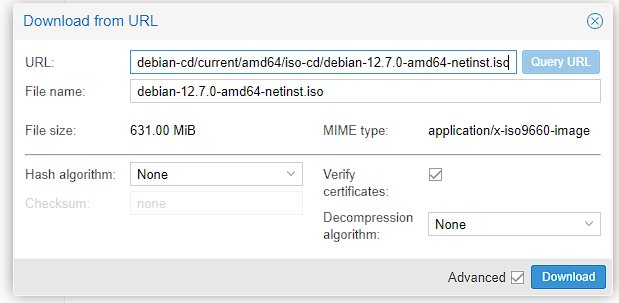
I can then open the Download from URL button in Proxmox, paste the link into the URL box and press the Query URL button, that fills in the rest of the details for me:
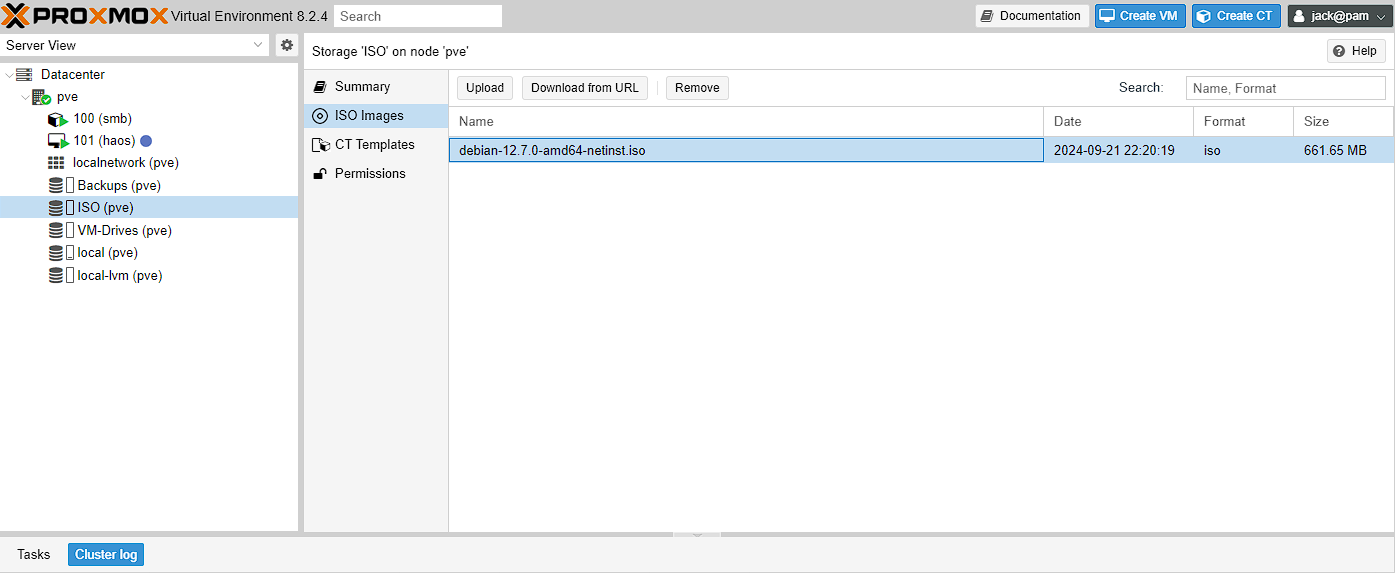
Upon pressing download, there should be a confirmation window that this is happening and I just need to wait for this process to complete and the ISO should show up in the folder now:
Virtual machine setup
To create the VM, I just click the create VM button at the top of the screen:

I then leave the ID as the default, and set the name to docker as a reminder of what this machine will be doing for me. I also open up the advanced selection on tick start at boot:
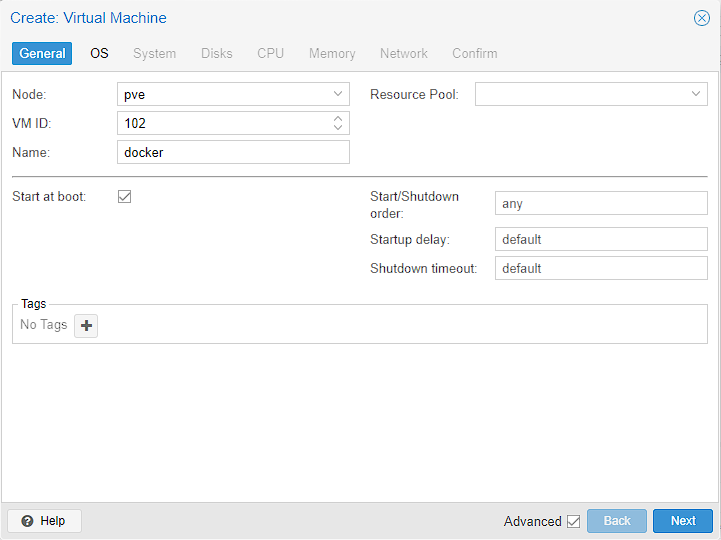
I can then select my the Debian OS I downloaded from the dropdown, and leave everything else as the default:
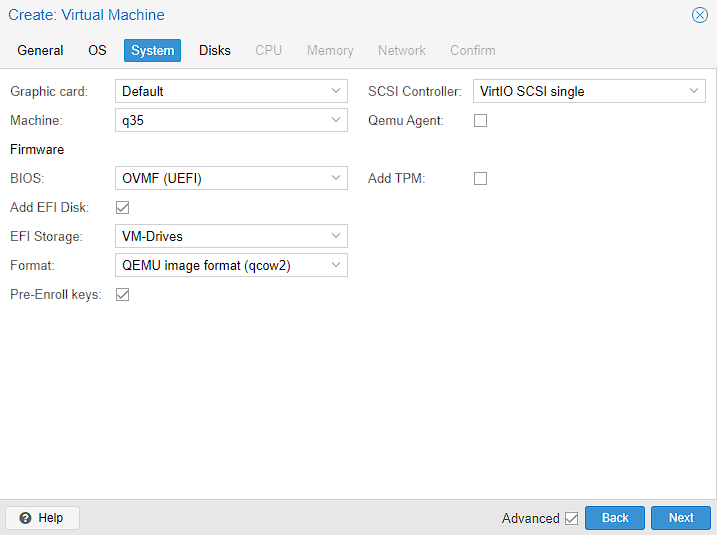
For the System screen, I do make quite a few changes.
- General
- I don’t have a graphics card, so left this as default
- I left the
SCSI Controlleras default as well - I changed the machine to from
i440xtoq35as I’m using a modern Linux version, and I might add PCIe devices at a later date - I left the Qemu Agent unticked as it requires being installed on the guest as well as being enabled. It does have some interesting features though, such as better snapshots, so I might enable it later.
- Firmware
- I changed the BIOS to UEFI, as it’s a modern Linux OS and I can take advantage of the faster boot times UEFI provides over a BIOS
Add TPMenables the trusted platform module which is required for installing Windows 11, but not Linux. This can add better encryption at rest, but I don’t think I need this, so I’ve left it off- I added the EFI Disk, as this saves the
EFIVARSfile that lets me change the boot order. I’m not planning to do this, but I have a fair amount of storage, so I’m going to enable it. - I select the
VM-Drivesfolder to store the EFI disk - I’m just leaving the format as the same. You can read about the differences here, but the TL;DR, is that this format supports snapshots and I’m not planning to move the virtual machine between Hypervisors.
Pre-Enroll Keysessentially allows Secure Boot to function correctly and so while I’ve had issues in the past with getting a PXE server to work, it can be disabled later on, so I left it.
The only thing I’m changing in the Disks selection is the Disk size, which I doubled to 64GiB.
NOTE: this is a demo system with a smaller amount of disk space. In my main server, with 16TB of storage, I set this to 256GiB as I had more space to work with. Don’t be too worried though, as it’s possible to change this later.. I also will show how to increase the size of the virtual machine disk drive later.
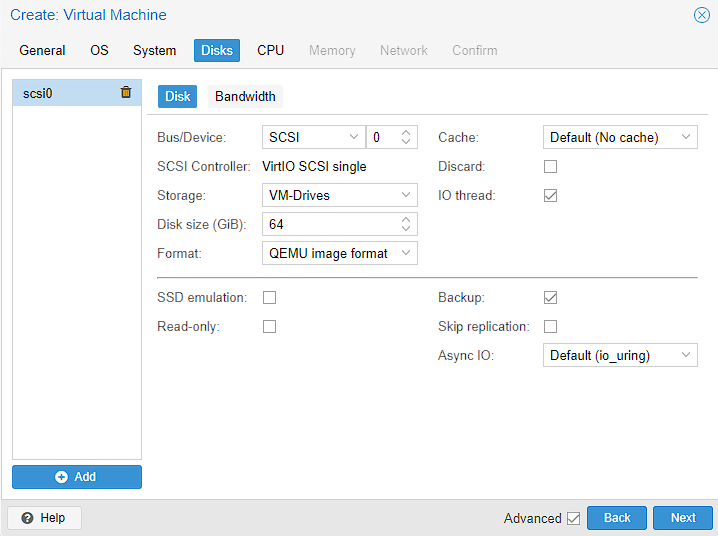
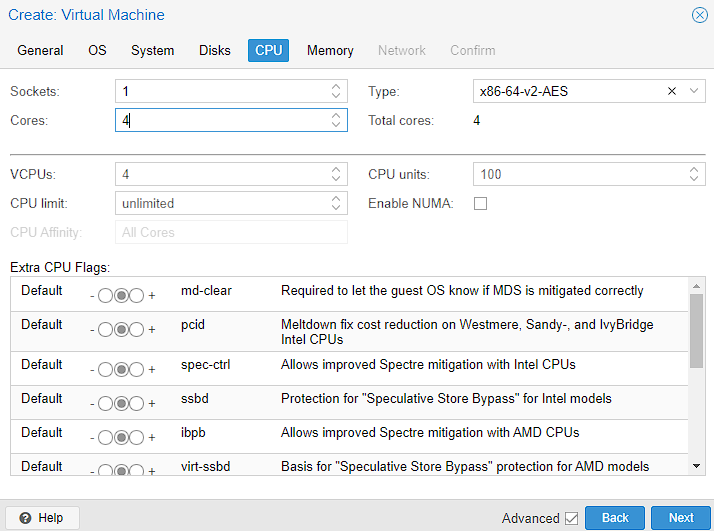
This system is going to contain a lot of services and is going to be by far the most resource intensive machine on this server. as such, I’m going to set as many CPU cores as I think I can get away with, which in this case, is 4 Cores. On my main system, I set 10 Cores instead. If this is wrong and I need more/less cores, I can always change this later. The rest of this screen looks like a lot, but everything else is left as the default, as this machine only has a single socket and it’s a 64 bit machine. The additional section below the line, is all advanced configuration I leave as default as well.
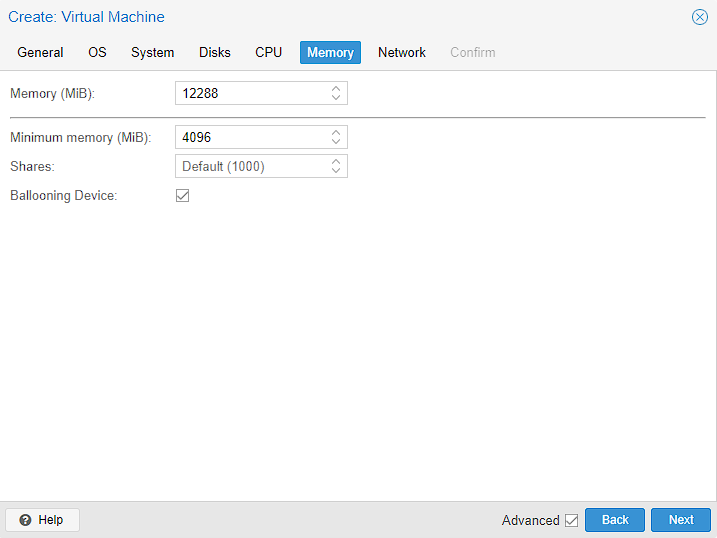
After setting up my homelab, I can see that the minimum memory required to run every service in this guest is 16GB of RAM. Unfortunately, that’s the total amount of RAM this system has, so I have to make a sacrifice and set 12 GiB (my “real” server has 32GiB set here) to leave something for the other containers and the host. I’ve also left Ballooning Device enabled. What this does is allow the host to take back unused memory from the guest if it’s available, but set a minimum floor of 4GiB.
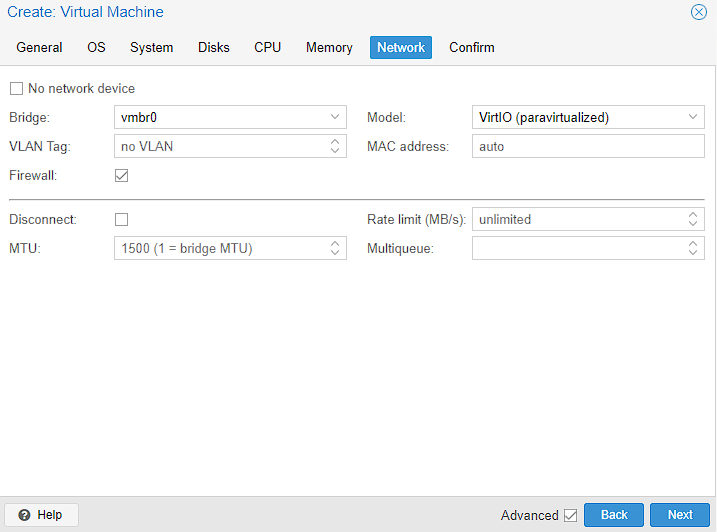
In the Networking configuration, I’m leaving everything as default as I want this machine to use the vmbr0 bridge that allows this guest to talk to the internet:
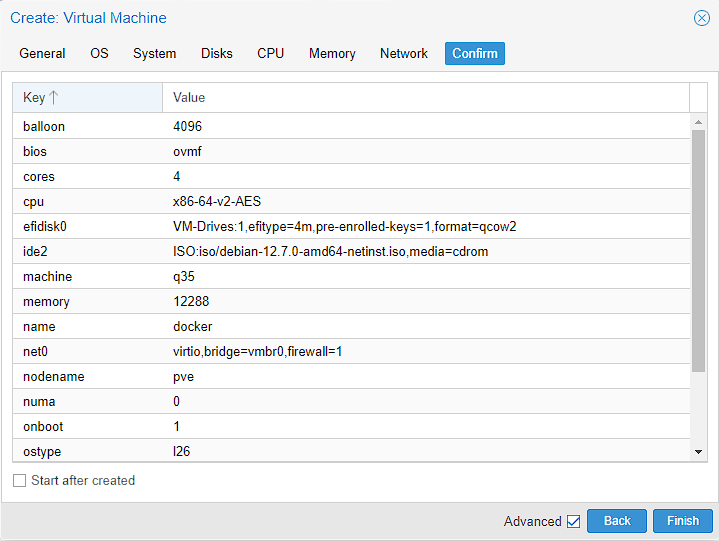
Finally, there’s just a confirmation screen for me to verify everything is correct before I can create the virtual machine. I’m leaving Start afer boot unticked, but this is personal preference to keep the step separate from virtual machine creation this time:
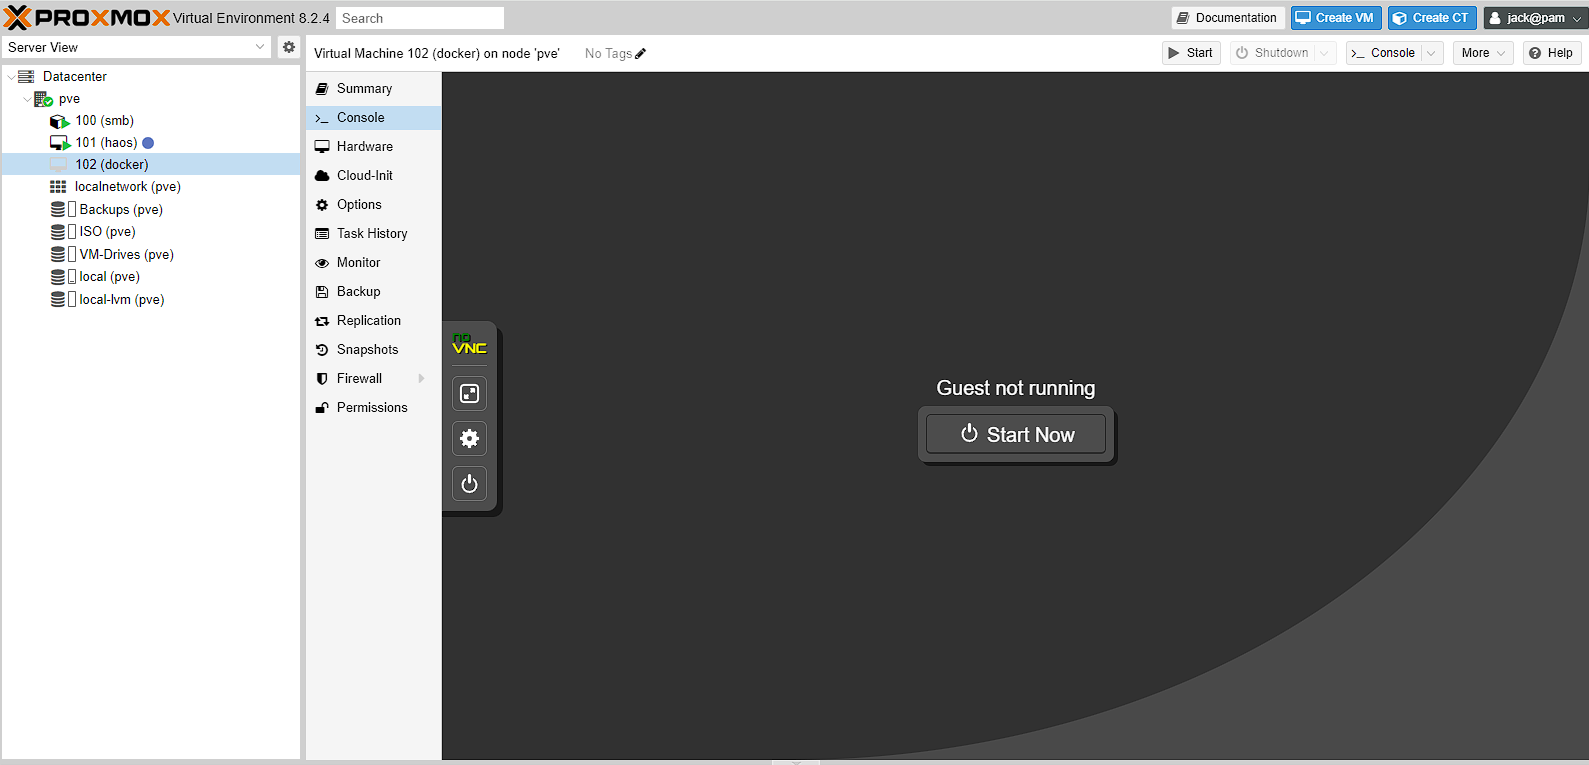
The machine should almost instantly be created, and I can choose to start the machine:
Installing Debian
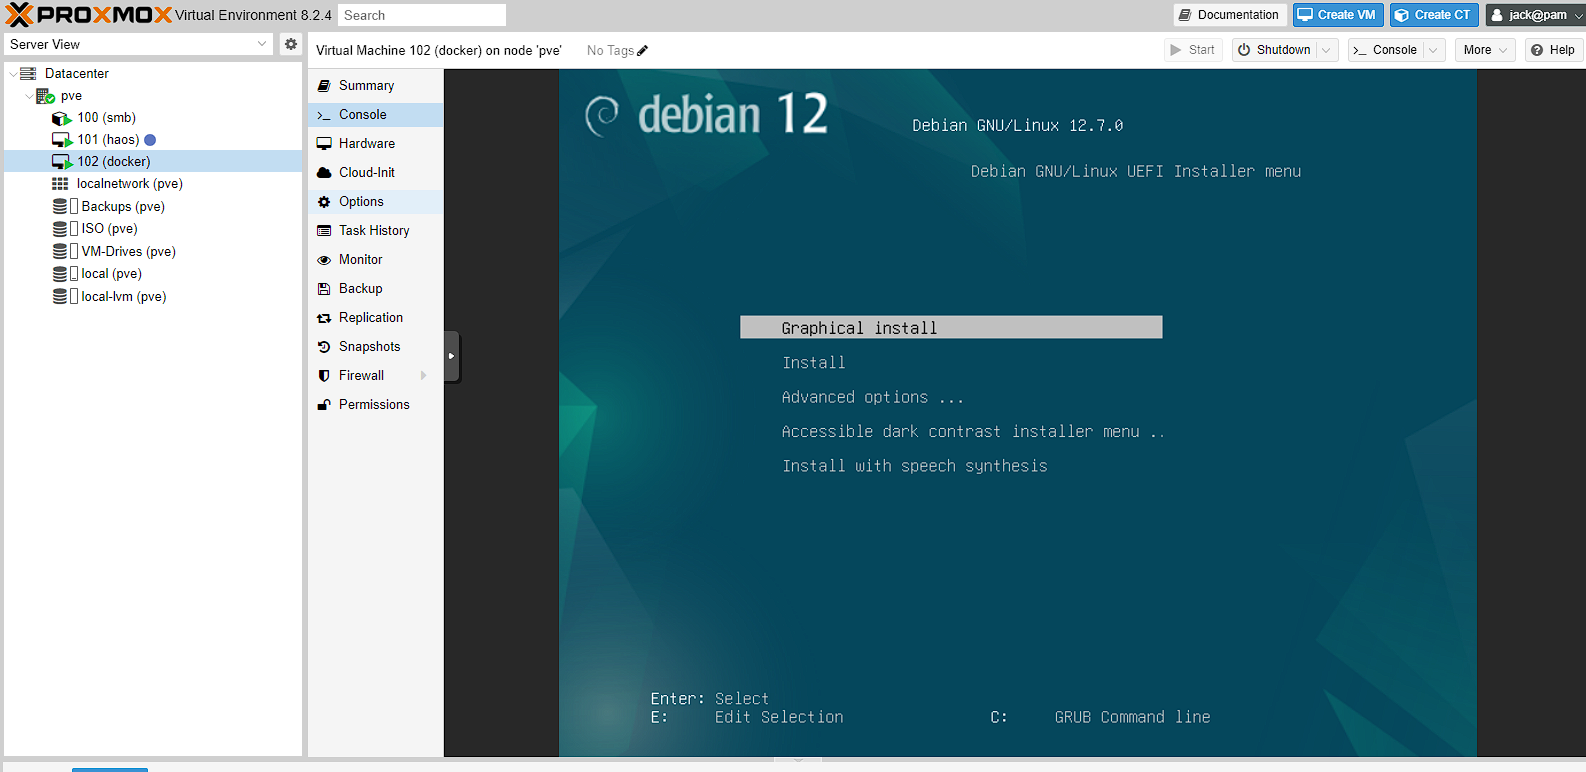
The Debian install process is pretty similar to the Proxmox installation, but I’m going to go through it anyway. To start with, when I boot the machine I get a choice of how I want to install Debian. I’m going to choose the graphical install option, as it guides me through the process best.
I’m not going to go through the next set of screens as they’re pretty self-explanatory, but I just wait a few seconds for the install process to start, then select English for my language, United Kingdom for location and British English for the keyboard. These will obviously change based on where you are.
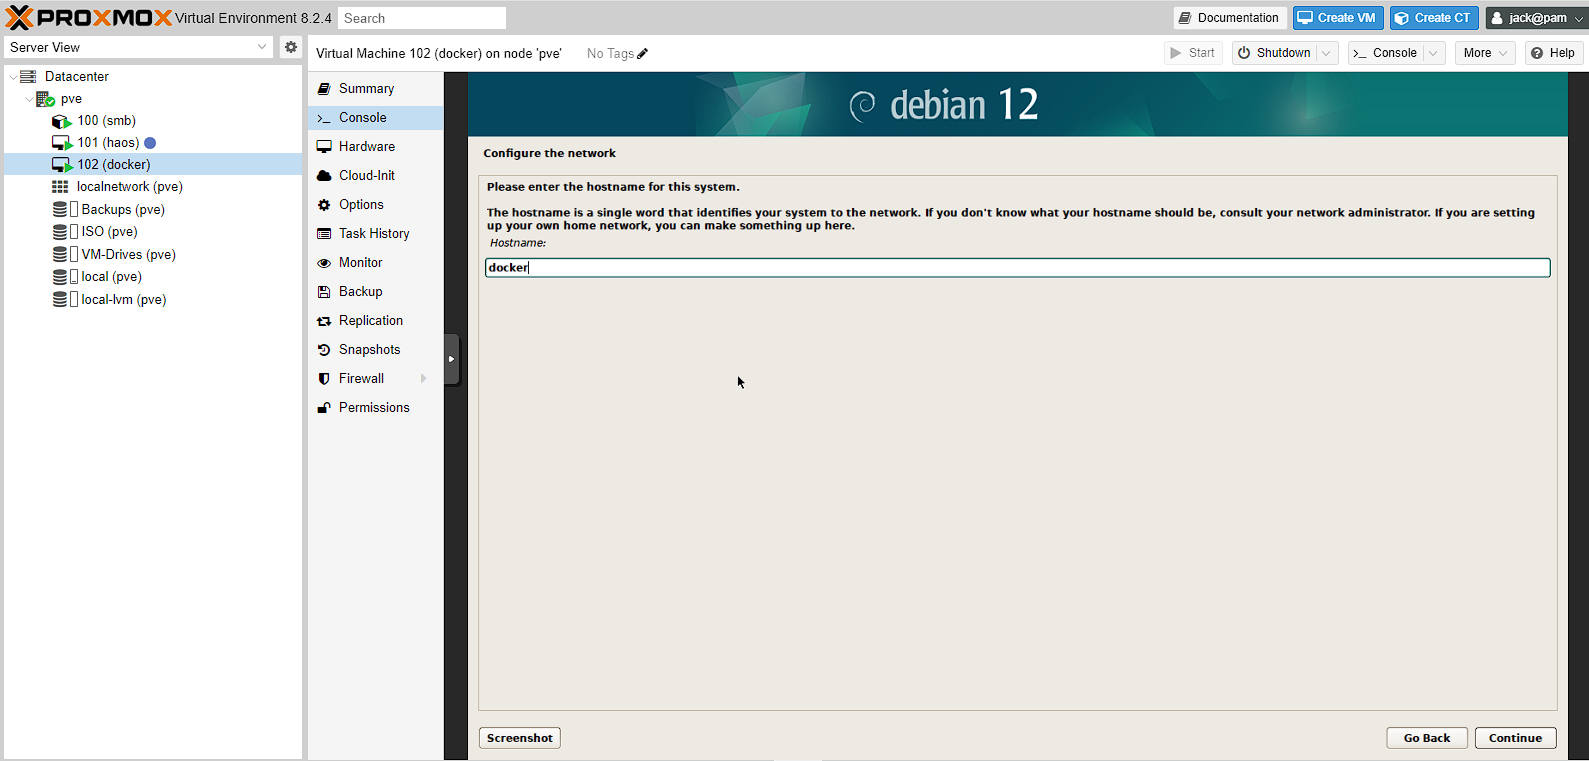
After this a short install process should start before asking me to set a hostname. I chose docker, as it’s what I’ve called the virtual machine and it indicates the purpose quite clearly.
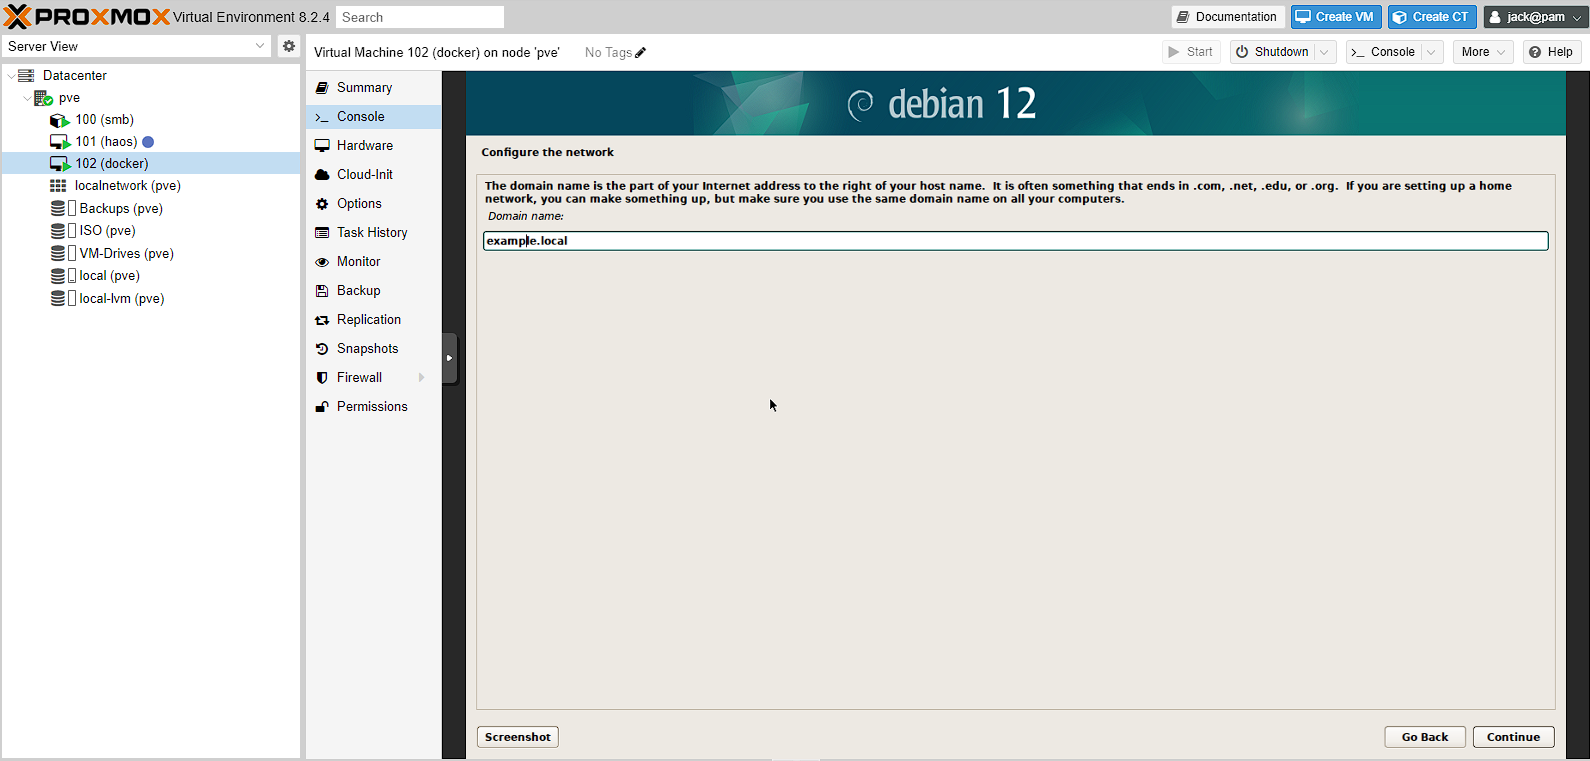
At the domain name configuration screen , I just chose example.local as I’m pretty much not going to use this, as I’ll be using either the IP address, or a configured domain I own later.
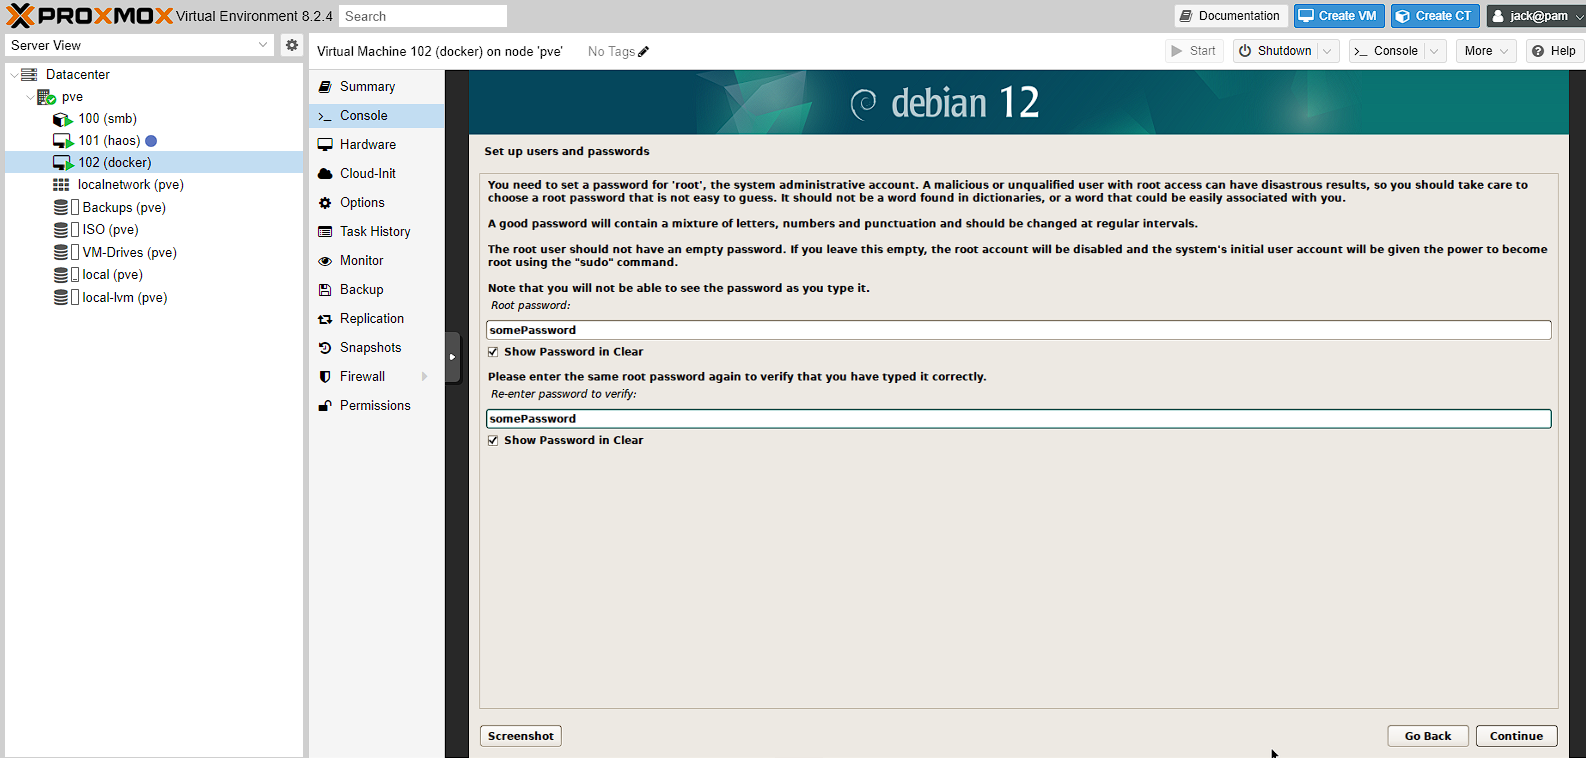
Next I’m just setting a root password
NOTE: if you set a root password, and the user setup below, the user below will not be allowed to use sudo by default
Debian lets you set a user account instead of root, so the next 3 screens are related to this. Once again, it’s self explanatory so I’m not going to screenshot them. I’m setting the name of the user of this account to jack, the username to jack and setting a password.
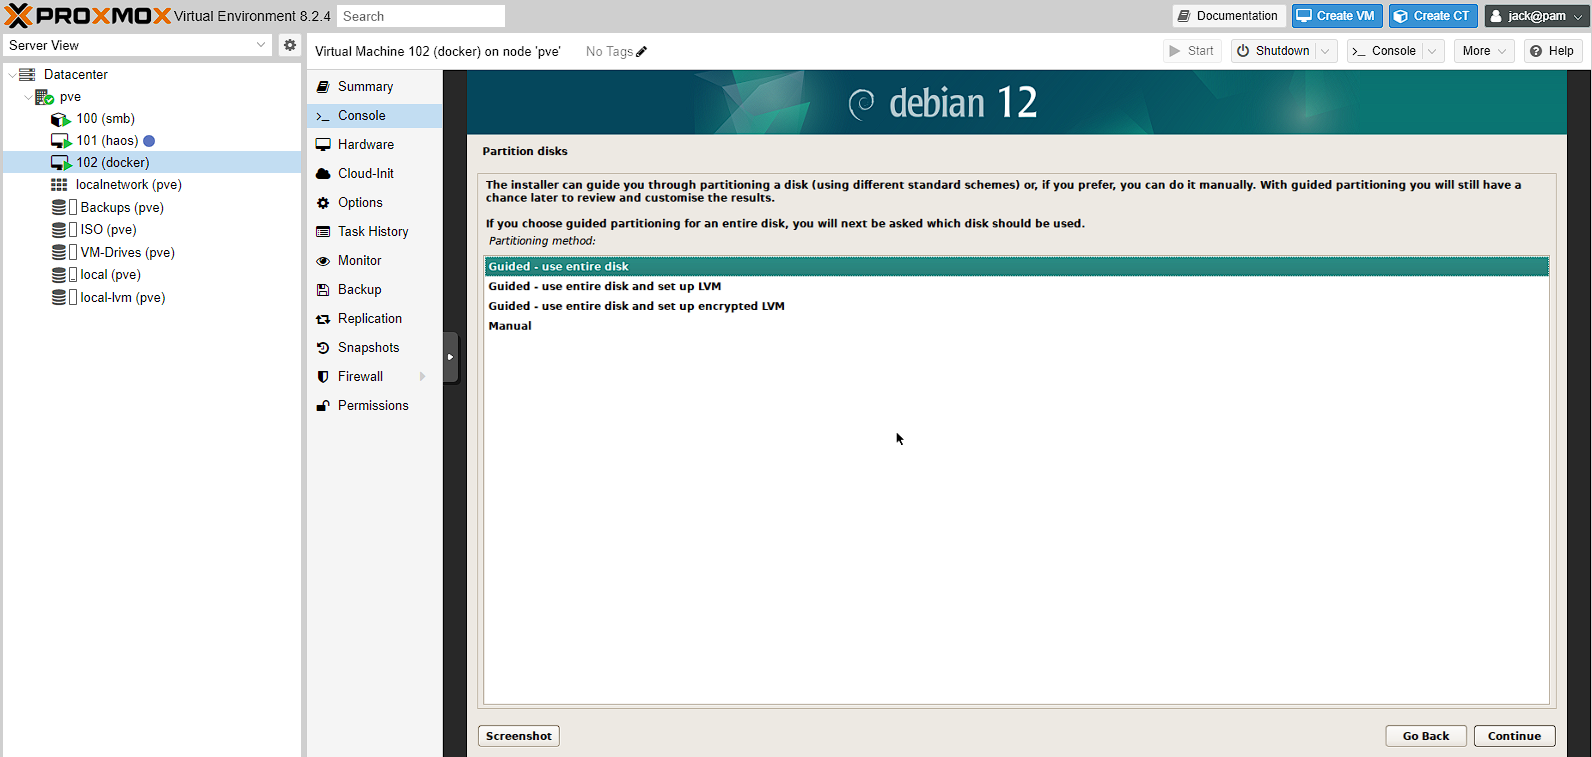
Once again, a short install process will occur (though, this is also where the clock is setup if the virtual machine can’t access a network clock ) and then the disk selection will be started. There are 4 options, and I’m leaving the default. The reason for this is that the manual process provides more settings than I need access to. The LVM essentially is a way to create and manage volumes, that I already can do on the virtual machine in Proxmox. See more discussion here.
I then have a single option for the disk to use, so I select that.
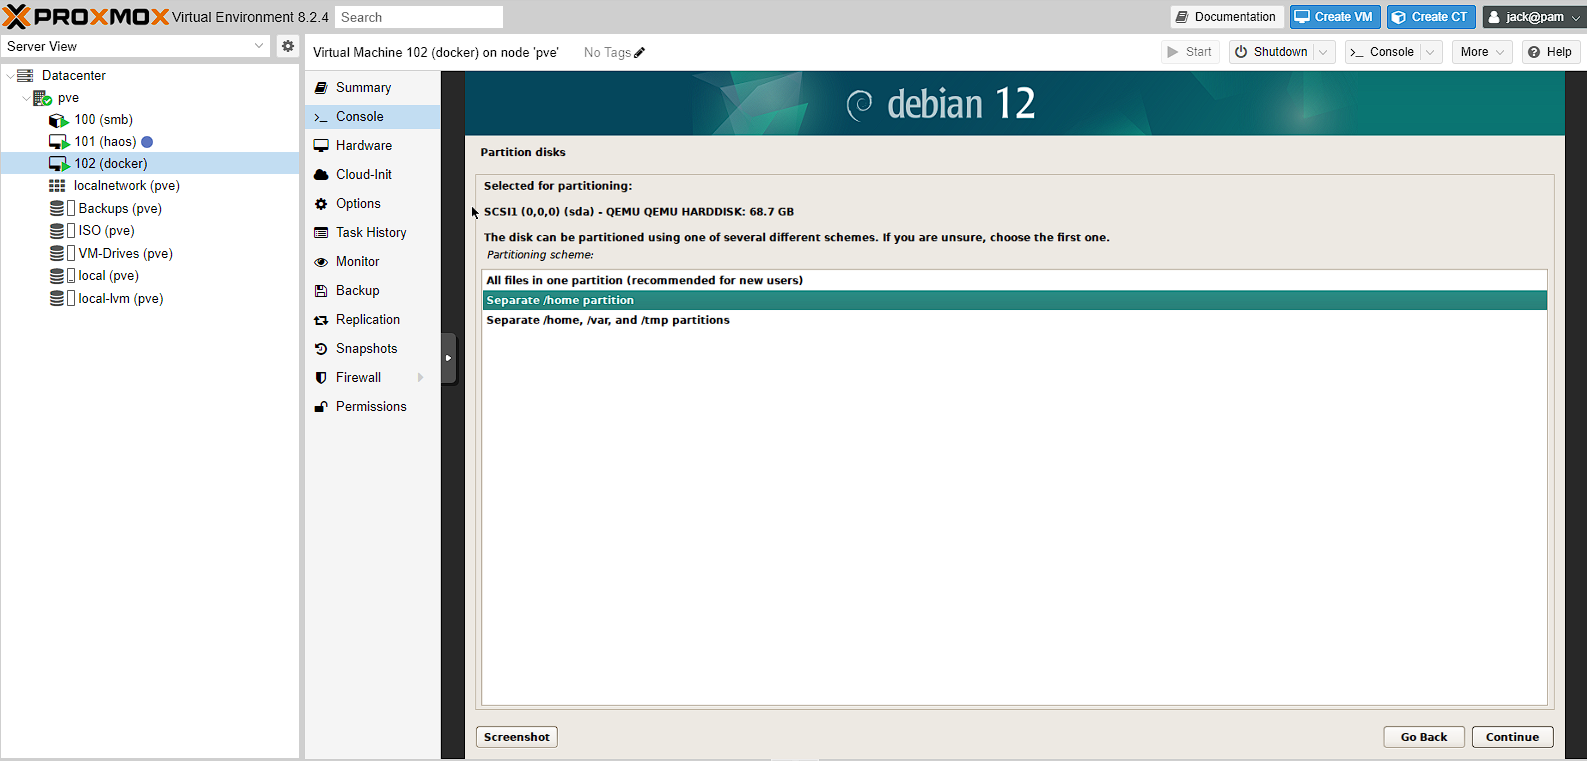
Next up, is choosing whether or not to use a separate /home directory. What this means, is whether to add a partition for /home that needs to be managed. However, what this gives you, is the ability to reinstall more easily and that if the /home directory fills up with data, the server doesn’t start crashing. As such, I decided to add a partition for /home.
Honestly, this decision went either way for me, and this could make things more difficult in the future. As such, this choice is really personal preference.
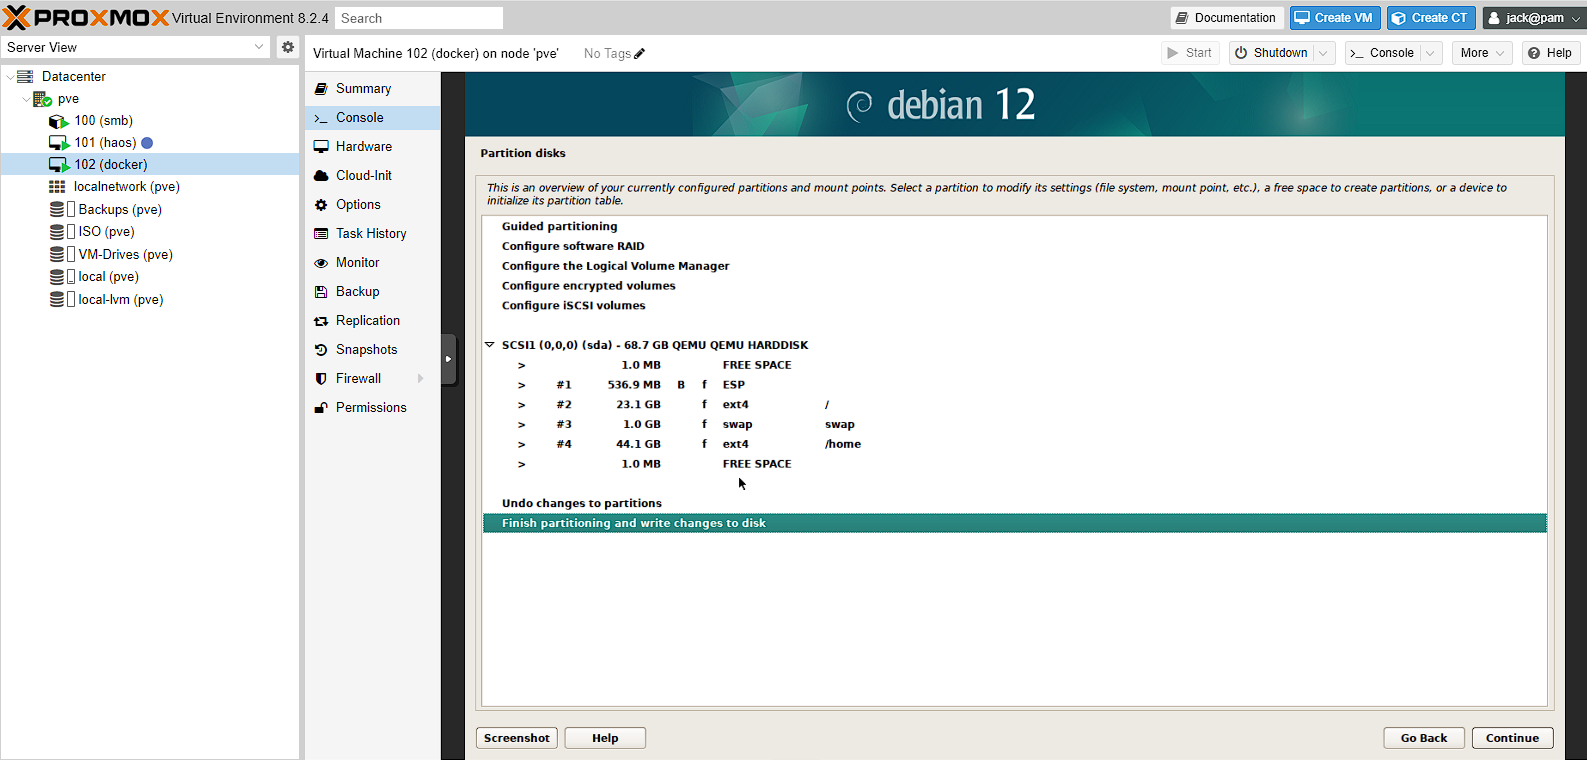
I now get a confirmation screen showing that /home is getting a 44GB partition, the / is getting 23GB and the other parts of the system use the rest:
NOTE: you will get a second confirmation screen after this before changes are written.
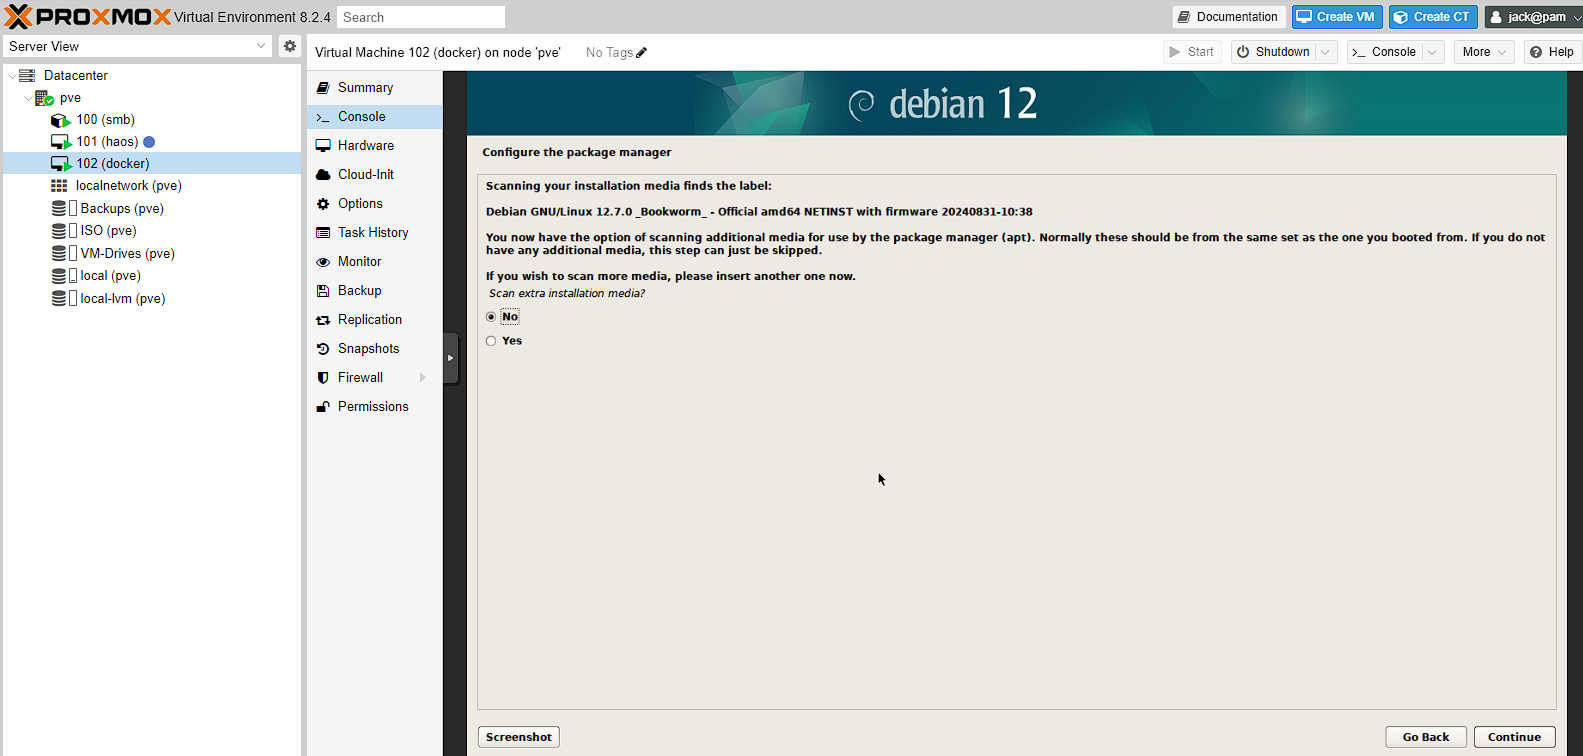
Once the install is complete, I get asked if I want to scan for additional media, but I don’t so I’m just clecking no to skip
The next steps are setting up the package manager, which I’m not going to show as I’m just leaving all the defaults. I set United Kingdom for mirror country, deb.debian.org for the archive mirror and leave the HTTP Poxy blank.
There will then be another installation screen for installing the apt package manager and some packages.
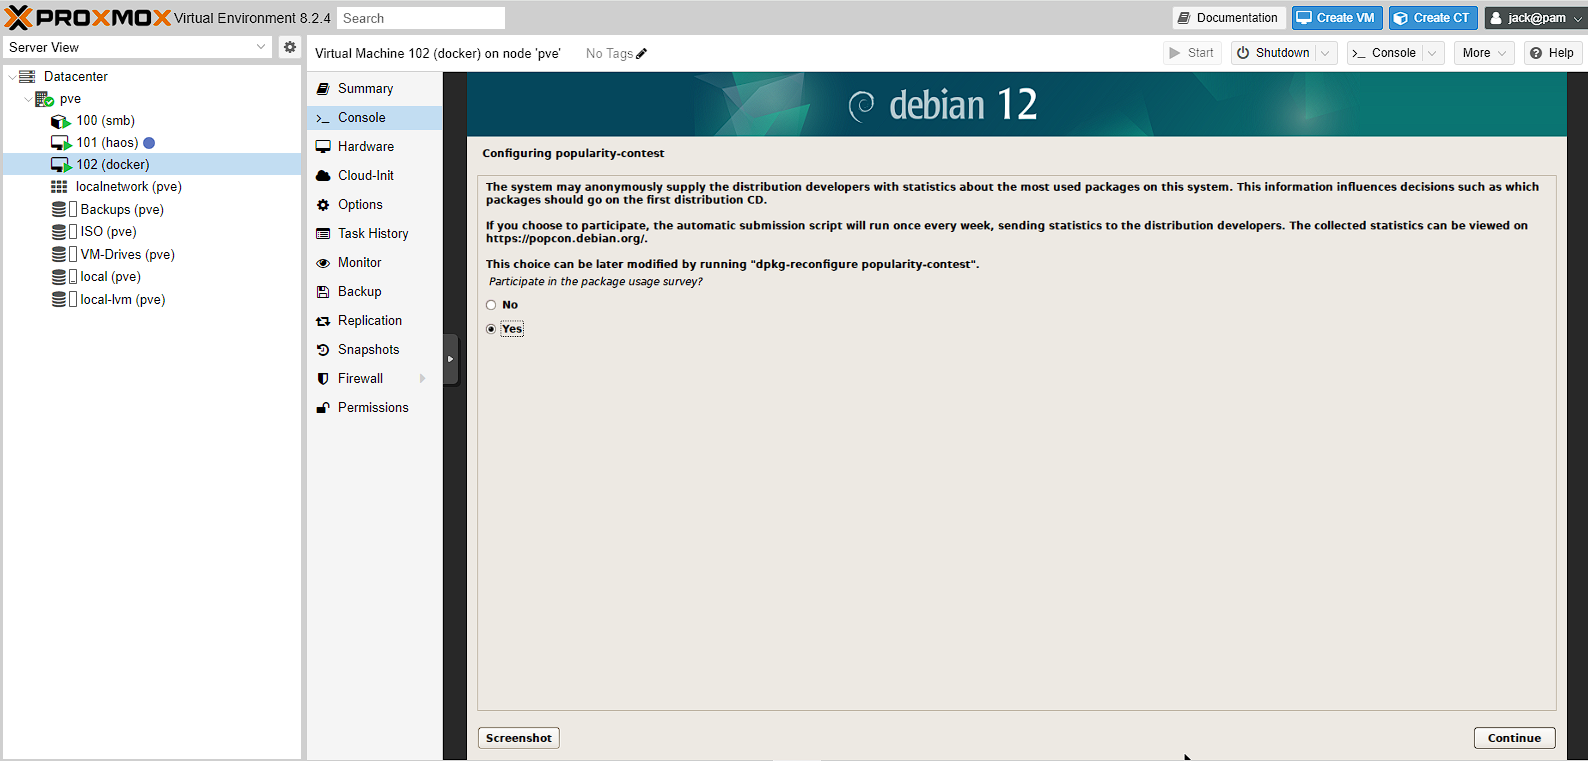
I can now enable the popularity contest, to track what I’m using, which I do given it’s free software.
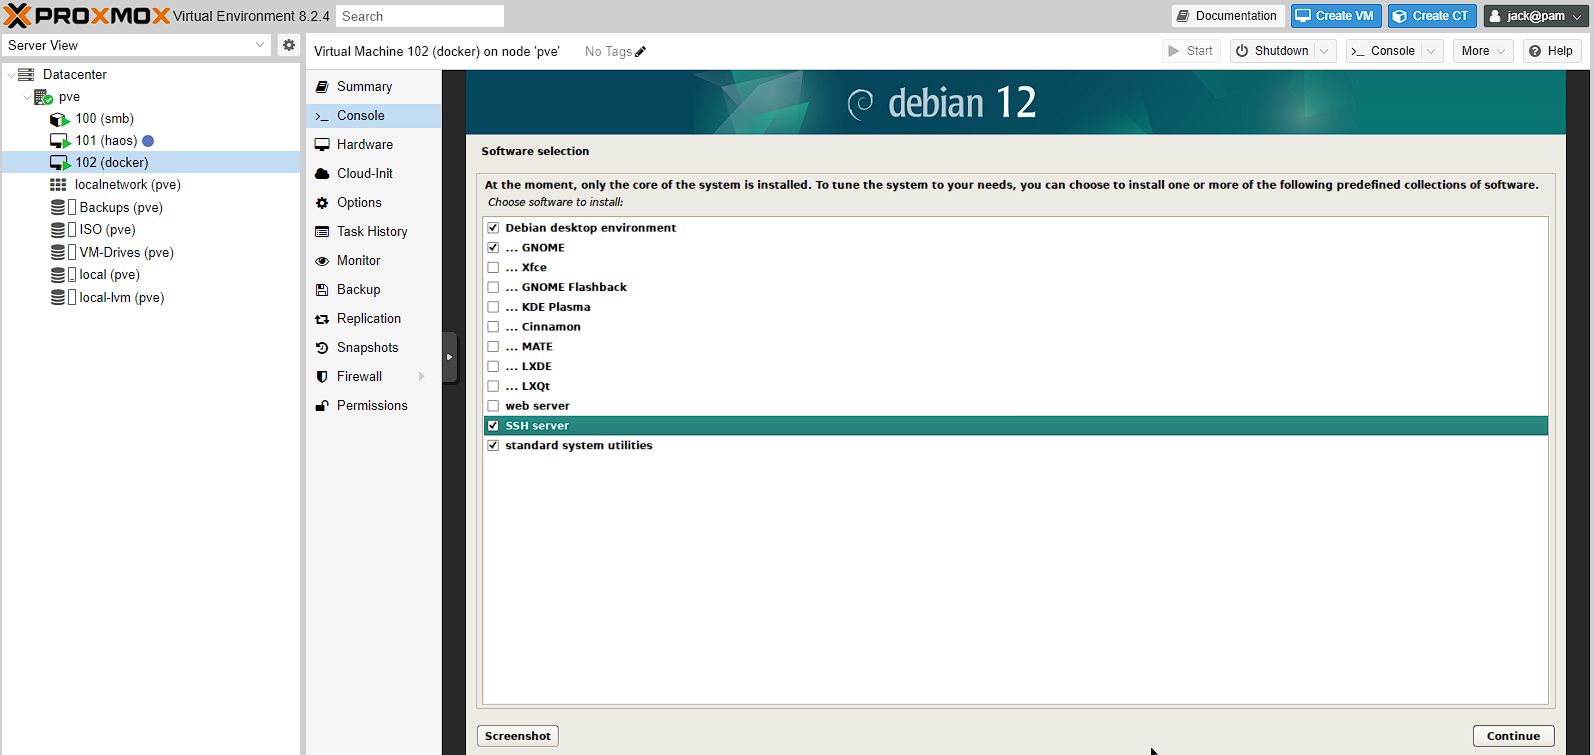
For the software selection, all I’m doing is enabling the SSH server, as I’ll need that later. I don’t actually need the desktop environment either, but it does make initial network configuration easier for beginners, so I’m going to leave it to install and show the configuration, but I will disable this later.
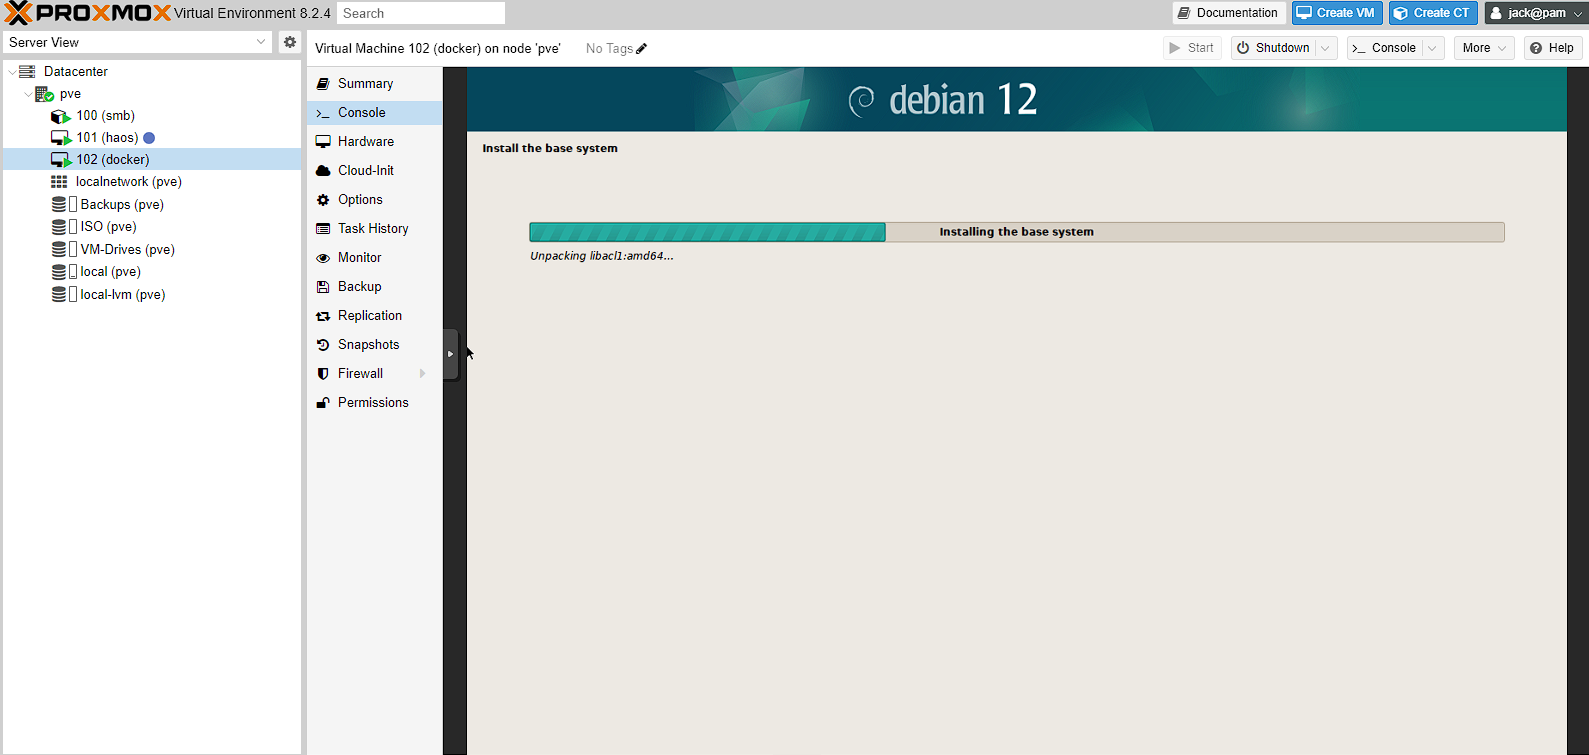
This will take quite a while to install packages and the GRUB bootloader, but should complete at some point.
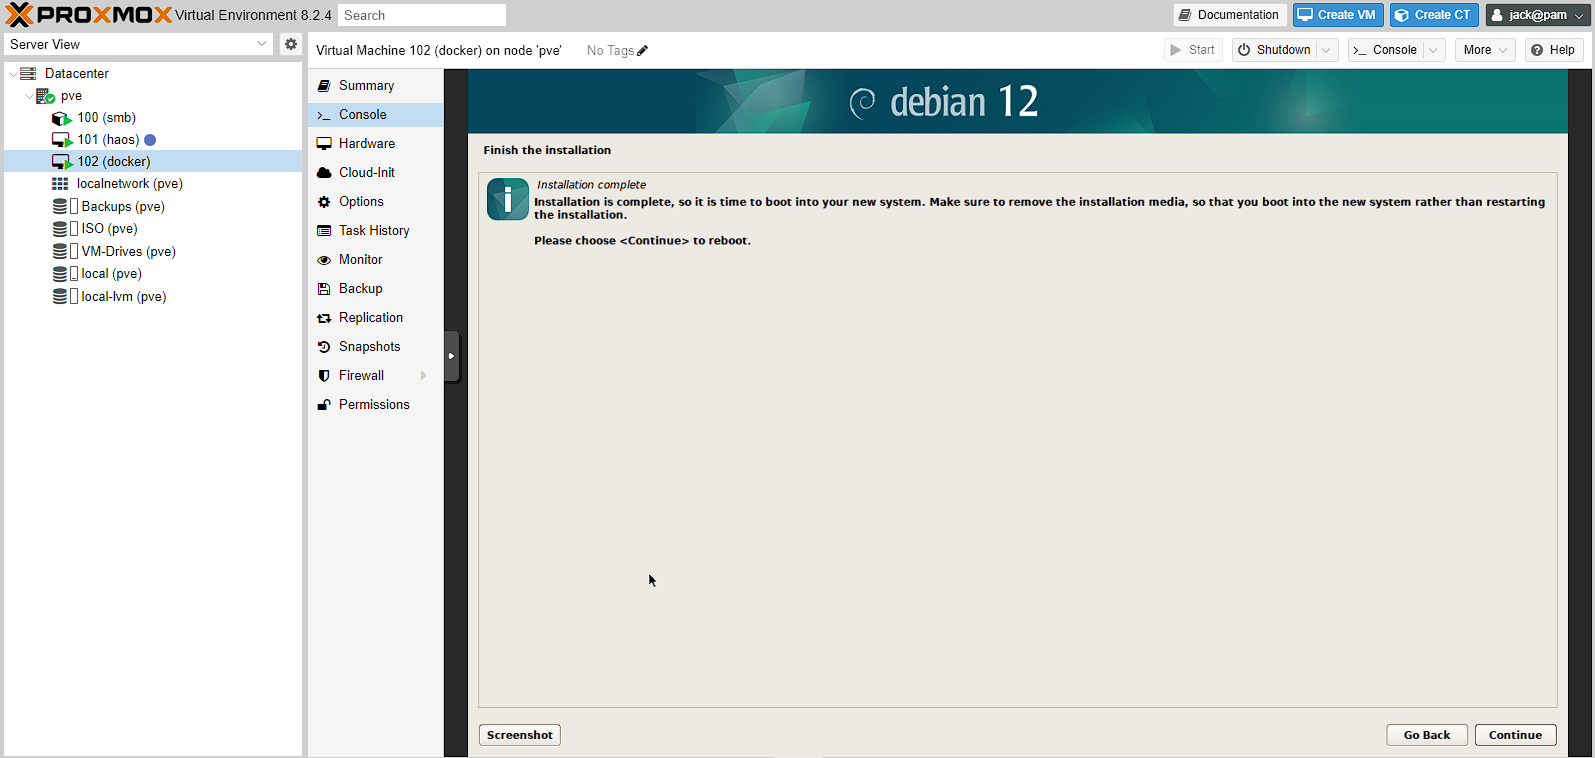
Once the install is completed, I just need to reboot the machine and the installation will be complete:
Basic settings
Once the reboot is complete the GRUB bootloader will be shown before automatically moving into Debian. As I’ve agreed to install a GUI I will get a graphical interface to log in to:
The password to access this will be the password set for the user created during installation.
Adding user to the sudo file
if you setup both a root password and a user during the setup process (like me) you will need to add the user to the sudo file. To do this, access a terminal and run the following commands:
bash
If you’re not using the GUI, re-log, if you are, you might need to be reboot
I then test the changes by accessing the terminal and running a simple command with sudo, such as sudo ls
Installing QEMU guest agent
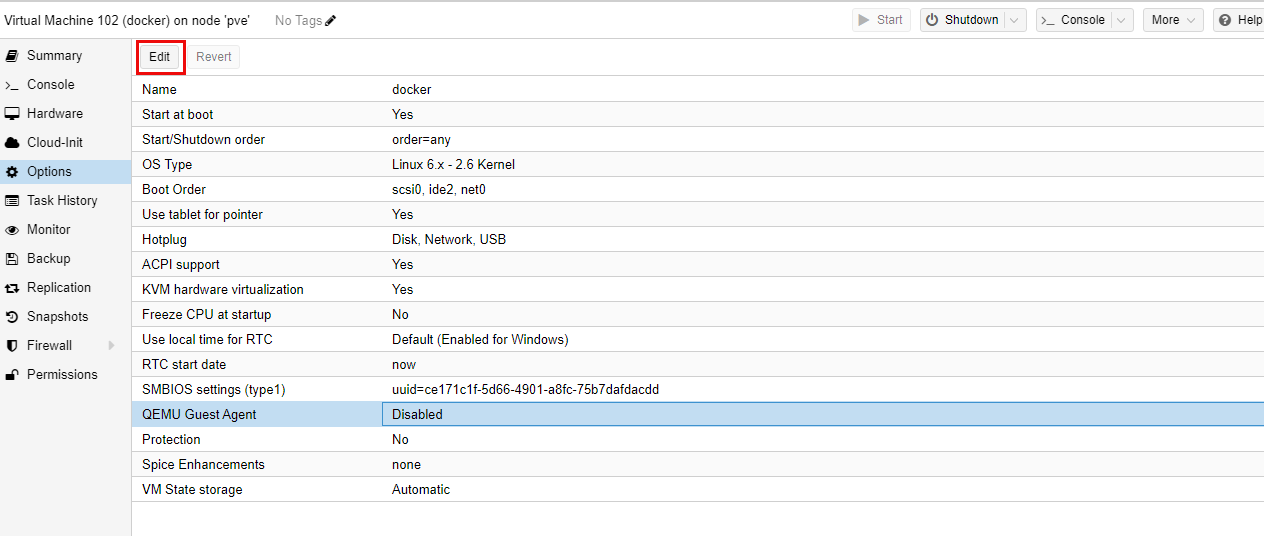
The QEMU guest agent provides additional information to the host Proxmox instance, such as the IP address. To get this setup, it first needs to be installed on the virtual machine. First, to make sure this is installed, in proxmox, go to the options for the virtual machine, highlight QEMU Guest Agent and click Edit:
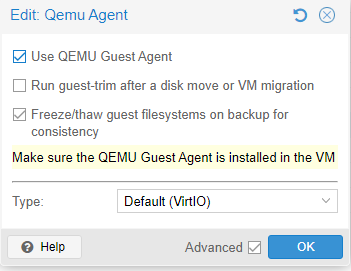
Now all I need to do is click the check box for Use QEMU Guest Agent and press OK
If the QEMU Guest Agent setting is highlighted in orange, it means the virtual machine needs to be rebooted:

Now I need to enable the QEMU guest agent, by logging into the Docker host and running the following commands:
bash
I can then tell this has been enabled, as the IP field is now filled out in the summary of the machine:
Network settings
The next step is just to correctly setup the networking in the virtual machine as it’s currently using DHCP. This can be either via the user interface (which I installed to show this step off) or by commands through the terminal. I’m going to show both ways below.
GUI setup
GUI networking
In order to get into the network settings, I head to the top right of the screen and click the leftmost icon to access the wired settings. I then click the >, followed by Wired Settings to open the network settings
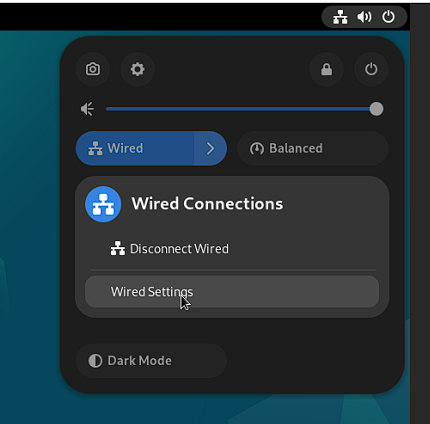
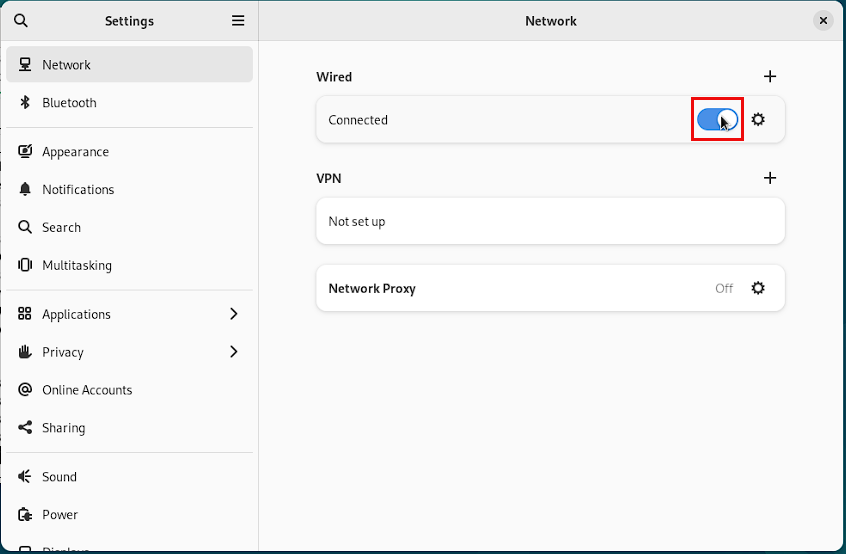
Next, I press the cog icon next to Wired:

I then switch tabs to IPv4, which is where the configuration lives for static IP changes, and I do the following:
- I choose the address I want to be static (which is
192.168.50.9in my case) - Set a Netmask of
255.255.255.0, meaning it can connect to devices with an IP address that starts with192.168.50 - Set my gateway to the router within this subnet, which is
192.168.50.1 - Update the DNS to point to my DNS server sitting at
192.168.50.1and the Cloudflare DNS

Once this is done, the changes won’t take effect until the wired connection is reset. To do this, just enable/disable the slider for Wired in the network settings page:
You can then verify the configuration has updated by clicking the cog and checking the IP address in the details pane.
Finally, I just check I can still access the internet from the guest by opening the installed version of Firefox and seeing if I can load a webpage.
Disabling the GUI
Now that the networking is setup, it’s worth disabling the GUI to reduce unnecessary resource usage.
It’s really easy to do this, just open a terminal and enter the below command:
bash
Then reboot the virtual machine and the shell should be set instead of the GUI
CLI setup
Enabling the serial console
It can be really useful to setup the serial console in a Debian virtual machine, as it provides access through a serial console, rather than the GUI that is provided via noVNC by default. The benefits you get from this is copy/paste support out of the box.
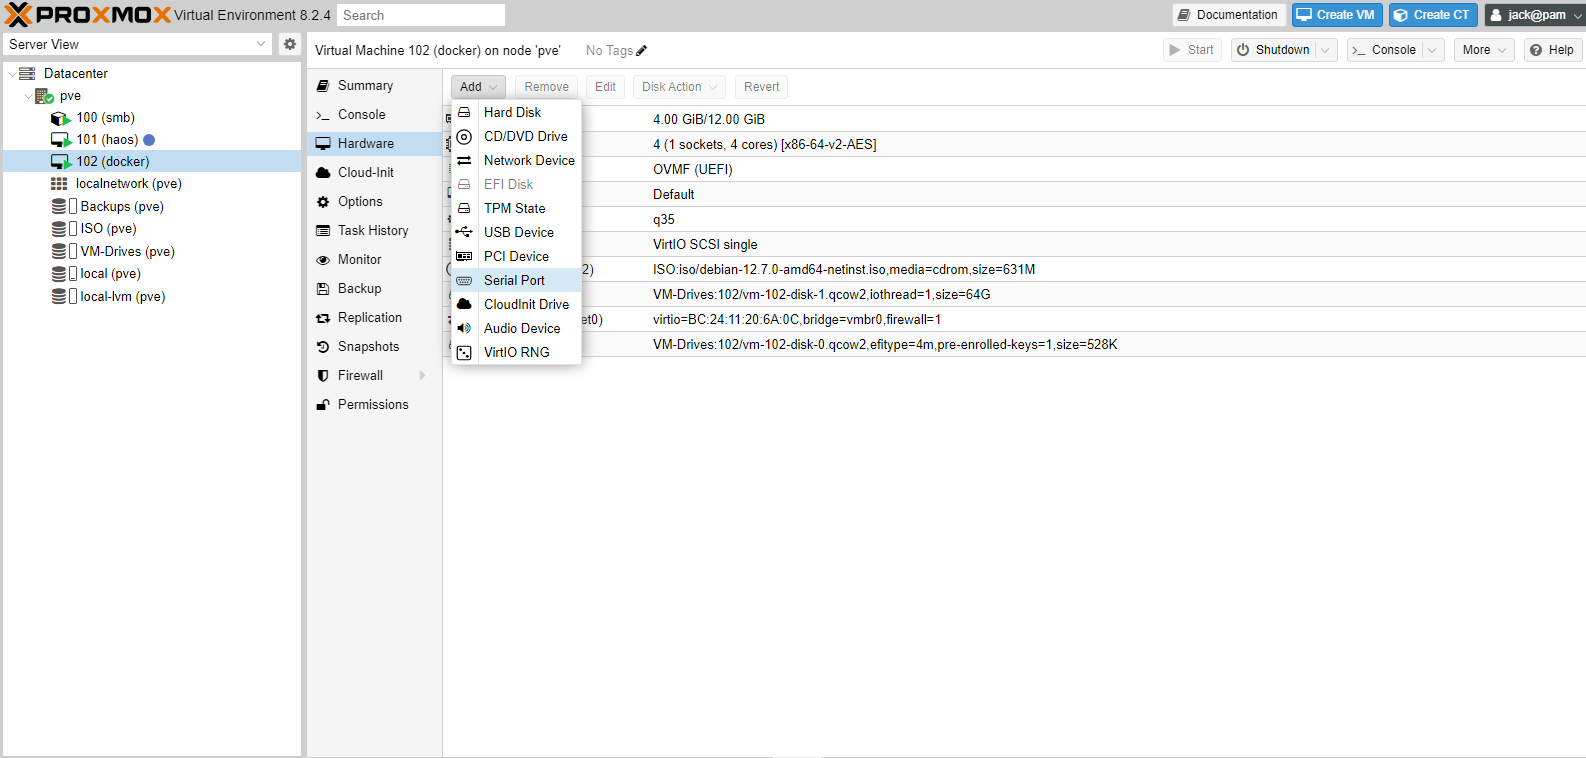
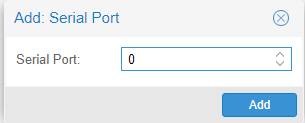
To start with, head to Datacenter -> pve -> 102 (Docker) -> Hardware -> Add -> Serial Port:
The only option here is to set the serial port in the machine. It should be 0 if there is no serial port setup yet, but just should take a note of it:
It should then be added to the machine:
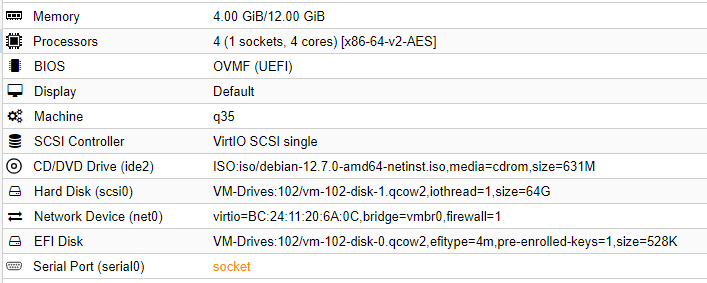
if it’s orange, it means the virtual machine was running when it was added and the virtual machine needs to be rebooted to take effect

In guest, I now need to enable the serial console to work. I can do this by using the following command:
bash
As mentioned in the comment above, the Serial0 serial port is referred to as S0, so replace as appropriate.
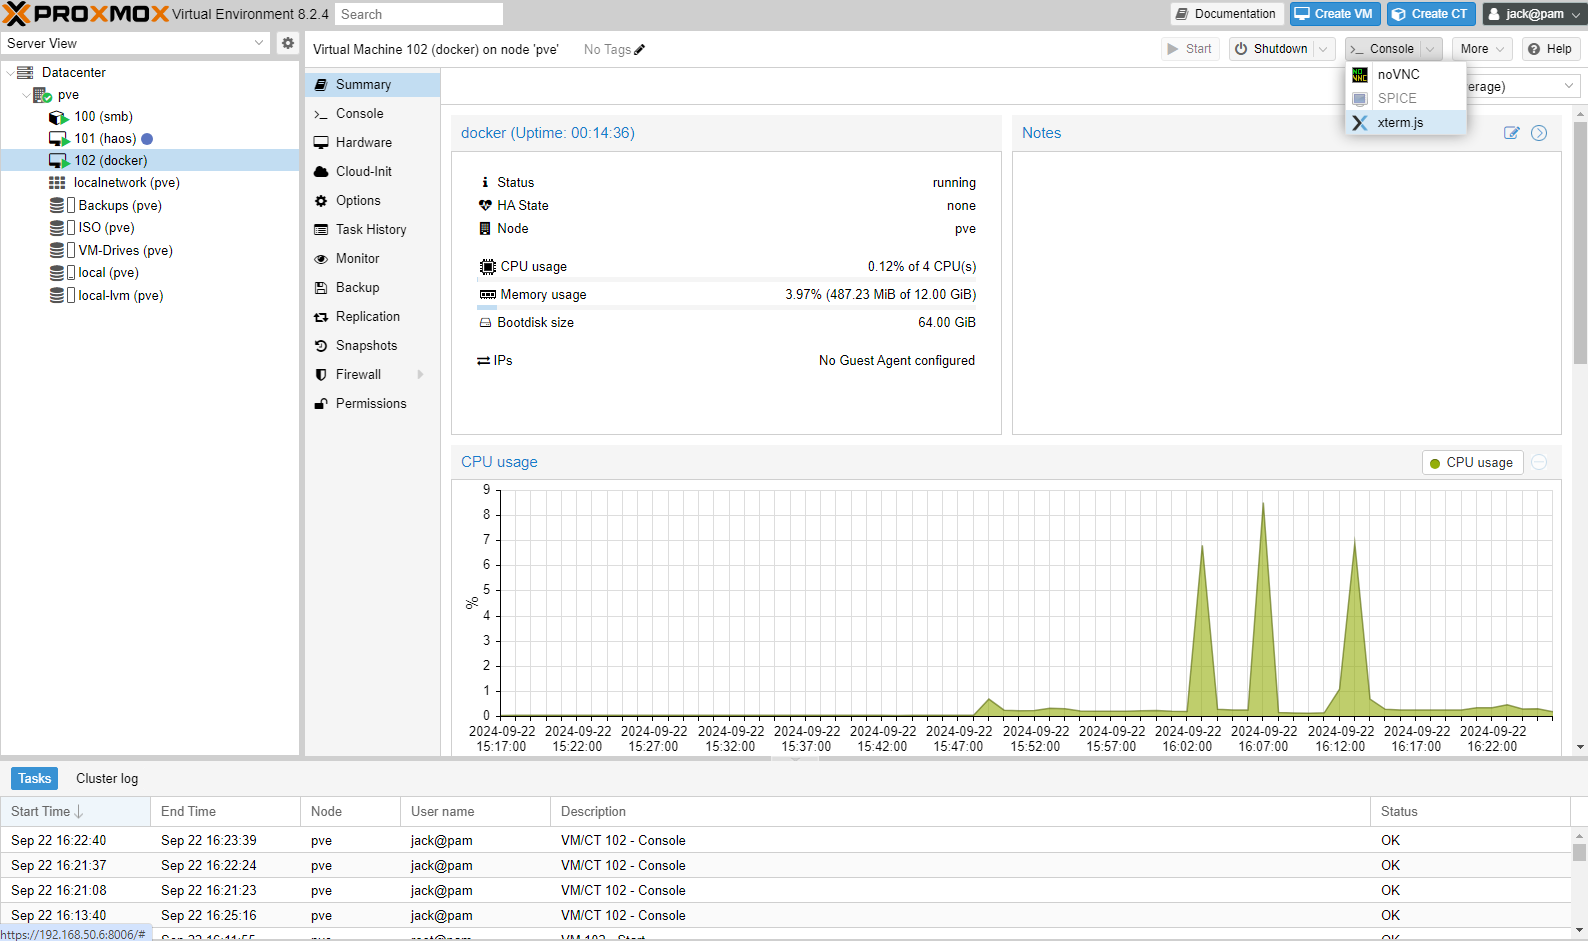
You should now be able to open up a serial console by going to virtual machine in Proxmox and clicking the Console -> xterm.js button at the top:
A console should then open up, and you can log in:
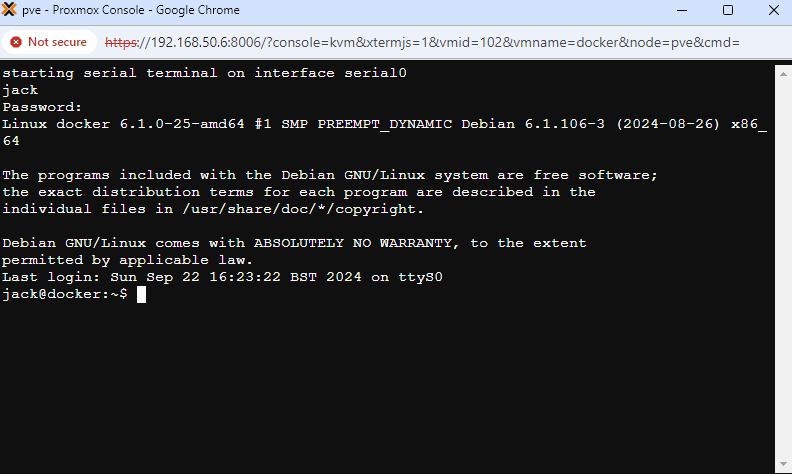
NOTE: initial text isn’t sent when the console is first opened, so just press enter and you should get the Debian login prompt
CLI networking
First up, I can check what the current assigned IP address of the system is with ip address (also ), and I’m looking for the IP not coming from the loopback address (denoted by lo), which for me, looked something like this:
text
The important part of this, is that it’s showing my current IP address is 192.168.50.136 and is dynamic. The name of this interface is enp6s18. This also shows that the link is UP at the minute, meaning it’s working.
I now need to update my network interface table to change this interface into a static IP address. However, it’s generally a good idea to backup files like this before I make changes, so I’m going to run the following command to make sure I have a copy of this file:
bash
now I need to edit this file to add the static address to this interface. To do this I use the command nano /etc/network/interfaces, and add the bellow to the bottom of the file:
bash
The resolv.conf needs to be updated with the nameserver, so nano /etc/resolv.conf, then add the following to the bottom of the file:
bash
NOTE: this tripped me up, so I’m just mentioning that lines with comments are ignored - make sure they’re on separate lines if you leave them in.
At this point, I need to reset the networking interface so it can pick up the new IP. I do this with the below commands:
bash
Alternatively, rebooting the machine will cause the network interface to reset as well.
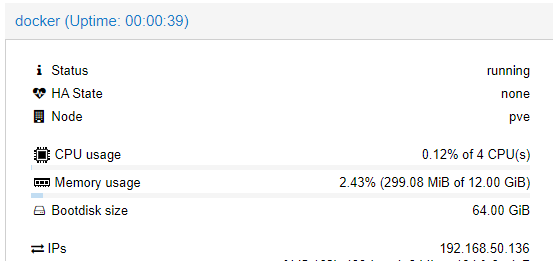
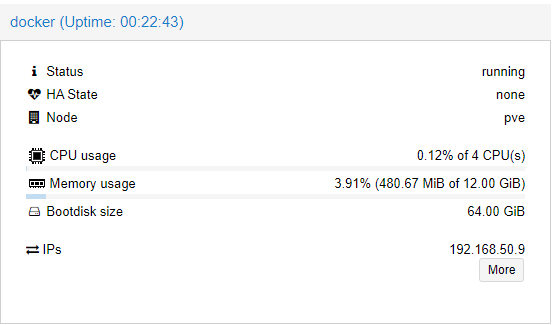
I can then check the guest has updated the IP by doing ip address and I can see the new IP is 192.168.50.9. Alternatively, as I setup the QEMU guest agent, I can see the IP has updated in the Proxmox summary:
SSH access
As I’ve already enabled the SSH server during install, this is as simple as opening an SSH client on my desktop and entering the command ssh jack@192.168.50.9.
I then get asked to set a fingerprint and can log in.
Increasing container storage
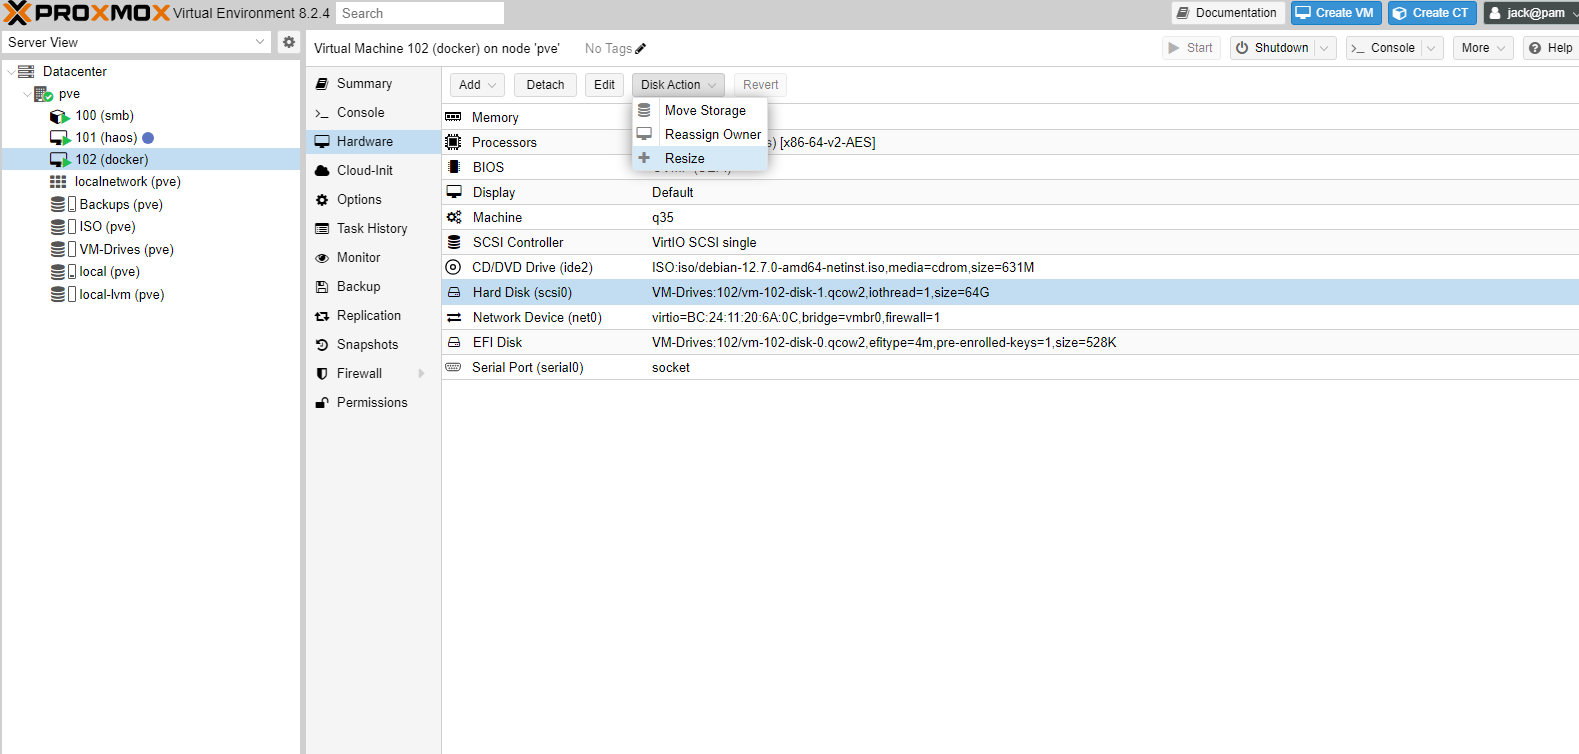
At some point, I might want to increase the size of the storage allocated to my virtual machine, sop this is the process for it. To start with I took a backup of the virtual machine as this can be quite dangerous. To start with, I went to Datacenter -> pve -> 102 (Docker) -> Hardware and selected the disk I wanted to increase (scsi0) and then went to Disk Action -> Resize:
I then added an extra 64GiB to the hard drive:
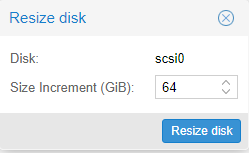
I can see this reflected in the Hard Drive line now, which says 128G:

This is not the end though, as while I’ve increased the disk, I now need to change the partitions I’ve created to take advantage of that new disk size. To do this I open the terminal and enter the command lsblk, which outputs the below:
text
The 2 I’m interested in are sda2 for the / and sda4 for the /home directory. I can also see that sda has 128G of space. The partition I want to extend is the /home or sda4 partition because this is where I’m going to put everything. I’m going to user a tool called parted to change this, it needs to be installed first though:
bash
From lsblk, I know the disk I want to update is sda , so I can use the command below to access parted:
bash
I then need to pick which partition I want to expand, so I first enter the print command to bring up the partition table:
bash
I can see that sda4 and the print command show me that the partition I want extend is partition 4, so to extend this I can enter the below command:
resizepart 4
I can then enter how large the partition should, and in this case given I have 128GB of space, I went with 125GB. This does mean there’s some space left over (up to 137GB in fact), but it’s pretty small - if you want to get closer to the edge of the disk you could use a larger value.
I then ran the print command again, and received the below, showing it’s worked:
bash
lsblk also shows the same:
bash
However, if you run the command df -h you will this hasn’t changed, so needs to be updated with the resize2fs command on the sda4 partition:
bash
df -h now shows it’s resized:
bash
Closing thoughts
This was a really long article, and went far more in-depth than I was originally planning… However, at this point everything is configured and ready to go! Next time I’ll be looking into getting docker running on the Docker virtual machine, as well as some of the decisions I’d come to about how I want everything built out in docker.